


🚐 Tow Boldly, Tow Smartly — The Hitch That Means Business
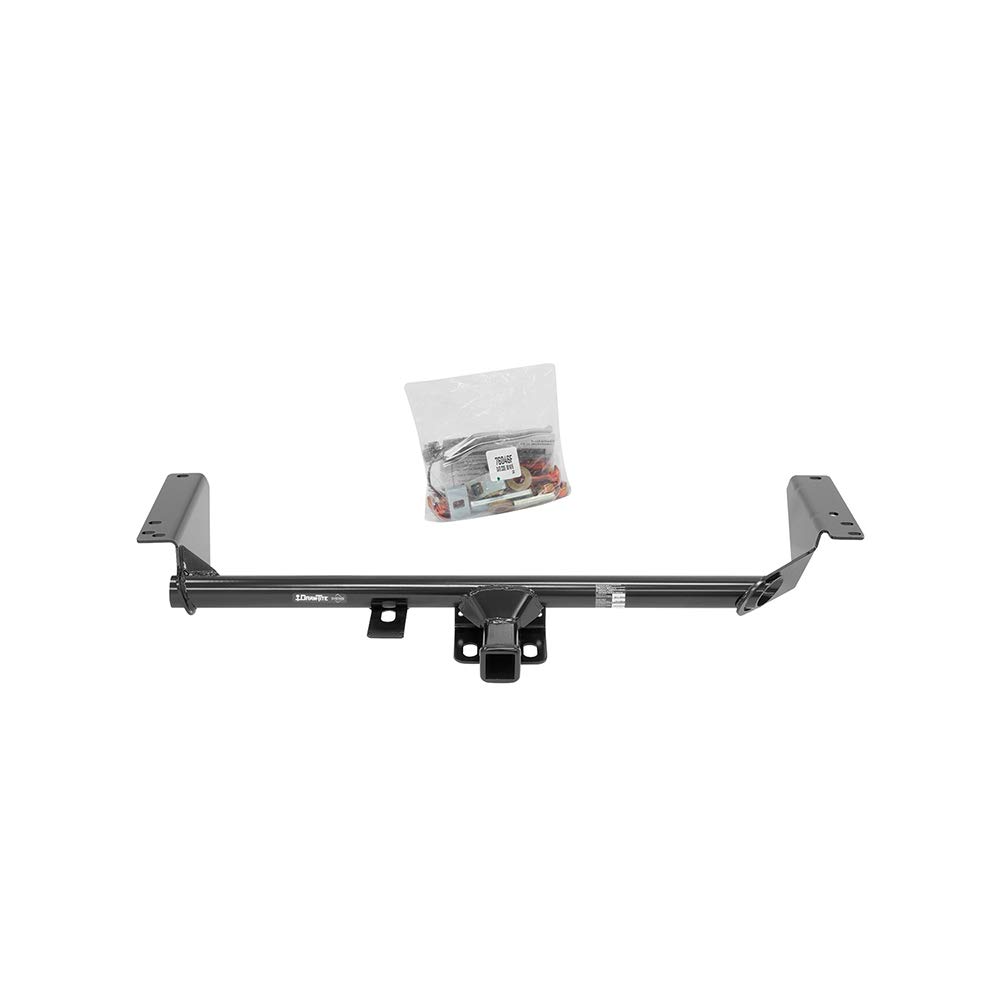
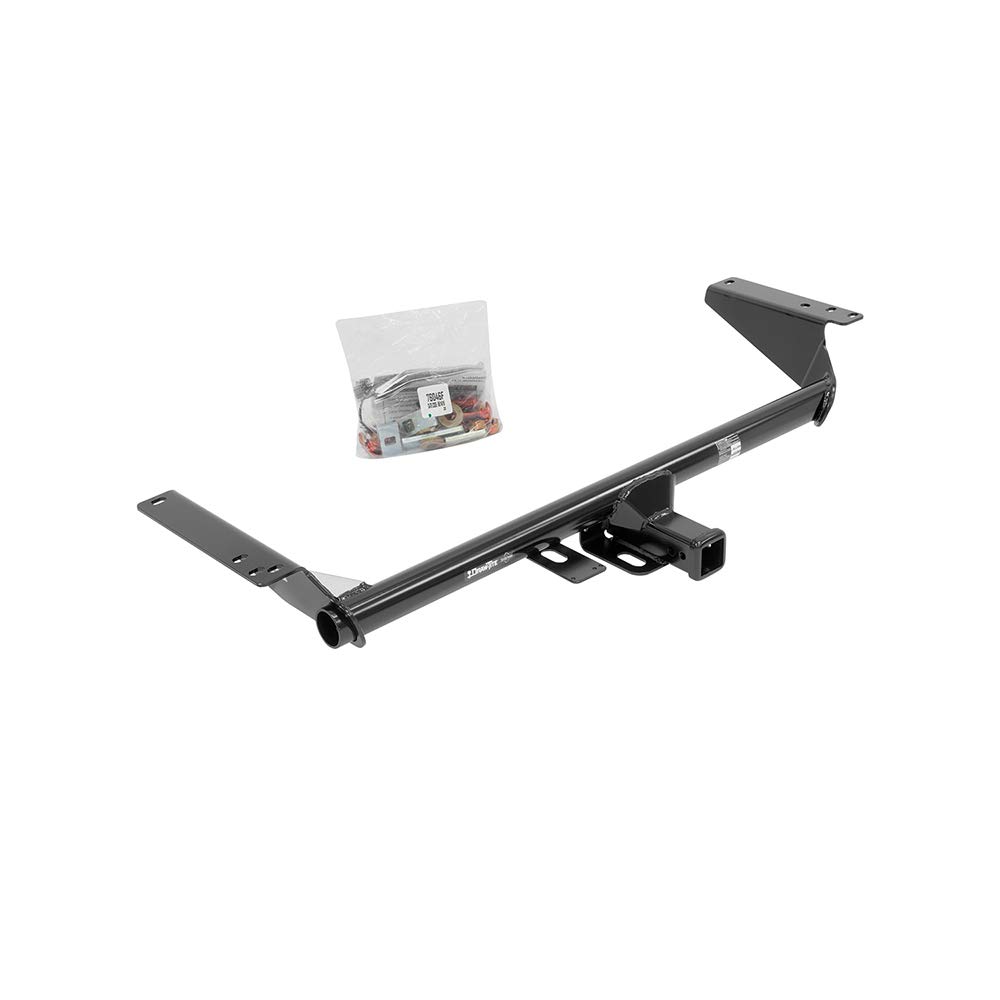
The Draw-Tite 76046 Class 3 Trailer Hitch is a heavy-duty, vehicle-specific towing solution engineered for Chrysler vans from 2017 to 2025. Crafted from solid alloy steel with a protective black powder coat, it offers a robust 4,500 lbs towing capacity and a 2-inch receiver for versatile accessory compatibility. Tested beyond industry standards and backed by a lifetime limited warranty, it ensures reliable, rust-resistant performance for professional-grade towing needs.


| ASIN | B01FRNVFDK |
| Automotive Fit Type | Vehicle Specific Fit |
| Best Sellers Rank | #135,576 in Automotive ( See Top 100 in Automotive ) #305 in Towing Hitch Receivers |
| Brand | Draw-Tite |
| Brand Name | Draw-Tite |
| Compatible with Vehicle Type | Van |
| Customer Reviews | 4.4 out of 5 stars 278 Reviews |
| Finish Type | Powder Coated |
| Global Trade Identification Number | 00742512760460 |
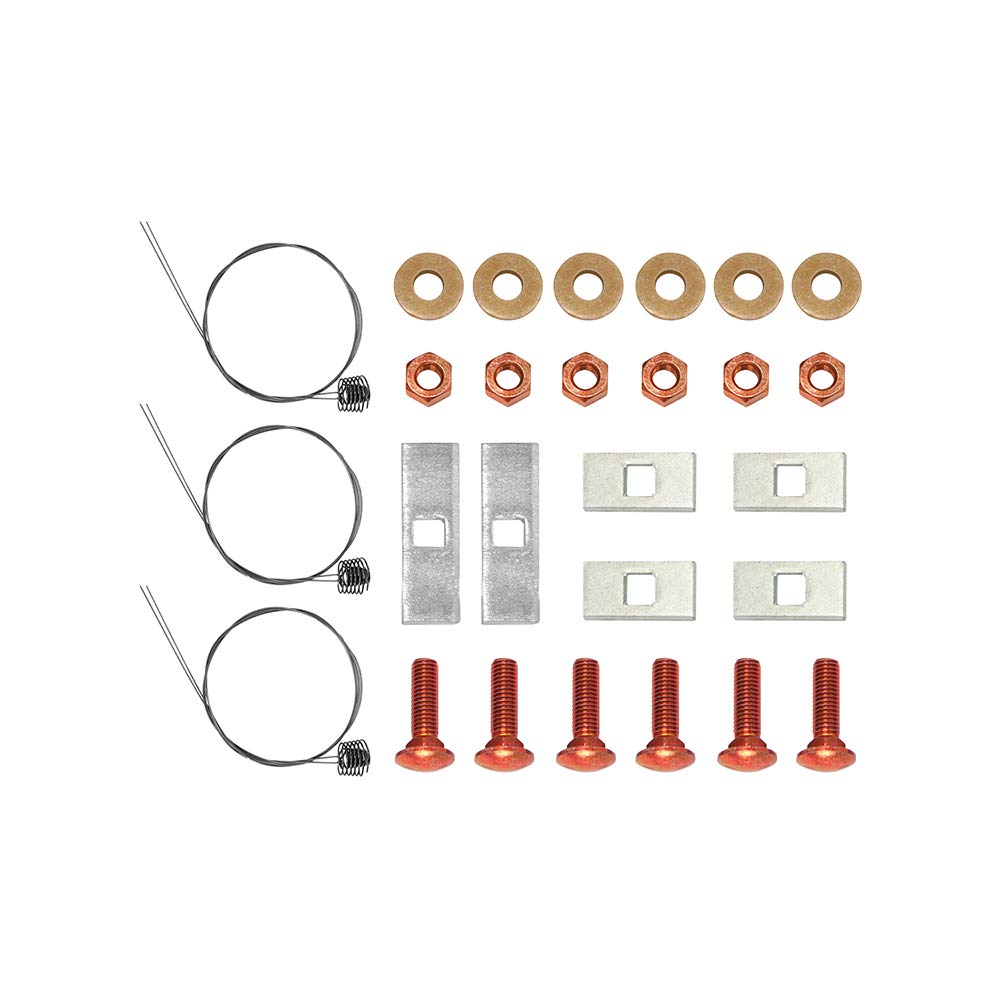
| Included Components | Trailer Hitch Class I Receiver and Installation Hardware |
| Item Height | 7.7 inches |
| Item Type Name | towing-receivers |
| Item Weight | 43.8 Pounds |
| Manufacturer | Draw-Tite |
| Manufacturer Part Number | 76046 |
| Manufacturer Warranty Description | Limited Lifetime Warranty |
| Material | Alloy Steel |
| Material Type | Alloy Steel |
| Maximum Towing Capacity | 4500 Pounds |
| UPC | 742512760460 |
| Unit Count | 1.0 Count |
| Vehicle Service Type | Van |
C**E
Good hitch, good price
Application is 2017 Chrysler Pacifica. Two people to mount up in about 2.5 hours. Mounting is straight forward, recommend you review youtube for some videos. The mounting hardware includes some wires for fishing the bolts and washers thru the box frame members. Seriously, who ever came up with idea deserves a Nobel peace prize. Without these ingenious wires it would be almost impossible to fish the bolts and washers thru the frame. With them, once you figured out the first one, it was a breeze. Probably prevented a major war or at least a regional conflict. You will have to demount the sound deadening panels and the muffler heat shield. Recommend you eyeball the panels and heat shield by holding up the hitch to approximately where it will go. This will make the trimming of these parts easier. We did it by putting the rear of the van on six inch blocks. This gave us ample room to move around. All hardware that was needed was included...its not alot. Once installed it is mostly hidden and ground clearance is adequate when going up sloped driveways. Have not dragged it yet. We used it with a Yakima hanging bike carrier and a anti-rattle hitch pin. Drove it 650 miles down to Florida. We added two straps to stabilize the rocking motion of the bikes. For around town or short drives you probably don't need the straps as the hitch is pretty stable when rocked. All in all, a good purchase
J**B
Great Product
Perfect fit for my 2020 Chrysler Pacifica. Easy install for a DIY’er as well. I have been hauling with it for the last couple of months with no issue.
B**E
Got it on but WHAT A JOB!
Man, never in my life did I think I’d have so much trouble installing this receiver! We recently purchased a 2020 Chrysler Pacifica and wanted a receiver on it for our bike rack. This is a beastly item, seemingly VERY well build. Instructions were OK but not great. Following the instructions, I removed the guard under the van. The first picture is of the guard and I have each fastener marked. The green is for nylon screws, red for nylon nuts, magenta for the integral cover screws, and white for the two metal nuts near the heat shield. I sprayed lubricant on the muffler hangers to make it easier to remove. After that, stringing the bolts through the frame rail proved problematic. The driver’s side went fairly well but the passenger side is more difficult because you have the muffler to contend with. On that side, space is limited and the spacer and bolt got stuck in the frame rail. It took me around 2 hours just to get that bolt and spacer back out. To help make sure that didn’t happened again, I taped the wire to the spacer as shown in the 2nd picture. That little trick helped and slowly but surely I was able to get all the bolts where they were supposed to be. Just make sure if you use that idea to have that tape facing DOWN when you thread it into the frame rail. Once the bolts were in (after a fair amount of blood and some choice Marine language) I was able to mount the receiver, tighten the bolts to the specified 110 ft. lb. I then trimmed the heat shield and bottom shield and remounted them. It is super sturdy and looks good BUT it was one heck of a job. By the way, I did all this by myself.
R**Y
Chrysler Pacifica hitch
Installed on a 2023 Chrysler Pacifica. The hitch came a little bit scuffed up from shipping, no big deal. All the hardware and the assembly fit perfect. The only part you see is the square tube, everything else is hidden. Perfect!
R**7
Great product poor packaging
Great construction and fit but piss poor packaging. Had to respray much of it with black Tremclad paint because the original powder coat was so beat up. Come on cardboard wrap is not that expensive.
S**N
Self Installation on a Chrysler 2017 Pacifica
The hitch arrived in 2 days as promised by Amazon Prime. It was shipped via FEDEX. The shipping box was flimsy and the crossmember had one scratched area on it at the top of the bar. I hit that with a bit of sandpaper and sprayed with Rustoleum primer and paint (black). Arrived with all required hardware and instructions. I reviewed an installation video several times and the drove to the Auto Skills Center on a nearby military base to utilize the lift rack. I used a rack that lifted the vehicle at 4 lift points on the undercarriage. These are clearly marked on my Chrysler 2017 Pacifica. Installation took 2.5 hours. I had never installed a trailer hitch before. I'm also not a person who does much mechanical work. What I learned: 1. the video doesn't show that a cover under the undercarriage needs to be removed and trimmed. The instructions for the rack indicated this clearly. This took a bit of time but was not a major source of time or irritation. Removal, trimming, and re-installation took a total of about 30 minutes. 2. remove both rear wheels to improve visibility and access. If you choose to only remove one wheel make it the rear driver-side wheel. There are 3 screws that you'll need to access in the wheel well to remove the undercarriage cover. It makes things much easier. 3. Fishing the bolts and spacers through the frame was quite easy. The nuts went on quite easily too. I chose to leave the fish-wires on while I mounted the hitch. In the video the technician removed them. I was afraid that if I didn't leave the fish wires on then I might accidentally push the bolts up into the frame. 4. I was glad I had help holding the hitch in place while I threaded the nuts onto the bolts that I had fished through the frame holes. Frankly, I could not have accomplished installation by myself due to the weight and awkwardness of trying to jimmy the hitch into place while threading these nuts on. If you need help this is more than likely when you will need a helping hand. 5. I trimmed the heat shield with sheet metal cutters. Too easy. I used a box cutter to trim the undercarriage cover. Also too easy. 6. No special tools were required although a good pry bar helps in getting the rubber exhaust hangers off of the exhaust. The auto skills center did not have exhaust removal pliers. I did spray both hangers generously with soapy water. Re-installation of the hangers was a snap and took about 5 seconds. 7. A good drop light or flashlight will help. The installation cost me $25 to rent the stall for 2.5 hours. I received two quotes prior to this for installation by local businesses. $95 at a trailer hitch company and $150 at a local garage. I'm glad I did this myself. Satisfaction for doing the job is priceless and I now know a bit more about the underside of my vehicle. If you are mechanically inclined installation should be easy for you. I have a 5-bike bicycle rack installed on this hitch. As you can see from the photos you cannot see the crossmember once you have the hitch installed. Draw-Tite did a good job of designing this hitch so that it is not visible. MY vehicle does not have the toe-tap to open the liftgate option so I cannot tell you whether you lose that capability by installing this hitch.
T**.
Professional looking!
Nice! A fair price and well constructed! I am happy with this purchase.
C**S
Easily a DIY project for amateur garage enthusiasts
This came well packaged and boxed. After opening it up and going through the instructions, I then watched the video from etrailer on the install and went to work. The instructions that come with the hitch work, but the video makes it much easier. While a lift and a second person would absolutely help to install this, neither are required with a bit of ingenuity. I put the back of the van up on jack stands, took off the passenger side rear tire and went to work. The tire isn’t necessary to remove, but makes it so much easier to remove the panel since a few connectors are in the wheel well. When moving the hitch up into place on the bolts, the second set of hands would be nice, but I used a crate and my height adjustable rolling shop stool to hold it up...a jack would have worked as well, but I liked being able to move the shop stool around its wheels for easier placement. This hitch does sit lower than the Chrysler factory hitch, but the price is much better and you don’t have to replace the fascia with this one. You also don’t lose any ground clearance as it still sits higher than other components under the van. All in all it took me about 2 hours to install on my 2017 Pacifica. I do not have the foot sensor for the lift gate so I don’t know if it interferes with that operation or not.
Trustpilot
3 days ago
2 months ago


