✨ Reflect Your Style, Protect Your Space! ✨
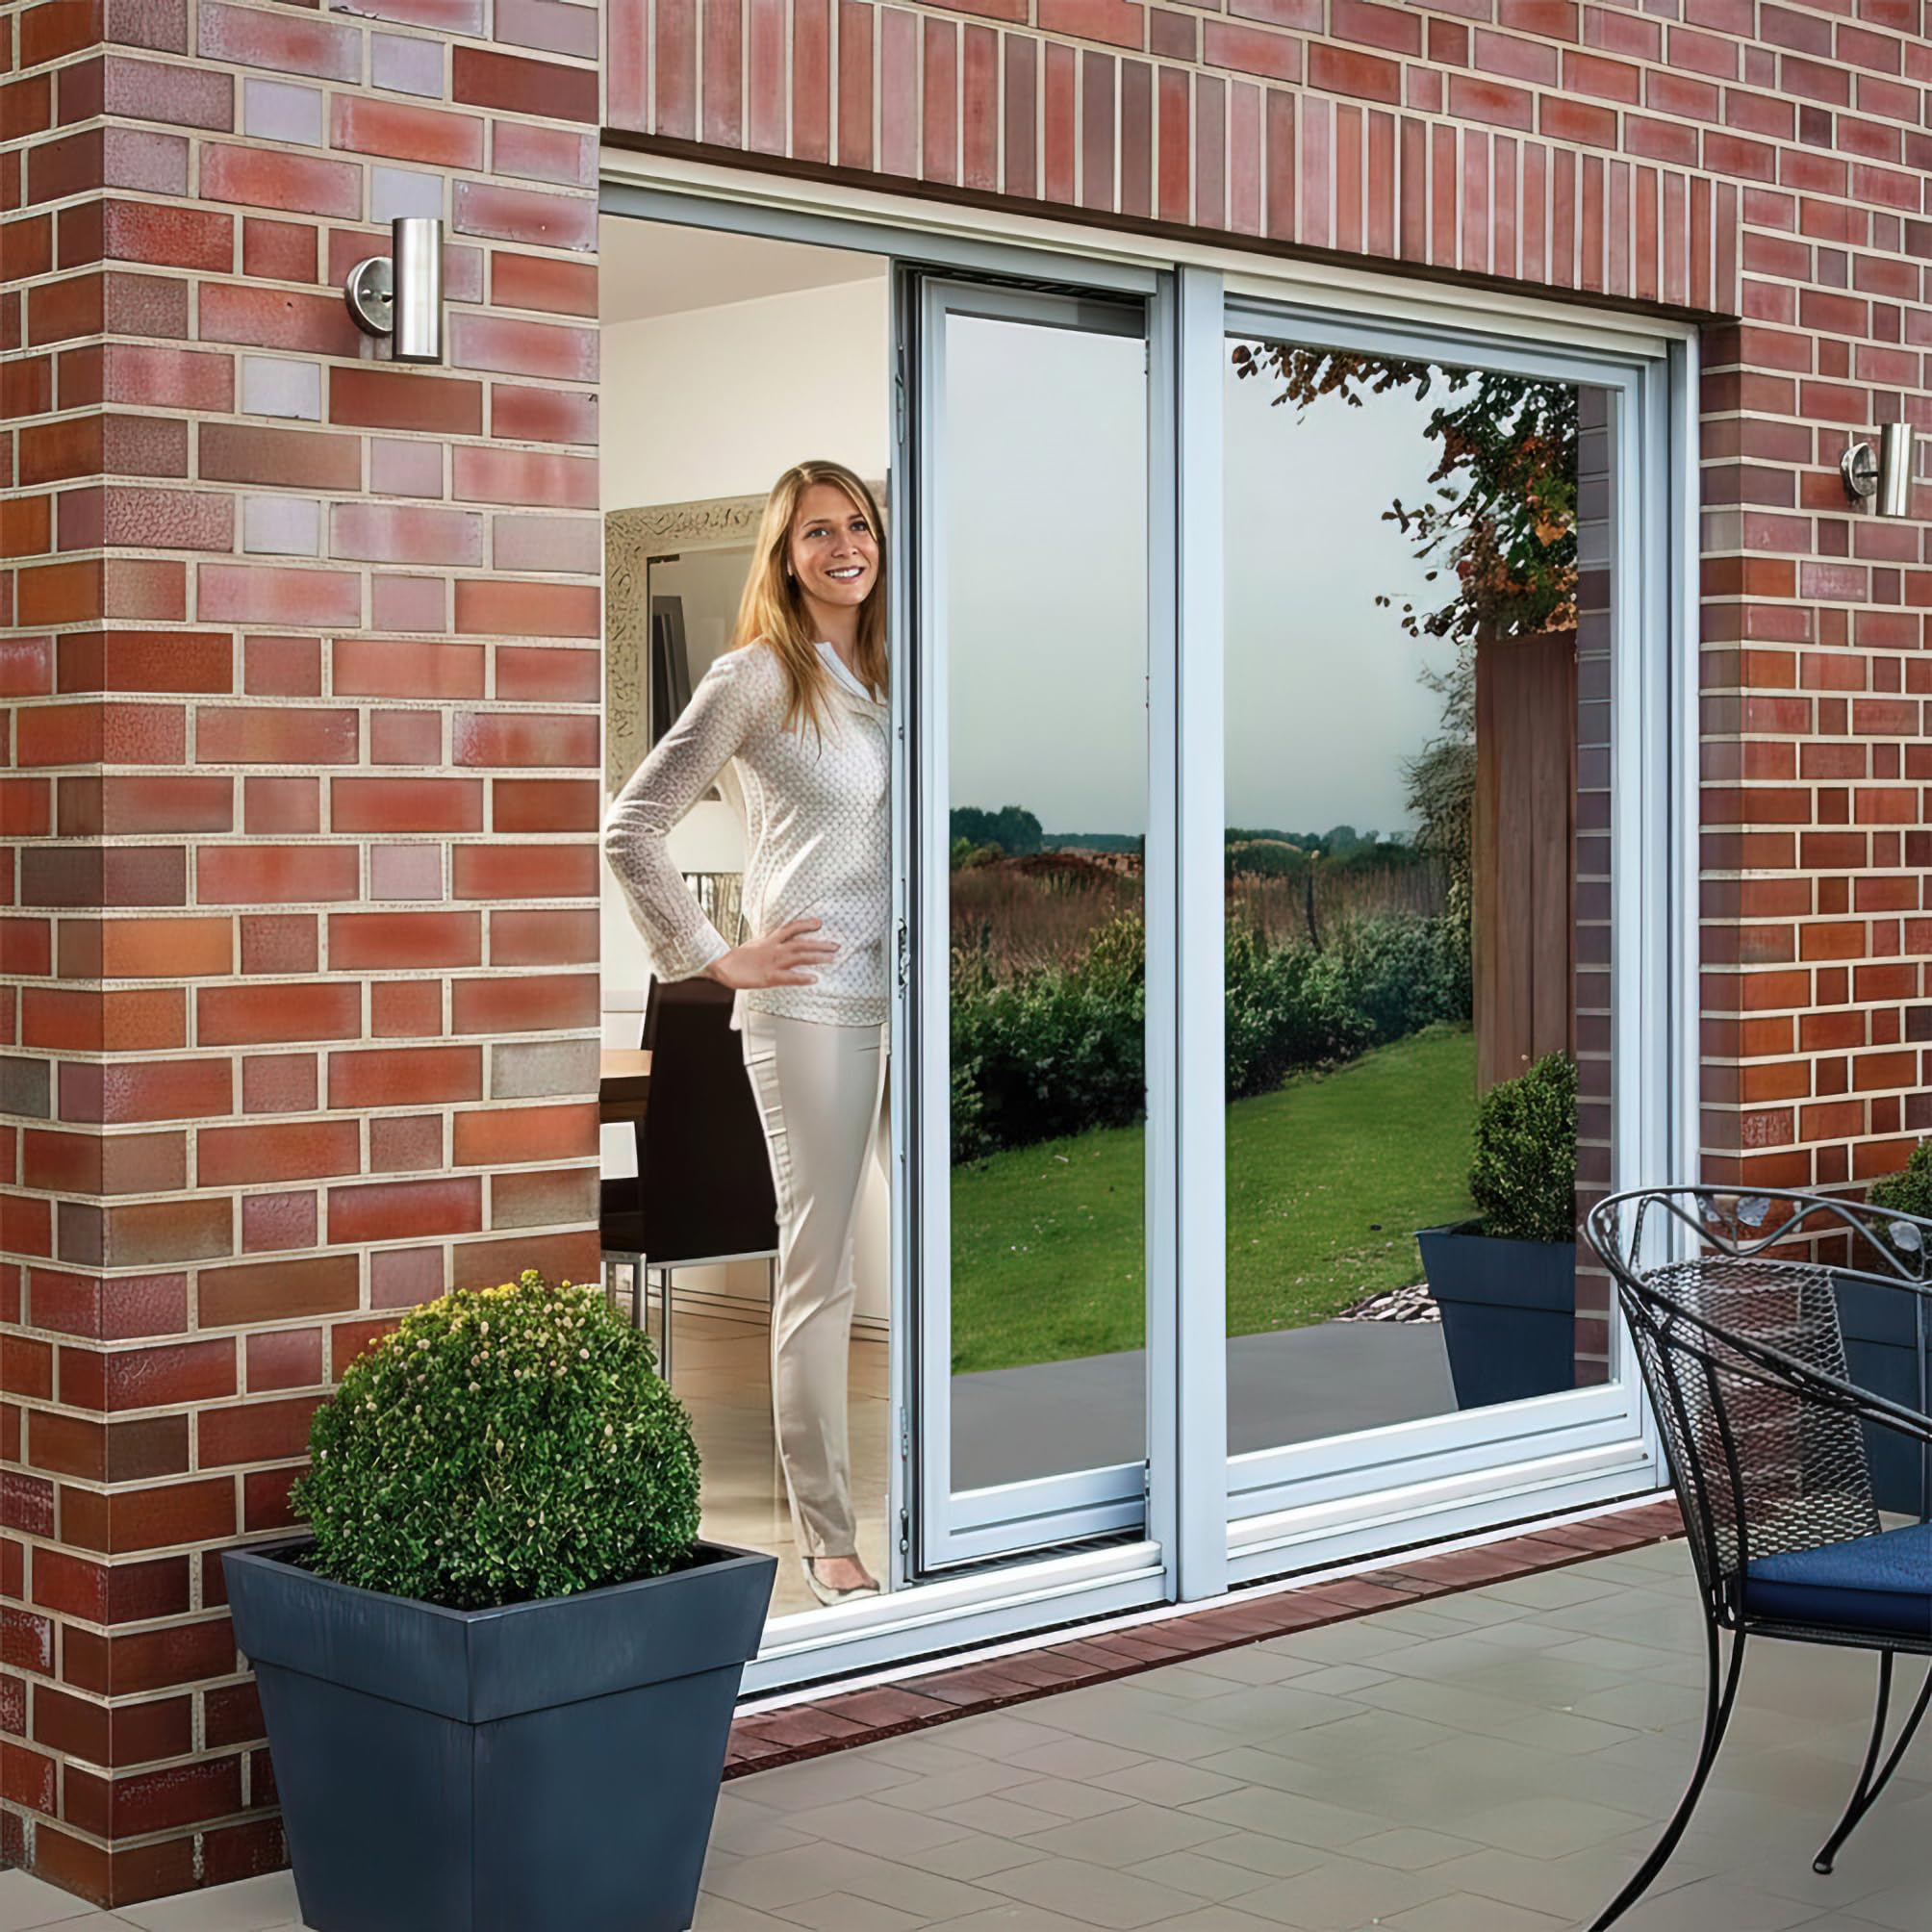
The Silver Reflective Window Film is a high-quality, self-adhesive film designed for easy installation on windows and glass surfaces. Measuring 76cm in width and available in various lengths, it effectively reduces solar heat, glare, and UV exposure by over 80%. With a professional-grade PET material and a 10-year warranty, this film combines functionality with style, ensuring your space remains comfortable and private.
Product Dimensions | 76 x 2 x 0.01 cm; 308.44 g |
Specific uses | Windows and Glass Film |
Ultraviolet light protection | True |
Anti-Tick Material | Professional quality PET |
Warranty description | 10 year. |
Batteries required | No |
Item weight | 308 g |
I**I
Excellent privacy window film
The film product is excellent quality, very competitively priced and delivered in a few days. It should be noted that the film will give a very mirrored surface to the outside view of the windows that from a distance gives the appearance of the property having very clean windows. I've attached a photo for reference. On the first photo, the lower panes have the film applied, the upper panes did not.On the second photo, film has only been applied to the right hand side lower pane.From the inside, it WILL definitely darken the amount of sunlight (and heat) transmission into the room. It can be likened to having a pair of light tint sunglasses on. At night with an interior light on, it will not be possible to look out of the windows as you'll only see a reflection. At night with an interior light on, from the outside, it is possible to view into the room just as when there was no film on the window.If unsure of the tint situation, try a small area first. I had to remove one 240mmx250mm sheet due to it being slightly undersized and found that almost no amount of household cleaner, microfibre or application of hairdryer heat could eaily remove the remaining adhesive from the window. A spirit cleaner probably would have removed the adhesive much quicker.The film is delivered securely; the film is on a plastic roll with two end caps that prevent damage to the edge of the film during transit. Only instructions are provided. Tools used were:- Steel Framing Square 400 x 600mm e.g. manufactured by Draper- Sharp cutting knife e.g. manufactured by Stanley- Spray bottle (1 part washing up liquid to 4 parts water)- Rubber blade/squeegee- Thin tipped marker pen that was suitable for CDs/DVD, etc.- Microfibre cloths x 2- Sellotape- Large cardboard sheet as a cutting boardIn order to make applying the film as straight forwards as possible for myself, the following was done:- The lid of the delivery cardboard box is dicarded, but the lower cardboard is kept, placed on it's side on a clean laminate floor, to hold the end caps onto the roll, whilst the film is unrolled as necessary onto the large cardboard sheet.- Measured the inside width of the glass to be covered at the top, middle and bottom, taking the smallest dimension and subtracting 5mm- Measured the inside height of the glass to be covered at the left, centre and right, taking the smallest dimension and subtracting 5mm- The inside of the film roll is the backing sheet so this is the side that has to be marked out with the aid of framing square. I did not detect any difference in the appearance of the film if the orientation was rotated, therefore film was cut to maximise usage as opposed to ensuring all window films were cut to maintain the same direction for each window.- Mark out onto the film the above dimensions.- Cut using the marking square as the cutting edge, ensuring enough pressure is applied to cut fully through the film and against the square to maintain a straight cut. If the blade is no longer really sharp, change the blade otherwise the blade will drag and locally creases the film.- Thoroughly clean the inside of the window with one of the microfibre cloths- In order to remove the backing film, apply two pieces of sellotape across one corner of the film, one on the film surface and one on the backing surface. Gently pull the two pieces of sellotape apart and the backing foil should start to come away from the film - but don't fully remove- Without creasing the film, spray copious solution onto the inside glass surface; top to bottom to enable gravity to assist - ensuring the complete glass surface has a layer of water- Remove the backing film and discard the backing film. If there are any creases in the film, it would be better to discard and re-cut a new sheet.- Offer the adhesive side of the film onto the wet glass surface. The film will 'float' on the wet surface enabling the film to be correctly positioned. If the film does not move then the glass surface was not totally wet. Gently lift the film from the area of the film that will not slide and spray the glass again- Place the other microfibre cloth or as many as necessary on the bottom of the window frame to absorb water that will be expelled.- With the film in the correct place apply some (but no need to saturate) spray onto the film surface to prevent the rubber squeegee from scratching the film- using the squeegee, working from the top down and from the centre out, squeeze the water out from the between the glass and the film. On the first stroke it may be necessary to hold the film to prevent it moving.- Apply firm pressure to ensure all air pockets are removed, continually to work from the centre outwards. If necessary view the window from outside to detect any remaining air pockets.- Using the microfibres that have soaked the water to dry the frame, sill, window film - squeeze drying as necessary.- Move onto the next window pane- I followed this process and successfully covered over 2 dozen panes.
A**R
Definitely not easy to put on but looks great after
Great product overall, came fast, good quality, clear instructions and support for questions (tiny bubbles formed at first despite the slip solution but cured and disappeared after).However, be very very careful while cutting the edges as this can mess up the entire sheet of foil, it is fiddly and prone to rips.Careful while choosing colour too, I got the silver one but it does make the light coming in a little darker than natural.
P**L
Brilliant bit of kit
I purchased the window film to stop people looking into the house as my kitchen faces the street and I have two large windows. I have blinds over the windows but to make it a little more private I used to keep them partially closed - making it dark in the kitchen. Then I saw this stuff on a tik-tok video so I thought I’d give it a try. To say I’m impressed would be an understatement - it’s bloody fantastic. The only minor fault is that because of the tint it looks a little “bluey” in colour when you look out, however, I have so much more light in the kitchen now and don’t even have to close the blinds to stop nosey passers by looking in. For all interested purchasers, make sure you set aside time and have a clear working space. You will also need to purchase the install tools as I couldn’t have done this without them. They’re only a £5 but you get everything you need to properly install. Take your time and prepare the window as described in the easy to follow instructions. The first window took me about 35 mins to complete as this was my first go but each of my two large windows is divide between an opening window and a fixed. By the time I was on window 3 and 4 I was hanging the film in 15 mins. DO NOT rush it as any mistake cannot be rectified. The film is like tin foil, very easy to crease and once creased you’ve had it, so take care and be amazed. Trust me you’ll wonder why you hadn’t bought it before. I’ll be purchasing again for other windows. In the last photo, the right side you see has the film on while the left doesn’t, just for a comparison. You can see the reflective difference - very happy.
S**Z
Good quality film with some installation hallenges
I am quite satisfied with its performance. However, there are a few downsides that I encountered during the installation process.One of the main drawbacks of this film is that it is still somewhat see-through from a distance of 4 meters. If privacy is a major concern for you, this film may not provide the level of opacity you desire.Additionally, installing the film on a large window proved to be a challenging task. It is recommended to have two people for the installation process, especially for larger windows. This can be a bit inconvenient if you are attempting to install it on your own.On the positive side, the film itself is of good quality and can be easily removed and repositioned multiple times without losing its adhesive properties. Once properly applied to the window, it gives a perfect and neat appearance.One tip I would like to share is to ensure that you use plenty of water when applying the film in case you need to reposition it. Using less water can cause the film to stick to the window, making it harder to remove any air bubbles with a squeegee after application.In conclusion, this reflective window film is a good quality product that provides solar control and privacy tint. However, it does have some limitations, such as being somewhat see-through from a distance and requiring assistance for installation on larger windows. With proper application techniques, this film can enhance the aesthetics and functionality of your windows.
Trustpilot
5 days ago
4 days ago