🚴♂️ Elevate Your Cycling Game with Andeshunk!
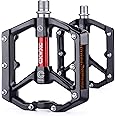
The Andeshunk 27-Speed Mountain Bike Crankset features a robust alloy 6061 crank and high-strength steel chainring, designed for a wide range of bicycles including mountain, hybrid, and road bikes. With a crank length of 170mm and compatibility for 7S/8S/9S speeds, this crankset is perfect for cyclists seeking performance and reliability. Plus, it comes with a detachable sprocket for easy customization and a lifetime warranty for peace of mind.
| Item Package Dimensions L x W x H | 10.35 x 7.36 x 6.73 inches |
| Package Weight | 1.23 Kilograms |
| Item Weight | 16 ounces |
| Brand Name | shanmashi |
| Color | Crankset red |
| Manufacturer | Andeshunk |
| Part Number | 2023 |
A**R
Best value for replacement cranks.
These cranks are superior to old square taper bottom bracket cranks in every way including price. No guess work on bottom bracket width because these cranks come with all the spacers you need to fit any Euro bottom bracket. They are very light weight, strong, and easy to install. They don't come with install directions but there are plenty of instructional videos out there. I'm a home bicycle mechanic and I'm always looking for the best value for my personal bikes, my customer's bikes, and the bikes I sell and these cranks meet all my requirements and I will continue to buy them.So far I put them on my 2012 Giant Revel 1 and my 1997 Trek ZX6500 and they look and perform perfectly.Be sure to invest into a proper bottom bracket tool, and a bicycle torque wrench for the installation and check your torque periodically.My only complaint is that I wish that they came in more colors.
K**R
Nice upgrade for my old Schwinn Hybrid
I'm not a bike product expert but it seems to me to be of very good quality for the price, upgraded my old triple to get the 22t chainring. Looks much nicer than the stock riveted chainring crankset too. Didn't come with instructions but easily installed as usual for this type crankset.
M**U
Very smooth movement, feels powerful
First of all, for the price it should definitely include a paper or at least an online installation description in this posting. Second of all, you can easily install it if you pay attention, research, and watch YouTube videos. This was my first time to install a new crankset and I was able to do it in a few minutes after searching YouTube.Pay attention to the markings on each piece. They say “R” and “L”. You may not need any tools to install it. I did use a flathead screwdriver and hammer because my threads on the bike were tight. Also added bike grease to the threads. And then a smaller allen wrench to tighten part of it. No other tools were needed!A popular review on here mentions needing a specialized tool. It made me hesitant, but I ultimately learned that was not correct. You might need a specialized tool to remove your old crankset, but as far as the install of this crankset no special tool is required.Overall, I love it! Definitely an upgrade from my square tapered bottom bracket.
A**N
Poor CNC machining, GREAT customer service
***UPDATE***I've contacted the seller and they did refund 50% since it was beyond the initial warranty by 6+ months. That covered the cost to replace that chainring with an aluminum Truvativ TrueShift. I've also filed away 2mm of each spider arms to increase clearance as well as replaced the short nuts with longer ones which I had on hand.***ORIGINAL***The bottom of the chain is NOT sitting flush on the middle chainring at the bolts because the crank's spider arms was not machining low enough to allow proper engagement. This caused excessive wear and the SRAM powerlink to snap off.Also, the nuts provided were for SINGLE chainring, 5mm, instead of the 8mm needed to shoulder properly the spider holes.The rest was great quality like solid anodized coating, hollotech axle and non-drive arm fit and locking mechanism.
J**A
Excellent
Great crank set. I’ve put a little more than 300 miles on it and it is working good. Very impressed and my bike looks nice.
L**.
Arm does not fit
When I received this crankset and arm, I did not put it together right-a-away. Now, I tried to put this crankset together the arm does not fit the crankset. It seem this product is ok, but I think this was a resell of the crankset & arm by Amazon seller…
M**P
Excellent buy
I love this crank. It was a great Bargain, and I caught myself at 27 mph with a side of the road speed radar in the school zone. Let me tell you I was putting tons of power into this crank to get to that land was flat. It can take a beating. Just buy it!
C**.
Plug Compatible with Hollowtech
This couldn't have been easier to install. Plug compatible with Hollowtech, and I measured the hub and it too is compatible, so you can use a standard bottom bracket when this one fails. Spacing, and everything is identical. Weighed my old Shimano Deore M591 and this one and was heavier but within an ounce. Park Tool BBT-9 (without the annoying insert) is used to install, which has 16, not 14, teeth.Instructions: remove your pedals, and note one side is backwards threaded. Pedals can be removed with a 15mm wrench and some can be removed with a hex wrench from the inner side of the crank arms. Note which pedal is the drive side with a piece of tape.If you have a hollowtech bottom bracket: Unscrew the dust cover from the non drive side using the park tool BBT-9 flower shaped insert. Unscrew the two bolts holding the non drive side crank arm to the hub and side that arm off. Slide the drive side gears out of the bottom bracket by pulling towards you from that side. Unscrew the bottom bracket, again one side is backwards and note how many spacers came off of which side. (Square taper bottom brackets use similar techniques, but the two crank arms require a crank arm remover tool to remove and the bottom bracket removal tool is also different from the BBT-9 and specific to your bottom bracket.)CLEAN CLEAN CLEAN the grease from the threads for the bottom bracket on both sides using a dry rag or paper towel. Threads are the little ridges the two pieces touch when you screw them together. Do not use cleaner or degreaser or the residue will damage the new grease.Add new grease to the threads for the bottom bracket, which will keep water out and make it easier to remove when the time comes. Note the R and L on the new bottom bracket, R goes on the drive side, add the correct number of spacers to the correct sides and screw them on, then tighten with BBT-9 tool slightly more than medium hard.My bike used one spacer on the drive side, one on the non drive side. You may have to use trial and error if you did not note your spacers or are using this to replace a square taper arrangement. Use spacers to align the chain to the derailleur (chain parallel to the front sprockets when rear gear is slightly less than middle) and to make sure nothing is scraping the frame when you rotate the pedals. The outer sprocket does deform as you pedal hard, so you need to leave at least a quarter inch between the outer sprocket and the frame.Slide the hub with the gear side through the bottom bracket and then slide the free crank arm over the non drive side of the hub with the opposite orientation from the crank arm on the drive side (i.e. one is up while the other is down). Slide it all the way on and then put the Y shaped tool into the round dust cover and screw it on to the end of the hub in the non-drive side, slightly less than medium tight.Tighten the two bolts that hold the non drive side crank arm onto the hub to a little more than medium tight. Clean the threads of the pedals with a rag or paper towel - no degreaser. Put grease on the threads of your pedals and screw them on to the crank arms (one is backwards threaded) and tighten them a little more than medium tight.You may need to adjust the front derailleur, which is never easy. These chainrings shift easier than my older ones, which means it tends to slip off when I shift to the largest sprocket on the back because my front derailleur wasn't adjusted properly. That was a harder job than installing these.
Trustpilot
3 weeks ago
1 day ago