🚗 Don't let cracks steal your view!
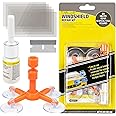
The Rain-X Windscreen Repair Kit is designed for quick and effective repairs of chips and cracks in laminated windshields. With an advanced resin formula, it minimizes visibility and prevents further damage, making it an essential tool for maintaining your vehicle's glass integrity.
| Manufacturer | Rain-X |
| Brand | Rain-X |
| Model | Winsdscreen Repair Kit |
| Product Dimensions | 12 x 5 x 1 cm; 30 g |
| Item model number | 26150 |
| Manufacturer Part Number | 26150 |
| Item Weight | 30 g |
T**S
Exceeded Expectations – Fantastic DIY Repair!
I recently had a small chip with two cracks (about 6mm and 10mm) on my windshield and decided to take matters into my own hands after a frustrating experience with a professional repair service. A few months ago, I used Halfords’ service, and they actually made the crack more noticeable and scratched the glass around it. This time, I went the DIY route—and I’m so glad I did!While the product didn’t come with English instructions, I found plenty of great tutorials on YouTube, so it wasn’t a big issue. I may have used a bit too much resin, as some leaked out even after tightening, but I saw that as a plus—more pressure to push the resin deep into the cracks! To give the resin more time to settle, I covered the repair with a black hoodie since I was working outside on a sunny day.Once the resin cured, it was easy to scrape off the excess with a razor blade. The result? Way better than I ever expected! From the outside, you can’t even tell there was a repair. Inside, there’s only a faint shadow if you really look for it. After a few hours, the repair became completely invisible!I was so impressed, I used the leftover resin to fix a chip on my watch face caused by welding spatter. It filled in perfectly and is barely noticeable unless you look closely at the right angle. I wish I had taken before photos to show just how good this repair turned out. Definitely worth every penny!
B**9
un resultado decente
tenia un picotazo que amenazaba con llegar a la segunda capa del parabrisas,hay que seguir las instrucciones al pie de la letra y no apresaurarse.al final se ha quedado como una pequeña mancha pero evita que raje por completo.
S**I
Works decently to stop the chip from spreading. But don’t expect miracles
US/UK twitter’s favorite — indeed a proper repair gel. A bit complicated with application but manageable. You wouldn’t indeed find a better solution for DIY fix. Main goal for DIY fix— to stop the chip becoming a crack, second one — to make the chip less visible. This item seems to be well with both.Any better result would require to go to a glass specialists — but would cost much, much more (in my case the quote have been 10X the cost of RainX).Thus, totally recommend RainX.
H**.
Viel Geld gespart für neue Scheibe 😊
Da einschlägige Firmen meinen Steinschlag außerhalb menes tatsächlichen Sichtfeldes auf die Straße nicht reparieren wollten und meinten, der TÜV findet das nicht geil, musste ich mir nun DAS einfallen lassen.Mit ein wenig Gefühl, Ausdauer und handwerklichem Geschick habe ich mir nun hoffentlich eine neue Windschutzscheibe für mehrere tausend Euro erspart. Und die einschlägige Firma hat sich mein Geld auch gespart. Danke Rain X!!! 😊Gerne wieder!
J**O
ça marche vraiment!
Le résultat est bluffant.Ayant un méchant impact (oeil de boeuf + petite fissure en étoile) à la limite de la transition de la sérigraphie (la partie noire sur le pourtour) le pare brise devait être changé.....moué.....J'ai tenté le coup avec ce kit et franchement il faut vraiment chercher pour arriver distinguer l’impactPetit conseils:-le produit durcit/sèche avec les UV donc pendant toute la première étape il faut être à l'abri du soleil (garage/sous terrain...)-il faut bien nettoyer le trou de l'impact et l'agrandi un petit peu en forme de rond bien propre et un peu en profondeur (utilisez à la main un fraise diamantée trouvable dans les magasins de bricolage). retirez la poussière de verre pour que le trou soit propre.-bien viser le trou en vérifiant l'alignement en regardant le pare brise à l'intérieur-faire plusieurs fois l'étape 1 en remplissant 3-4 gouttes et attendre 6 minutes selon la taille de l'impact. le faire jusqu’à ce que le produit comment à couler du joint contre le pare brise indiquant que tout est bouché.-vous pouvez utiliser de la chaleur (sèche cheveux/chaussette chauffante) 50 degrés max pendant 10 secondes du coté intérieur du pare brise pour faire un effet de pompage du produit par les fissures. faire ça 2-3 fois pendant les 6 minutes d'attente.-à l'étape finale retirez tout et mettre une petite goutte + feuille plastique transparente et exposer la fissure au soleil ou avec une lampe de poche UV 365mn ( le produit sèche/durcit en 10 minutes avec une lampe UV).-gratter et refaire si le rebouchage n'est pas à niveau.
Trustpilot
5 days ago
1 month ago