


🚴♂️ Elevate your ride, not your clutter!
The Zero Gravity Bike Rack is a sleek, wall-mounted storage solution featuring a patented bike holder design and durable powder coated finish. It offers tool-free assembly and a compact footprint, making it ideal for garages or homes where space and style matter.
| ASIN | B0756NS1MC |
| Additional Features | Powder Coated Finish |
| Brand Name | Zero Gravity Racks |
| Color | Black |
| Customer Reviews | 4.1 out of 5 stars 69 Reviews |
| Finish Types | Powder Coated |
| Is Customizable? | No |
| Item Dimensions D x W x H | 9"D x 17"W x 33"H |
| Item Weight | 5 Pounds |
| Manufacturer Part Number | ZGR-BK-FBA |
| Material | Metal |
| Material Type | Metal |
| Model Number | 155 |
| Mounting Type | Wall Mount |
| Number of Shelves | 1 |
| Product Dimensions | 9"D x 17"W x 33"H |
| Recommended Uses For Product | Storage |
| Required Assembly | No |
| Room Type | Garage |
| Shelf Type | Hanging Shelf |
| Special Feature | Powder Coated Finish |
| Style Name | unique |
| UPC | 858962007007 |
M**H
So good, I bought two
I have a 1 car garage that needs to fit my car, bikes, and tools. That's been a struggle, until I found this bike rack. I got one, and it worked so well I bought anther one a week later. Now the bikes are up and out of the way. I can pull the car in (Honda CRV) under the bikes, and the back of the garage (where bikes were) is now open for a workbench and tools. Sturdy construction, and easy to use. Installation is fairly simple. Hardest thing is getting the mounting height and rack length adjustments right. They are dependent on the size & weight of the bike, length of bars, and ceiling height - so can be a bit of trial and error. Some minor issues: On bikes with long handlebars (like mtn bikes), the bars can hit the wall when bringing the rack is down. Care needs to be taken not to damage the wall. Also, securing the front wheel with velco feels like a bit of an afterthought. A slightly more elegant solution for that would be a welcome enhancement. But even with those imperfections, this is the best solution I've seen for storing bikes out of the way.
P**A
Awesome mounts, slight bend in the metal from the hydraulic.
I really like these mounts, they were easy to assemble and instructions were straight forward. Both bikes I mounted were under the weight limit, however keep in mind that your handle bars might be too wide. I had to mess around with hanging methods for the bikes to get it right, but once I found a way to position them, it was easy. One thing that was a slight concern (but hasn't gotten worse so that's good) was the hydraulic must be so powerful it bends the thick metal plate it secures to. The first bike I hung (not the red one) is decently light, I installed the mount, hung it up, then moved on to the red bike (it is much heavier but is under the limit). By the time I finished mounting the second rack to the wall, I noticed the first mount (now holding the lighter bike) had a bend in the plate. I quadruple checked the instructions and am 100% sure I installed it correctly. I got the second red bike hung and sure enough, bringing the bike up and down caused the plate to bend slightly. Like I said, they haven't bent any more than what you see in the pictures, but it's still concerning. Only time will tell. I think this is due to the asymmetrical mounting and a VERY powerful hydraulic. I would like to see the hydraulic centered over the metal plate, or more symmetry to even out the torque. See my pictures for the bends. All around I would still recommend this product, it seems very sturdy overall, can lift and hold a heavy beach cruiser, secures your bike so they won't fall, and allows you to walk/park under your bikes.
J**Y
Great space saver and baby proofing bonus
This is a fantastic mount for someone looking to have their bike (or surfboard, kayak, whatever) up high and out of the way. I purchased this particular mount because I began commuting from my small apartment to work and I wanted my bike to be easily accessible without dragging a muddy wet bike through the living room and onto the balcony. The installation was pretty straightforward as long as you mark your studs' centerlines properly. I wanted to mount the bike as high up on the wall as possible so that it would be as out-of-the-way as possible. Luckily the instructions detailed how to measure your bike to achieve the proper/minimum clearance. This had the bonus effect of keeping the bike safely out of reach of my 9-month old even in the lowered position. The operation of the mount is pretty easy and the mechanisms feel sturdy and well-made. Suspending a heavy object dauntingly above the head of your family is not usually a fun prospect. I feel completely safe with this mount and the construction and hardware. All-in-all, I am happy with the mount. It's definitely a conversation starter and extremely functional.
C**E
Poor mounting description/ faulty hardware/ customer service MIA
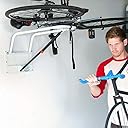
What a nightmare. Save yourself the time and buy a vetted bike rack from a real store. This online-only company fails to mention this rack can ONLY be used on standard 16"-spaced wall studs. The instructions that come with the bike rack say that if you have any other stud spacing (mine is 24"), to go to their website to order a "special mounting kit". News flash- they don't have a "special mounting kit." In their FAQ section, they provide links to two products priced over $30 at Lowes, but don't provide any instruction on how to install the products they've told you to buy. I called customer service for help- got the busy signal. I'm pretty handy, so ended up just buying extra hardware and 2x4s to custom-create a wall section that would support this bike rack. It took 3 hours, several tools, and $25 in supplies to build. So now, I could FINALLY start to mount the rack. The instructions say to install using a level, tape measure, stud finder (if your walls aren't exposed like mine), pencil, power drill (you'll need drill bits, too!), safety goggles, and wrench. They aren't kidding. But please, skip the wrench and use a ratchet. If you don't have a ratchet set, don't bother. Your arms will die trying to screw 8 giant mounting screws into the wall with a wrench. My first clue that something was really off with the hardware came in the half hour it took to complete step 1. The directions say to drill pilot holes with a 3/16" drill bit. WRONG. The screws are metric (size 10). If I'd predrilled with a bit that large, the screws would have stripped the holes very quickly, if they grabbed at all. Dangerous mistake on the part of whoever was writing the instructions. Thankfully, I compared the screw core to the bit size before starting to make the pilot holes and used a bit smaller than 3/16"! Three and a half hours into this project, I finally have two pieces mounted to the wall. Yay! The rest should go pretty quickly and easily. NOPE. The hardware isn't labeled well, and there are extra parts that don't go with the unit. If it wasn't for the parts breakdown and blown up schematic, it could have been disastrous. Certainly not intended for non-handy types. During step 2, I discover that either the receiver (part 20) or the screw (part 15A) for the safety bar were improperly threaded in the factory, and therefore will not go together. There is clearly a giant bump in the threading, which I circled in the picture above. But there are two part 15A/part 20 combos for the bike rack; for the sake of finishing the job, I push ahead, hoping one safety bar will suffice for the time being. Now pushing five hours into this job. *Sort of* completed step 2- time to move on to step 3. No way there could be two improperly threaded screws in this box. WRONG AGAIN. Step 3 has the user install the bike hooks to the rest of the rack. I frustratingly discover that the screw on one of the bike hooks is actually bent in the middle (also circled in the picture). How does that happen coming straight from the factory?!? Once the nut (which is supposed to be screwed all the way down to the hook end of this piece to act as a stopping point) gets halfway down the screw, it gets stuck at the bend. Because of this, there is no way to add the second bike hook to the rack, thus rendering the whole rack useless. So after five hours, I attempt to call customer service again. Busy signal again. No option to leave a voicemail. No way to or the specific parts I need. Can only send an email. Don't even receive a confirmation that the email was received. All I want is two replacement hardware pieces, so my whole afternoon wasn't spent sweating it out in a hot garage in vain. It's a vendetta now, since I can't get those hours back. Wow, this company should take some assembly, quality control, and customer service hints from IKEA. DON'T WASTE YOUR TIME!!!
A**S
Instructions and videos could be better
Installing the first pieces the wall plates was easy enough. The rest of the install went fine UNTIL we got to the gas strut. Just like others mentioned - pulling down the gas strut the first time bent the plate it is attached to. We immediately stopped what we were doing to double and triple check the instructions. Then we also watched promotional videos which show the gas strut positioned/installed on the left! The strut is has A LOT of resistance - and is hard to manage/pull down for someone with average arm strength. Also for something SO IMPORTANT --- and NOVEL - a gas strut system on a bike mount - you would think that they would spend more time explaining in the manual or on video what to expect - how it should feel and how it works - but they don't. Looking at the other reviews - we have or gas strut connected in the same way - so I'm gathering we did it right. Not sure why the promotional videos contradict the instruction.
L**A
The Gas Strut is Not Operable.
Unfortunate as the gas strut is not working and the company is not responsive. I had the unit professionally installed and now vested in keeping an inoperable purchase. My suggestion would be to test the strut ahead of installation.
J**T
Excellent bike rack! We need 2 more
This bike rack is awesome! My husband installed it on the wall himself, it comes with all the hardware you need. It looked easy enough but my husband is also a general contractor and makes everything look easy. In any case, if you have a level, a tape measure, a drill, a step stool/ladder, arm strength and know how to find studs in the wall you should be able to hang this rack. This rack Is perfect for space saving bike storage. We have 2 cars in our very small 2 car garage so this rack was a perfect solution, sturdy, easy to raise and lower and holds any bike. Highly recommended.
L**N
Totally awful experience **edited**
I was originally very excited about the prospect of this bike rack as a novel space-saving solution in my apartment. It is a very cool-looking invention that would finally allow me to hang my bike unobtrusively in my space. After following the instruction manual and spending half a day drilling into my walls and buying extra materials/drill bits to make it work, the most critical part of the bike mount which raises it did not work! Upon contacting the company for a replacement part, I like many other reviewers received no response. This leaves me with a bike rack that does not work as intended. This product is a complete waste of time and money, I had my hopes up for something that would help open space in my home. Instead, I was subjected to a scam product that is not supported by its creators. EDIT: the creators eventually got back to me and told me specifically how to mount the bike rack. It was a journey but with extra guidance I eventually figured it out. Their instruction manuals and video guides should be clearer, but when you get the rack up 100% correctly it really works great.
Trustpilot
2 weeks ago
2 weeks ago