Desertcart purchases this item on your behalf and handles shipping, customs, and support to Israel.
🪑 Upgrade your throne—comfort and durability that won’t quit!
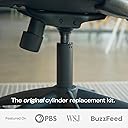
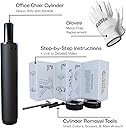
The Office Oasis Office Chair Cylinder Replacement Kit features a heavy-duty Class 4 pneumatic gas lift piston with universal sizing to fit most office and gaming chairs. It includes a patented removal tool for easy installation, supports up to 1000 lbs, and comes with a lifetime warranty, making it the ultimate cost-effective solution to revive sinking chairs without buying new.
| ASIN | B01FGLVD6M |
| Auto Part Position | Bottom |
| Best Sellers Rank | #6,732 in Office Products ( See Top 100 in Office Products ) #158 in Office Furniture Accessories |
| Brand | The Office Oasis |
| Brand Name | The Office Oasis |
| Color | Black |
| Customer Reviews | 4.6 out of 5 stars 8,095 Reviews |
| Extended Length | 4.75 inches |
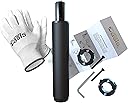
| Included Components | Chair Cylinder, Cylinder Removal Tool, Gloves, Installation Instructions |
| Item Weight | 2.5 pounds |
| Manufacturer | The Office Oasis |
| Material | Alloy Steel |
| Material Type | Alloy Steel |
| Model | OAS-2010 |
| Number of Items | 1 |
| Number of Packs | 1 |
| Part Number | OAS-2010 |
| UPC | 760842156357 |
| Unit Count | 1 Count |
| Warranty Description | Lifetime Warranty |
P**B
A new life for my chair
I'm incredibly lazy about writing reviews. It's a testament to how much I enjoyed this product that I am writing this review within 24 hours of the item being delivered and installed! The piston of my 10+ year old office chair was on the decline. Coming from a country where everything can be repaired, I was determined to repair my chair, but this is America, where everything is disposable. Not wanting to bite the bullet on a new chair, I was trying to make the chair last longer, which gave me more time to search, and I ran into this product. I bought it immediately; it arrived the next day with an upcoming delivery. I had already watched the installation video by Kevin Lehoe online, so I got working. With my OCD, I lined up the two collars perfectly, resulting in the screw holes to line up perfectly! The printed instructions included in the box, clearly tell you NOT to align them, but well, I was too excited to fix my chair! I should mention here that the instructions are printed on quality paper! I'm impressed, while also, could be a cost saving for a young company to go with flimsy recycled paper? The engineering to simplify the piston removal was ingenious - it's a joy when the chair top frees itself. I did have to take the base outside to hammer out the piston, as I didn't want to disturb my neighbors at 9pm! Installing the new piston took less than 30 seconds! Just drop it in the base, drop the top over, and it's done! It is a much cleaner design than the original with the telescopic plastic cups. The up/down action is sturdy, it rises to a good height, and I now have a functioning chair for a fraction of the cost of a new chair! This product reduces waste and increases the lifecycle. I was also immediately drawn to the rollerblade wheels, and ordered them without hesitation. I am excited to swap out the wheels when they arrive. Also went down the rabbit hole and found the PBS coverage of the startup! It's so cool that a small business came up with this amazing product line!
J**C
Absolutely PERFECT!
I rarely write reviews because something has to be complete crap or exceptional. This has to be one of the best products I’ve ever bought on Amazon! It does everything they say it will. Everything worked exactly as they described. And so far, it’s better than the original cylinder that came with the chair! Most importantly, it’s my wife’s work chair & she’s thrilled with it. As they say, happy wife, happy life! 😉 Now the details… Yes. Removing the old piston is a chore. Not the fault of this product. And this product even includes an ingenious tool for removing the piston from the bottom of the chair. It is slick as <expletive deleted> and worked great! Removing the piston from the chair base is a bit more difficult & there is no tool that they could provide to make it any easier. Again, not the fault of this product or its manufacturer. But they do include excellent & very clear instructions on how to do it. By using the provided instructions, a bit of Blaster PB penetrating oil, letting it sit for a bit & a hard plastic mallet got the job done. I did have to remove the clip & internals of the piston to get it out but it only took 3 or 4 whacks with the mallet. Once the old piston is out, installing the new piston is a piece of cake. It’s literally plug & play, fit perfect and took no more than 2 minutes on a generic Staples brand high back executive type chair. The new piston is quite solid. It has a much heavier feel than the old piston. It also has a longer travel than the old piston so the max height of the chair is noticeably higher than with the the old piston, even when it was new. The old piston always had some give to it, even when new. Not enough to go through the hassle of returning it, but enough to be noticed. This one seems rock solid so far. The action of raising & lowering is very smooth & easy. It raises quickly & lowers smoothly. One thing I noticed & really liked is that as soon as you let go of the lever to lower the chair it stops without delay. Most chairs I’ve used tend to keep going just a little more which can make it difficult to get the exact height I want. That’s about all I have to say for now. If something changes I’ll update. But IMO, this product is worth every penny! As I loved the fact that they included a pair of work gloves! It’s a nice touch!
R**N
Finally an easy way to remove a stuck gas cylinder – this kit is a game changer
If you’ve ever tried to pull a gas cylinder out of an office or gaming chair after it’s been sitting for years, you know how ridiculously hard it can be. Once that cylinder is seated into the base of the seat, it feels almost impossible to remove without damaging the chair. I’ve tried everything — rubber mallets, soft-blow hammers, even a sledgehammer — and still struggled, especially getting it out of the bottom of the seat (star bases are usually easier). I bought a used Secret Lab chair for my son. These chairs are expensive new, so I didn’t want to risk tearing it up. The chair worked great overall, but when you rotated it you could hear a clear tick-tick-tick from the hydraulic cylinder. Something was wrong with it. I measured the old one, found the closest replacement (it ended up slightly longer than ideal but still worked fine), and ordered this kit that includes both the new cylinder and the two metal brackets. The brackets are simple but brilliant. You put the first one up against the top of the chair (around the piston), then the second one against the base, and tighten the two Allen-head screws a couple of turns at a time, alternating sides. It literally just pushes the chair up and right off the top of the gas piston. No pounding, no fighting it, almost no effort on the Allen wrench — it felt easy enough that you could nearly turn them by hand. After six or eight turns back and forth, the four-year-old cylinder came off like it was brand new and had never been installed. For about ten bucks more than just buying a cylinder alone, you get the cylinder plus this removal tool. It’s a fantastic buy. The videos show exactly how it works, and it performs exactly as advertised. If you need to get a stuck gas cylinde
C**S
Perfect Office Chair Replacement Cylinder! Don't Hesitate to Buy!
Perfect Office Chair Replacement Cylinder! I have an old, but still very nice, OFM Inc. office chair. It's been slowly slipping down and not staying back up for far too long. I'd finally had enough and decided to do something about it and bought this kit! I'm a small-sized 72 year-old woman and, I tell you, it was amazingly easy to install this new cylinder! The kit came with everything you need, and detailed, easy-to-understand instructions. The two removal collars make removal of the old cylinder a breeze. Two things I'd recommend: prior to installing the removal collars, wipe the old piston with a wet-ones prior to drying with paper towel or an old rag - this really helps to remove any grease. Also, when the instructions tell you to hit the bottom of the cylinder to remove it from the chair base (meaning hit the inner part with the retaining clip, not the whole round sleeve on the bottom), put a 3/4 inch socket over just that part to be hit, and hit that with your hammer. That lined up perfectly on mine, no block of wood required. After completion, my chair now works like new! Many thanks to this small American company for developing and producing such a great product!
C**E
Great value, pretty easy to install once you "get it," would definitely recommend
I bought this product with the hope it would fit and I would be able to do it. I'm not mechanically inclined at all so I didn't replace my chair part right away. That was a mistake, I wish I had done it as soon as this one arrived. My old chair cylinder was worn out and would "fall" on its own occasionally. Instead of buying a new chair, I decided to try replacing the cylinder. I inspected the old one to see if I could get some idea of what I would need or how it would work and I hadn't a clue. I decided to just give it a shot and made the purchase. Essentially, I chose this product because it was a standard size and included the needed tools. The price seemed reasonable too. The package looked a little beat up upon arrival but not so much that I thought there would be missing parts. Once I finally committed to doing the work, I read the instructions twice and gathered my materials. The company did send me a copy of the instructions through email which is what I read. When I opened the box, the instructions inside seemed to be exactly the same so I used the email copy. They were not exactly the same... It's important to note that the shaft collars are installed on the new cylinder for shipping. They have to be disassembled for use before starting step 1 of the instructions. (The printed copy of the instructions does state they are on the new cylinder.) Additionally, the instructions reference a shorter set of screws vs a longer set of screws but only shows that one set is provided. The shorter set are the ones that are already in the shaft collars. I would recommend that the company changes the wording to reflect this instead of making it seem as though there should be another set in parts bag. And, the emailed instructions should be updated to exactly the same as the printed instructions. Ok, on to the actual work. The instructions sound pretty easy. And, if it's working right, they are. It wasn't too difficult to attach the shaft collars to the old cylinder. The hardest part there is figuring out how to position the chair and collars to get a good angle to maneuver the allen wrench. Once they are on an in position against the chair base, I would recommend making a mark on the cylinder with a marker. This will show whether the collars are working properly. What's supposed to happen is that the bottom collar holds on to the cylinder while the screws are tightened. This pushes up on the top collar separating the chair base from the cylinder. When I started tightening the screws, I could see the two collars pulling away from each other as expected. However, I couldn't tell if this was because the chair base was pulling up or the bottom collar was sliding down the cylinder. It turned out to be the latter. Making sure the bottom collar is as tight as it can possibly be is imperative. When I started over and tightened it again, I continued tightening until I thought I was going to break the wrench. (Probably not, I'm not actually that strong. That's just what it takes for me to get something as tight as my husband can get it...) Then, I started tightening the screws that separate the collars again. This time, I could tell it was working. And it was actually easier to tighten the screws. The attached photo shows why. The first time, the collar was gouging the metal as it slid down the cylinder. Obviously, the collar was tight but, not tight enough. It also shows the marks I made. The bottom mark is from the first attempt. That is where the collar was when I wasn't sure if it was working correctly. As I tightened the screws, the collar slid down over the mark and I knew I had to start over. Also, once I got to the end of this process, I expected the chair to kind of pop or fall off the cylinder. That didn't happen. Instead, the top shaft just sorta shifted instead of separating more. At that point, I easily pulled them apart. Then, it was time to remove the chair base. The instructions said patience and persistence is key. I AM persistent. Patient? Not so much. I got out hubby's small sledgehammer and a wooden block. I figured the extra weight would be helpful. It was. The block was not helpful. The point of that is to avoid damaging anything but, it requires an extra hand to use. At first, I tried using the edge of my stairs but, that didn't really work. I decided I was just going to have to hold the chair base and therefore could not hold the block. But, this wasn't really a problem in the end. Since I was using a sledgehammer, the only damage was going to be to the bottom of the cylinder. And since that was headed for the trash, I figured it didn't matter if it was damaged. The first strike didn't do anything. The force of the second strike popped one of the wheels out of the base. Surprise! (No biggie, it's just a caster wheel that pops back in.) The third strike didn't do much either. The fourth strike sent the cylinder skittering across the floor! Success! Ok, now I just have to put the new one in. I took a deep breath and read the instructions again. Wait, what? This turned out to be even easier than one can imagine. Just set the chair base upright, sit the new cylinder in the hole and line up the seat over the cylinder. Sit on it and adjust it with the chair's lever. That's it! It's like I have a brand new chair! I am very happy that this cylinder lifts higher than the old one. That one was a little short for my posture. In the end, as long as this holds up, it turned out to be an excellent purchase. I only marked off one star because the instructions could have been a little clearer for those of us who don't already understand this stuff.
C**D
Removed a Steelcase cylinder when no one else would
I've had a Steelcase Think chair (465 V1, pictured) for five or six years that I inherited with a broken pneumatic cylinder. The thing dragged a few millimeters above the floor collecting dust and hair. Gross. When I moved from place to place, the top and bottom would separate and greasy washers would fall out—which I later realized was because the gas cylinder was missing quite a few parts and had literally broken apart. The rest of the chair is perfect. Apart from a few scuff marks on the armrests and some minor stains on the seat cushion, it's pretty remarkable that the chair was manufactured in 2008 and is still like-new. However, I have long legs, and with the broken cylinder, it was always a bit too short. This was really starting to bother me after eleven months of working all day at home. I really love the Think chair, but a new replacement costs upwards of $700, and even a refurbished one costs $300. There was no way I was going to throw out my beloved chair, especially given the environmental consequences. I figured I could just replace the cylinder. Of course, the cylinder itself costs about $45–60—and that's when it's in stock at the few companies who sell them, which it wasn't. Steelcase itself doesn't even sell the replacement cylinder, never mind the removal tool it specifies in its manuals. Instead I ended up paying about $120 for a stool conversion kit from Crandall Office Furniture (it worked great, and it's pictured in the end result). Removing the bottom piece of the old cylinder from the base of the chair was easy enough with a rubber mallet and some WD-40. The issue was removing the top piece from the seat of the chair. After years of use with no nitrogen to absorb any of the weight, the two steel pieces were completely stuck together. It felt like they had rusted or maybe even cold-welded together. I really tried everything else under the sun. I bought a pipe wrench to try and rotate the top piece out. It ended up just gouging the steel (see picture). I removed the seat, bought a hammer, and whacked away at the actuator lever at the top of the cylinder for several minutes until it had deformed under the impacts (see picture). I heated the steel with a hair dryer until it was too hot to touch, and tried hammering and wrenching again. I took a titanium drill bit to the actuator in desperation; the drill bit eventually snapped. I used copious amounts of WD-40 between each of these steps and left the chair for twelve hours at a time. Nothing would make it budge. Then I ordered this generic cylinder replacement kit. I had stumbled upon The Office Oasis's YouTube video explaining how to remove an old gas cylinder and install a new one, and the "simple machine" explanation seemed to make sense. When it arrived, I turned the chair upside down again and followed the directions, making sure the top (floor-wards) shaft collar was incredibly tight and there was duct tape between them to protect the bottom shaft collar from the screws. I was worried it wouldn't work, because the join between the cylinder and the steel frame of the seat was at an angle of about 10°, so there wasn't complete contact between the bottom shaft collar and the seat frame. I think that helped, actually. On my second try, the cylinder simply popped out after about ten turns with the Allen key. I pretty much lost my mind. I don't know why the two components were so stuck together, because, as you can see, the cylinder isn't rusted at all, but none of the other methods I tried worked. But this tool was a life-saver. Within twenty minutes of it arriving I had the new cylinder in place and the chair reassembled. I can't vouch for the quality of the cylinder that came with this product because I didn't remove it from the packaging. It seemed decent enough, but it wouldn't have been compatible with the Think because the actuator is totally different. I really wish this genius removal tool was sold or rented by itself. At least one other company does that, but the down payment is $70 and shipping takes a week. I would have gladly paid $15 or so for this tool from The Office Oasis and just kept it around. I just don't need the cylinder and the cost of the whole package is pretty high. But because I feel a little bit guilty about using that part and then returning it, I'm giving The Office Oasis this stellar review. TL;DR: This removal tool is a miracle-worker, and if you have a stubborn existing cylinder like mine, it's a great buy.
D**F
As easy as can be, replace your busted chair lift with this unit.
I replaced my office chair lift tube with this unit. Directions were clear, and followed to the letter. The replacement tube came with everything described in the ad, and I had the tube replaced in about 30 minutes. I am thankful that it came with the removal tool, otherwise, I would not have even tried to do this. I would of just gotten rid of my perfectly good office chair with a bad lift tube and bought a new chair. After installation report, the chair is stable, fully functional, and is adjustable for my needs. I highly recommend this unit if you have to replace your chair lift tube. You won't go wrong.
H**T
Replacement worked great and I'm very pleased!
I'm not the most handy person but I found the video was helpful and thought it was something I could do. So when the cylinder and removal tool arrived I went ahead and tried to remove the piston from my old chair. The chair piston of the old chair had been broken for several months and was about $500 when I purchased it 13 years ago. I almost considered just getting a new one even though the piston and removal kit were far less expensive than a comparable new one would cost. The video and included directions were very helpful. The only problem I ran into was the "removal bolts" were fully extended and the chair still did not separate from the base. I ended up backing out the removal bolts, moved up the fixed clamp on the piston and resumed turning the removal bolts. The chair never popped off the base which is what I was expecting to happen after watching the video. However, with a few more turns I was able to pull on the seat and it came loose. A few good whacks on the old piston and it was out. I installed the new piston, got the chair seat back on the new piston and I was back in business. Not only does the piston extend nicely to raise the chair to a comfortable height for me but it seems sturdy and well made. I'm very happy with the purchase and would recommend this solution to others with a bad piston.
S**N
Premium Feeling Cylinder with Easy to use Tools
The included removal tools worked like a charm. Hardest part of the installation process was honestly getting the old cylinder separated from the base of the chair. Do note that due to how this cylinder fits, you might find your minimum chair height considerably taller than what it used to be. Though your experience may be different depending on the dimensions of your chair base. The entire chair feels much sturdier now and there's barely any side wobble or play if at all. Only time will tell if the gas cylinder replacement holds up, but until then, thanks Office Oasis for the quality replacement!
R**B
Brilliant
even if you dont need a cylinder..get it :) ..the tool removal is ingenious. Such a great package ..seriously though, the chair is as good as new.
A**N
Does not work properly
The cylinder is broken. Goes down once seated and up an hour after getting off.
D**Y
Fantastic installation, small initial issue that resolved itself
[Edit: changed it to 5 stars, the issue below seemed to resolve after 24 hours of use. The lock out valve must need a bit of time to ease into regular use] So the installation instructions were amazing, it was a painless install. I have a "top press" Herman Miller chair and it has breathed new life in it. The only concern is that it seems to go down "a bit" from full extension. I'm tall so expanding the piston 100% is perfect for me - but then I notice it started so go down about 5mm every 10 seconds or so until it's at maybe 90% height. This is workable but wonder what is happening - I doubt it's a feature.
A**R
It all comes in one box!
So, I was initially very disappointed as, when it was delivered i thought it was just the cylinder, and was about to start a returns process when i realised everything i needed was shipped inside the single box. The removal kit was a god send. I had struggled for hours before giving up previously, this time the whole thing was off in minutes. Keeping the removal kit in a safe place for future fixes, fields and family.
Trustpilot
2 weeks ago
3 weeks ago