


🌬️ Breathe Better, Live Better!
The Panasonic FV-11VH2 WhisperWarm Fan/Heater Combination is a state-of-the-art ventilation solution designed for bathrooms. With an ultra-quiet operation at just 0.6 sones, it efficiently circulates air at 110 CFM while consuming only 16 watts of power. This Energy Star certified unit is easy to install and comes with a 3-year warranty, ensuring long-lasting performance and compliance with various building codes.
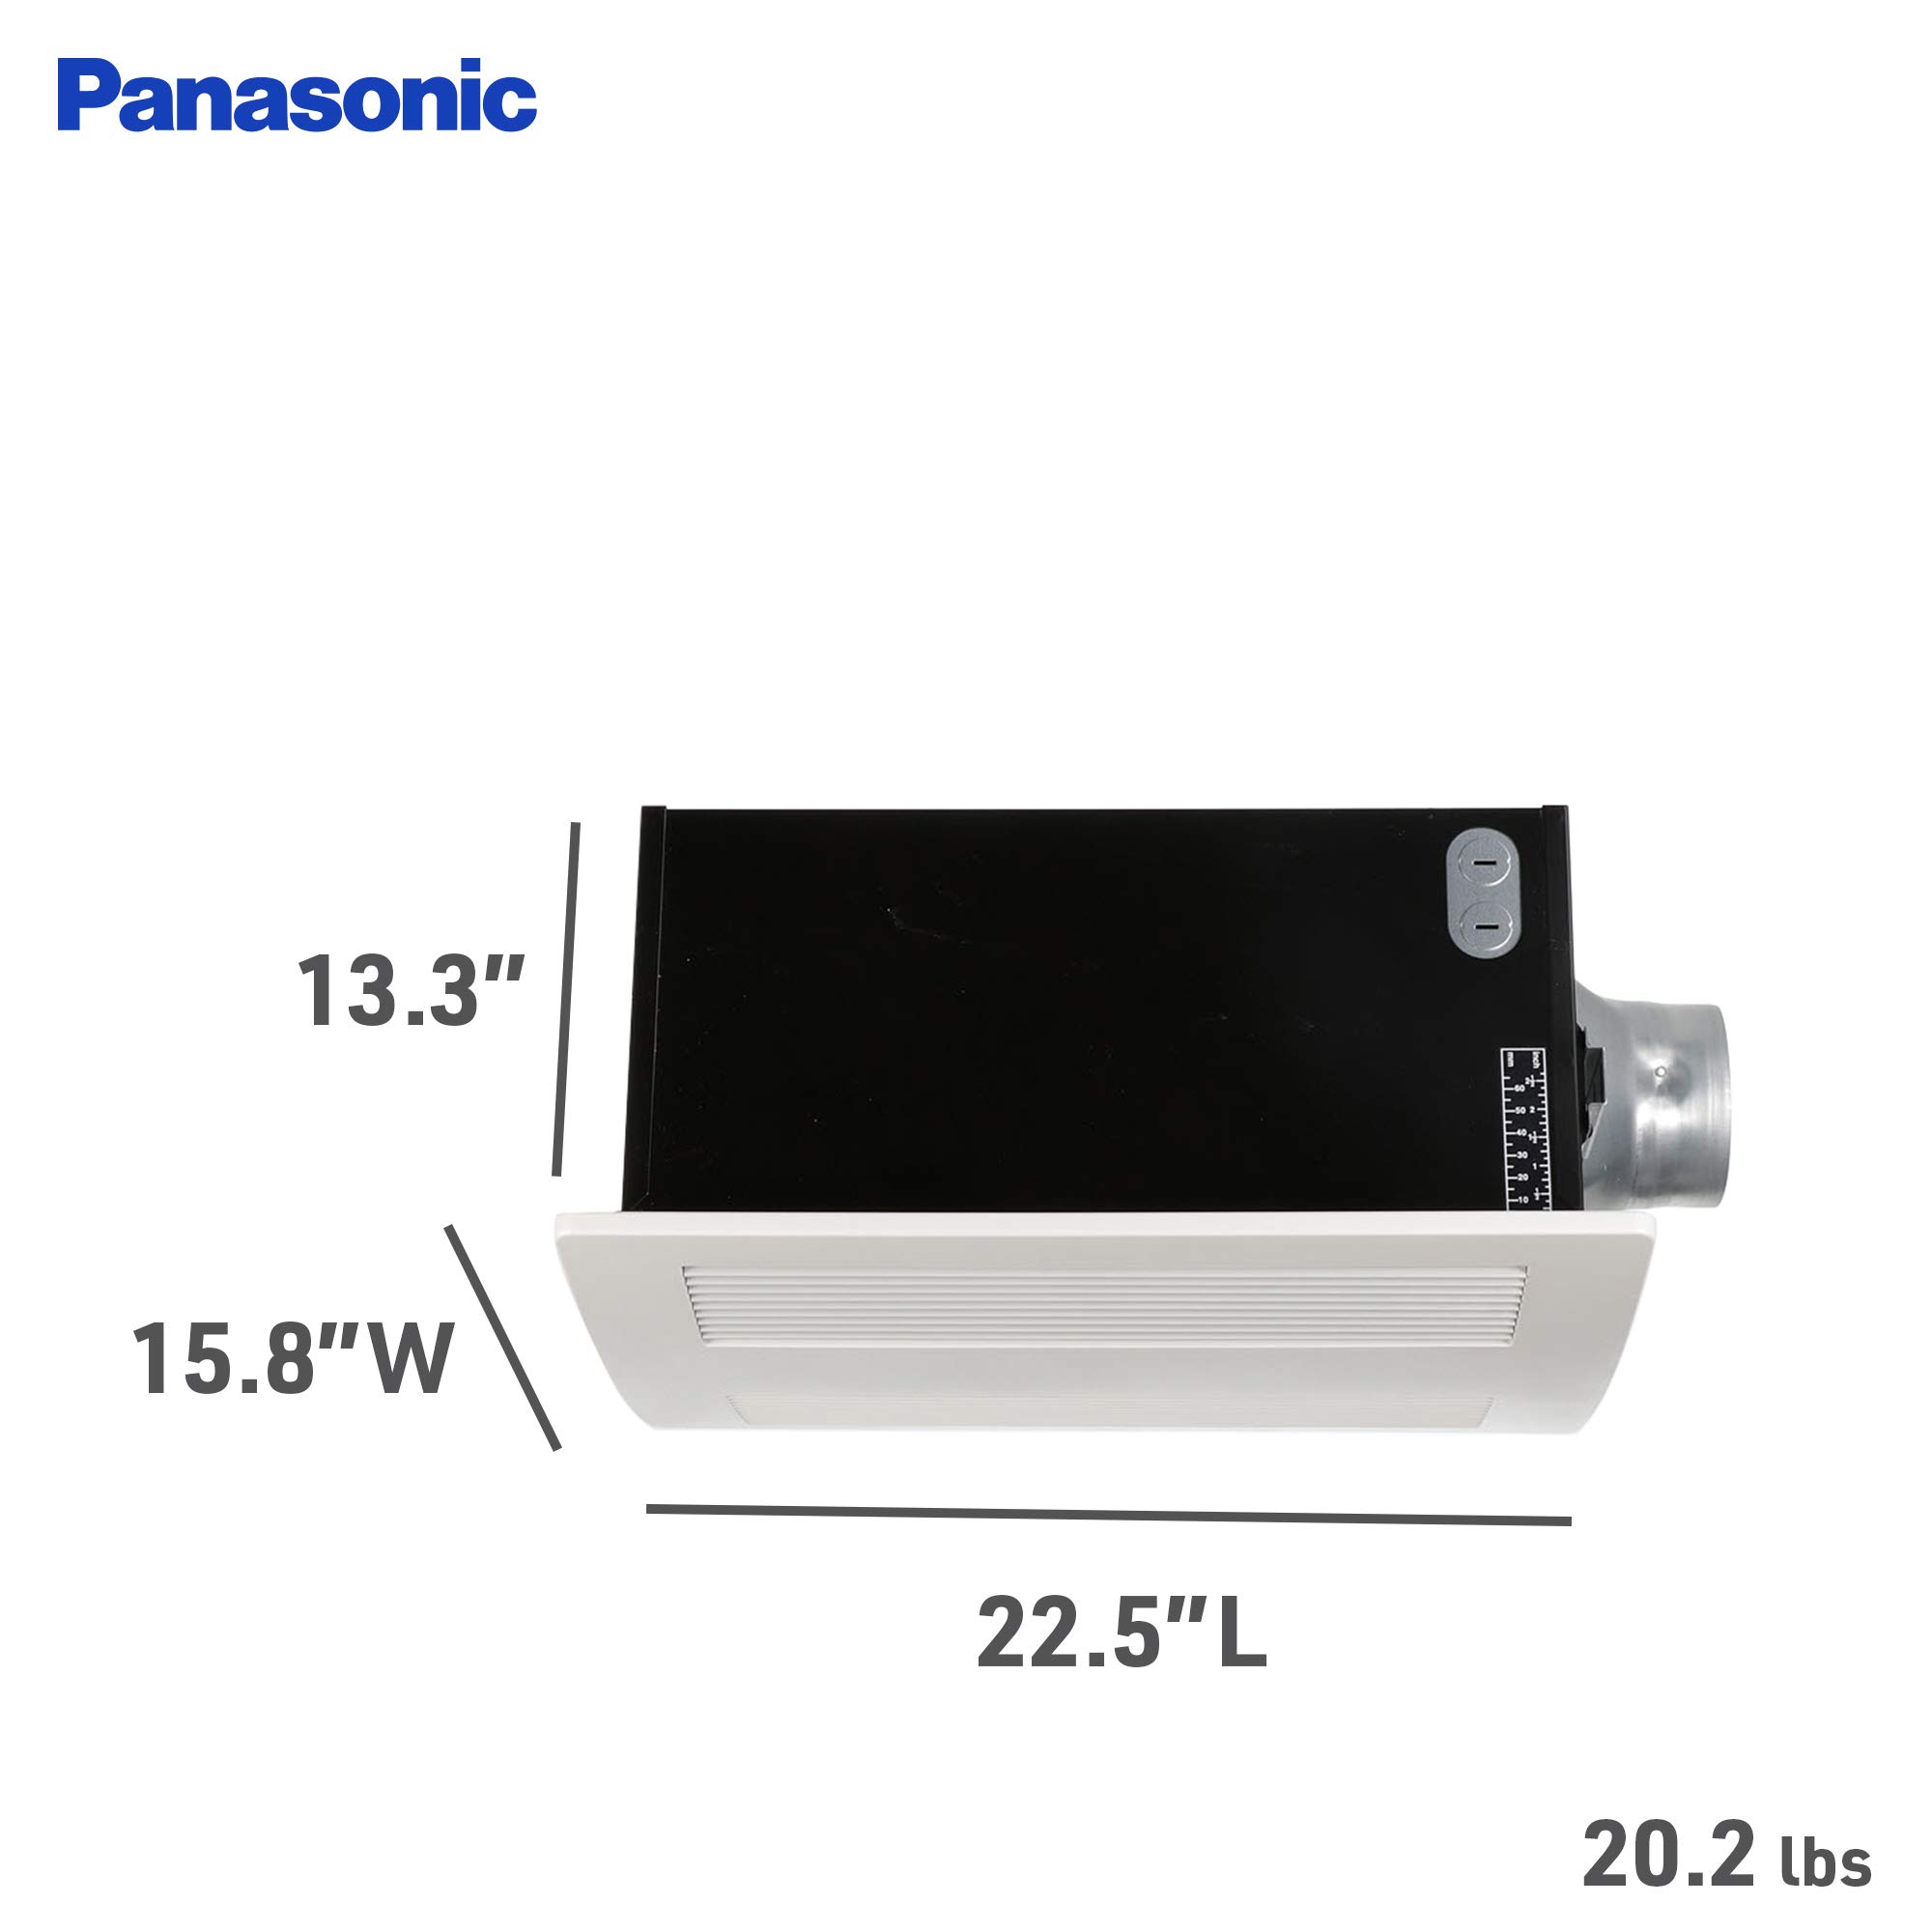
| Item Weight | 20.1 Pounds |
| Finish Types | Painted |
| Collection Name | Bathroom |
| Electric Fan Design | Blower |
| Style Name | Fan |
| Color | White Ceiling Fans |
| Blade Material | Plastic |
| Material Type | Stainless Steel |
| Specification Met | UL |
| Switch Type | Push Button |
| Indoor Outdoor Usage | Indoor |
| Efficiency | ENERGY STAR certified |
| Noise Level | 6 dB |
| Wattage | 16 watts |
| Air Flow Capacity | 110 Cubic Feet Per Minute |
| Power Source | Corded Electric |
| Room Type | Bathroom |
| Additional Features | Quiet |
| Recommended Uses For Product | Home |
| Mounting Type | Ceiling Mount |
| Controller Type | Button Control |
J**M
Well worth the money. Works flawlessly and effectively. Now wife wants one in the other bathroom.....
This unit is quiet, bright, and heats well. The 30+ year-old light-heater-fan in my bathroom needed to be replaced. Sometimes it blew wasps into the bathroom - not a good thing right after a shower, or ever. This unit was a lot of work for me to install, but that has more to do with it's location in my attic than the product. I will advise this, however. My brilliant wife suggested suspending it with para-cord from the roof joist thru the ceiling sheet rock hole into the bathroom while I hooked up the wiring. Sooooooo very smart. We popped an eye screw into the joist above it, ran para-cord thru the mounting holes on the lip that surrounds the item, and let it hang while I worked on it. Saved me a ton of neck pain. I cut the hole in the ceiling pretty carefully so that this guy fits snugly, so I couldn't drop it in from above like others mention, that mounting lip wouldn't fit thru the hole. And, my bathroom is on the edge of my house and there is very little space to work up there due to the slope of the roof. I spent a lot of time crawling and slithering around up there due to how tight it was, but that's not really pertinent to this discussion.Another thing to consider is this, I could not get it in the closely measured and cut hole in my ceiling with the outlet nozzle and mounting hardware attached. Look at the picture of the item. That white cover will be off when you install it, but that HUGE nozzle and the little mounting holders (there is one, the little silver slotted bracket by the nozzle, and a longer one on the other side) get in the way. I could not angle it sufficiently to slip it up in the hole with that nozzle on it. I didn't want to cut a hole in my ceiling any larger than absolutely necessary. But...., that nozzle comes right off, as do the mounting brackets. So, I took them off rendering the item just a rectangular box. I was worried that perhaps something inside the unit would also be attached by the screws used to attach the nozzle and mounting brackets, but happily such is not the case. Then I slipped the unit up into my carefully cut hole (I do hate getting sheet rock dust down my shirt - but taking my time with the hole paid off). We still had it suspended with that para-cord, so raising it up was not too hard to do with a helper up in the attic. I screwed two screws thru the provided holes in the lip surrounding the unit, and then hurried up to the attic as it hung there, supported also by that para-cord we moved to just the other side lip holes. Once slid into the ceiling hole, I reinstalled the mounting hardware and nozzle from up in the attic, and screwed the mounting brackets into the one beam I had. I had to reattach the mounting brackets to the unit with the mounting arms already slid in them (while lying on my stomach in the attic), and that was tricky, but doable. As you maybe can tell, the install required occasional help from another person.This might (hopefully) not apply to you, but because my bathroom is up against an external wall of my house, there was no beam on the other side of the hole I cut to make a wooden box to mount this to/in. The original fan had been mounted/screwed to just one beam-it was substantially lighter than this unit. More clearly, I only had one beam in my ceiling that I could screw this into. So, I cut one of the mounting arms shorter and reversed it so that both mounting arms screwed into my single beam. Then, I ran a cable between the joist up in the roof (that eye-bolt we put up there to tie the para-cord to for suspending the item during wiring was initially intended only for this task) and attached it to a smaller eye-bolt I bolted into the other side of the unit. I chose a spot to attach the eye-bolt carefully that would not interfere with any of the internal workings. I used a "turnbuckle" between the unit and the roof joist so that I could tighten it up just enough to get it level. That way, although only one side was screwed into a ceiling beam, the other side was suspended and "braced" securely so that the item won't sag. Remember, it's pretty heavy. It needs support on both sides.If you've never worked with wiring a triple switched item, you may want to have your helper be someone qualified in such electrical wiring. Honestly, I've done a lot of two-way switch, regular switch, and simple outlet work, but this was initially clearly over my head. I tore the old unit out without giving much thought to how it was wired. Not sure it would've helped me anyway had I taken notes. I wired the unit up in a way that "made sense" to me and it blew the fuse. I made "corrections" to my wiring without improvement. (Yes, I understand this likely horrifies anyone that is qualified in electrical work.) I then disconnected the unit from the power and switch and spent an hour on the Internet researching triple switch wiring diagrams and doing a lot of thinking and even some drawing to try and get my head around how this works. Yeah, I know now that the wire/conduit color doesn't always mean what you think it should mean in situations like this. One is hot, others are not, color may be inconsequential. Made my head hurt. I had to map out the wires to switches coming out of my ceiling and get a better understanding for how the unit is wired. If this intimidates you, get help.Finally, I left the night-light bulb out of the unit. I don't need that.Now, the thing puts off a good amount of light with the provided bulbs. The fan is VERY quiet by my standards, though I was used to a clankety, wasp-shooting, 30-year-old unit. Honestly, I am worried I am going to leave the house with it on, it's that quiet to me. Nope, not deaf. The heater is nice. When switched on it takes a few seconds to warm up the element, then the fan starts blowing. The heater fan is quiet and may seem wimpy to you at first, but it puts out plenty of heat.All-in-all, I am very satisfied with this unit. Now, the wife wants one in the other bathroom....
D**Y
Expensive and challenging to install, but the end result is AWESOME. Quality unit.
I installed this in my mother's 6 year old house as she was using a space heater in her bathroom. The bathroom is about 10 x 8 and already has 2 lights and a vent in the shower with a remote fan. Since she has radiant floor heat, there wasn't many options for getting her more heat safely (hydroponic kickspace heater) and researching the issue led me to this Panasonic. This unit is costly, but I think it was worth every penny in the end.I did the install myself that included running a new 20 Amp feed to the box with 12/2, cutting out the old 2 gain box and installing a 3 gain box, running one 12/2 from the switch to the heater and another 14/3 from the switch to the fan, light and nightlight. I tied all the neutrals together at the fixture and used the 12/2 neutral as the return. For those who are not familiar with mounting, here's what I did: find the center, punch a drywall saw through and cut diagonally towards the corners of your template. Once you hit a ceiling joist redraw your template using the edge of the joist. I was able to use drywall screws that catch the joist on one side and strapping on the other, so I did not use the mounting brackets that came with it. Much stronger mounting in my opinion.I used a Broan 77DW Three Switch, Four Function Control-Heater/Fan/Light, Night-Light for the switch. This switch is great as it is a single pole (one feed) switch that has 4 functions and is rated for 20 Amps. I wired the heater to the bottom, fan to the middle and light and night light to the top rocker that has 3 positions (on/off/on). It was tough getting all the wires into the box, but doable.As others have stated, the electrical box on the unit is extremely tight. So tight that I gave up trying to shove all the wires and wire nuts in and wired it outside the unit. I plan to stick all the connections in it this weekend just to meet code.The end product exceeds my expectations, heats the bathroom pretty quickly, adds plenty of light and is really quiet. The entire install took about 6 hours and although fairly handy, I don't do this type of work for a living. Tools and supplies I used included an electrical fish, electrical tape, 3/4" nailbitter augur abit, multi tool or sawzall (cutting the old box out), impact driver, lineman pliers, strippers, razor, screwdrivers, wire nuts, romex (12/2 & 14/2), 3 gain old work box, Broan 77DW switch, 25' insulated 4" vent tube, 4" exhaust duct, 4 1/8" hole saw, and beer lol. The beer is optional. Despite the long install, this unit is AWESOME!!!
A**R
Five Stars
Fantastic product. Installed in a small washroom and the small place will become like a sauna. Super quiet.
D**H
Five Stars
Best bathroom fan ever..Highly recommend..
Trustpilot
3 days ago
3 weeks ago
