🌟 Elevate Your Temperature Control Game!
The HiLetgo W1209 Digital Temperature Controller is a high-performance thermostat module designed for precision temperature management. With a wide range of -50 to 110°C, a 10A relay, and an accuracy of 0.1°C, it’s perfect for both DIY enthusiasts and professional applications. Its smart memory feature ensures your settings are saved, while the robust design guarantees reliability and stability.
G**N
Fiddly to assemble, but nice controller!
I give it 5 stars because I'm very satisfied with the product. It's precise and well-conceived. It's got a few rough edges, though. (I decided not to deduct a star, because the everything else is so good.)1. Very clever and attractive little plastic case. However, it requires assembly, which takes a bit of time. It is made of 6 precision-cut panels with protective film that you need to peel off. They insert together with tabs. Getting all the tabs in the holes is a fiddly process. If you want the case to be completely flat for mounting, you might want to remove a bit of the tab material before assembling, as the tabs stick out ver slightly (fraction of a mm) on the opposite sides of the holes.2. Some of the leads on the bottom of the board are a bit too long for the spacers provided, so you will need to trim them before mounting it onto the bottom panel of the case.3. I don't like the screw terminals. It's hard to insert wires into them. I have a rather stiff 18AWG wire that I used, just because I could push it into the terminal. Forget using any finely stranded wire, unless you use a (small) ferrule.4. The two boards I received disagree by 0.8 deg C. It's not a deal-breaker by any means.5. Setting the "on" temperature is very intuitive, but there are no instructions. Press (do not hold) the set button, and then set the temp with the +/- buttons. When you hold the set button, you end up in some mode to select different programs, without any idea what those are. (I think they set different hysteresis values.)6. The relay is pitched as 20A. However, that's the rating for 15VDC. The 120VAC rating is 10A. The 240VAC ratting is 5A.Other than that, the board is very snappy and precise, programmable to 0.1 degC increments. The temperature probes respond quickly.
S**E
Worked great for fan control
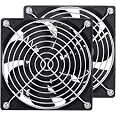
I have a home made cabinet for my CNC router. There is a compartment for the computer, but it doesn't have much air circulation. The other day I noticed the temperature was quite high in the cabinet and possibly a contributing factor for a recent hard drive failure.I wanted to add a fan to circulate air, but since the computer goes in to sleep mode and doesn't generate much heat when it's not being used, I didn't want something that ran all the time. With this gizmo and a 12V fan, I was able to set it up so the fan only runs when the temperature in the cabinet exceeds a certain amount. So far it seems to be working great. I have it set to come on at 32C and go off at 30C, and it's been been right in that range each time I've noticed the fan running.Set up was easy. I already had a 12V supply available in the cabinet, so all I had to do was hook up the power, insert the K0 and K1 ports inline with the positive lead of the 12V going to the fan, and drop the sensor in the cabinet. As I recall the default settings were what I needed, except maybe changing the temperature range.I opted for the case and that was worth the extra 60 cents. I could have laser cut my own, but it probably would have cost me 60 cents worth of material and certainly more than that in time. The only complaint about the case is that is doesn't provide any holes to mount it to anything unless you want to use the same holes used to hold the case together. No big deal - some double sided foam tape got the job done.Definitely worth it for less than $5 each.
Z**X
Cheap, effective, no instructions
I purchased this product for a little side project. I wanted to add a 12v fan to cool the charging transformer in a battery backup when it is charging on commercial power, but didn't want the fan to run 24x7. The UPS is no longer charging the small 7AH 12V batteries, but rather two 90AH 12V batteries.Installation of the device in the UPS case was pretty simple, but wiring and configuration was a different challenge since this product comes with absolutely no documentation. Keep in mind that this unit only deals with Celsius. If you want to know Fahrenheit, you'll need to convert it.Fortunately, some other reviews here have links to instructions and wiring diagrams.To wire it for 12V power to the controller board **AND** to the load device (fan in my case), do the following:1. Connect the 12V power source to the +12V terminal2. Run a short jumper wire from the +12V terminal to the K1 terminal, tighten down both +12V and K1 terminals.3. On the 12V device, (fan in my case), connect the positive power wire to the K0 terminal and tighten the terminal4. On the 12V device, (fan in my case), connect the negative return wire to the GND terminal. Also connect the negative return wire from the main power source to the GND terminal. Tighten down the terminal.To program the device for running a **cooling** fan like I did, do the following:1. Short press "SET" button one quick time and set the desired "turn off" temperature with the "+ or -" buttons. This is the temperature that your fan will turn off once reached. Once you have your "off" temperature selected, press the "SET" button again.This should get you going. If you set the temperature to 30C, the default swing temperature is 2C. This means that the temperature probe must get to 32C before the fan will turn on. The fan will run until the thermal probe drops back to 30C, then shut off.If you want to change the default swing temperature from 2C, do the following:1. Long press "SET" button until P0 shows on the screen. Press the + button until P1 is displayed. Short press "SET" button to modify that value. You should see "2" which is the current default setting. Press "+ or -" until the desired temperature is reached, then short press "SET" button again to set the new value.If the main "off" temperature is set to 30C like the above example, and you set P1 to 10, then the thermal probe would have to get to 40C before the fan kicks on. The fan would then run until the thermal probe reaches 30C before shutting off.
Trustpilot
2 weeks ago
2 months ago