🚀 Elevate Your Creativity with Precision Printing!
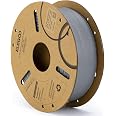
The Robox 3D Printer features a dual extruder system for high-definition printing, equipped with an innovative headlock system for quick changes, smart reel technology for material recognition, and user-friendly software for real-time project management.
B**.
Best 3D printer for the price!!
I have had my Robox printer now for about two months and I can say that I LOVE IT!This is a really easy to use printer and the models I make come out great. I like that Robox has an 800 number that I can call when I have questions. I called a few times when I first received the printer and they helped me with the entire setup. They were friendly and really helpful.The software is easy to use and gives me a lot of options. I like that I can choose between printing in a draft mode or create something really high definition in a fine setting. The software allows me to decide how solid or hollow I want the model which really saves on filament. I have printed a lot of models and still have the filament the printer came with. Seems very efficient!The print bed is heated which is important. I have heard that it is common for models not to stick with other printers. I had trouble in the beginning but the tech support guys walked me through a few calibrations and now everything sticks perfectly without tape on the print bed.The printing area has a see through door that can close and lock so I can keep the kids away from the hot parts while still watching it print.I would recommend this printer to anyone who is looking for a high quality 3D printer that is easy to use and prints well!
B**L
Very frustrating printer...
I had this printer for 13 months now, all I have is frustration. I had printed ~10 packs of robox PLA filament until now...I almost cannot remember how many times it broke and how many parts I have changed...I tried to record all the print major failure and broken part here.1. When I just got my printer within first several days, the nozzle broke and leaking a very large amount. I call amazon customer service and have a replacement.2. After I got my replacement, within 1 or 2 weeks, another error showing up and it's start flashing red light. The CEL customer service told me that it's rare to have this issue it should be coming from thunder storm which I highly doubt. They offer me a repair which they will pay for the shipment for sending back the printer, but they told me it will cost them 30 days or more to fix the issue.. I called Amazon customer service again and they said they could give me another replacement if I want.I just don't know what did I think that I accepted the replacement. I guess I really had a faith on CEL thinking of this could only be some rare issue, and the replacement won't have the issue again.. This time, I order an pro-care with the new printer which guarantee to have the issue fixed and and replacement printer will be send if the issue cannot be fixed immediately.3. 3 months after last replacement, I was quit happy with the replacement for 3 months, there is no issue coming out. Until the a week before Christmas last year, the extruder broke. I contact the CEL customer service and they provide me some instruction and send me a replacement extruder. It takes me 8 hours to replaced the extruder and it's still not working. The customer service let me use my pro-care and send me an replacement.4. However, the replacement still not working. The thermal sensor fails this time. The customer service apologized and send me another replacement 2 days later. The printer works okay this time, and they give me an backup nozzle this time.5. I was stop using the printer for ~5 months earlier this year (2018), and then I started to use the printer about 2 weeks ago, the printer is working okay for two weeks and then unfortunately it broke again, the nozzle is broken with stuck material, and I follow the instruction of removing the struck material, it's still not working. It needs to returned to the customer service for repair, but this time my pro-care expired, and I need to pay for the shipping and the repairing fee which cost a lot maybe more than a new nozzle.I think the product is not very reliable, and very easily broke. Within 9 months of using this, I almost has all the different component broke at least once. Extruder, power supply, nozzle, thermal sensor...I have to say this printer has a lot of features I really like, and the customer service is always very kind very nice, but the reliability has a lot of room to improve. It requires to have a tremendous of patient and love to this printer to have one. I hope my next printer would requires no customer service and I can focus more on my design instead of fixing the 3d printer..
R**L
I like to tinker a bit
I like to tinker a bit, but I see myself as a noob when it comes to 3D printers. This is my first 3d printer so I can't really personally compare this to other printers, but I can say that it is getting close to being plug and play. It was a choice between Ultimaker 2, Lulzbot Taz 4, Makergear M2, and Cel Robox. Out of the four, Cel Robox is the newest and did not yet have any reviews on Amazon when I purchased it. It was a bit daunting at first. I decided not to get Ultimaker 2 and Lulzbot Taz 4 because they cost way more and asked myself the following question: Do I really need to print something bigger than 4" or require a big build volume (Cel Robox's build volume is 8.3 x 5.9 x 3.9")? No. For my needs, I just needed to print components that I can attach to my actobotics components and couldn't justify spending more for build volume. Ultimately, Cel Robox won over Makergear M2 because of future-proofed technology (removable/replacble/upgradable print heads) and child safety, but Makergear definitely has amazing features/reviews and has a bigger community right now.My criteria and how they panned out with Cel Robox after receiving it 5 days ago:* Ease of use:Plug and play - print right away after installing Robox Automaker software (the white card is a usb drive accessible by flipping it to pop out and install software), but do the following first before printing (you knew the "but" was coming) :a) This is optional but Robox community suggests that you always run a Purge (there seems to be test filament in the print head upon unboxing so do the Purge before anything else) OR print the "Robox/3D Models/pyramid.stl" on Draft (you can always pause then cancel once the first few layers of the pyramid is confirmed sticking to the bed if not it takes 9 mins to print pyramid). I did find that preheating the bed, warming the ambient temperature inside the printer, and preheating extruder gives you successful first layers after especially with ABS filament.b) Let the bed cool down a bit so when you clean up the purged material or remove the printed pyramid, the alcohol from the IPA wipes doesn't evaporate right away and it'll be easier to remove the filament material when the bed is cooled down. It doesn't contradict the first step of preheating since the bed is still warm after and ambient temperature inside the printer is relatively warmer as well.c) Clean the bed with Isopropyl Alcohol (IPA) wipes.d) Add your model for printing. Before you press the Print button though, set the "Brim" parameter to either 2 or 3. It will add an extra thin first layer around the perimeter of your model. This will ensure that the first layer sticks and stays down instead of lifting up or bending up that sometimes happen on ABS prints. If you can't see the print button that looks like a play button, make sure the filament has been fed properly by pushing it in a bit, make sure you hear a motor whir after, and feel the filament getting pulled in.e) Now print whatever you like. Remember to let the bed cool down a bit before removing your print. Remove the Brim layer. Then clean up the bed again once you are done.Note 1: If you find that the filament is not sticking on the first Purge, AutoMaker software has a "Calibrate Nozzle Height" on the "Status" tab > Click 3 dots on panel divider to open advanced settings > "Maintenance" sub tab. This will make sure that the extruder nozzle isn't too high from the bed when printing the first layer. IMPORTANT!!! Before you run it, you will have to remove the PEI plate (the brownish plate with the Robox logo) on the bed. Slide the front black tab with a metal clip to the left, push up the plate a bit from the front finger slot, and slide it carefully out. Follow instructions to determine if the nozzle height is set just right.Note 2: You'll find that printing in "Draft" instead of "Normal" or "Fine" may be enough resolution for your needs. With Draft, it will exclusively use the larger extruder. Normal and Fine uses both extruders. Go with "Draft" first if you're printing the design model for the very first time. It will save you lots of time. It won't be as pretty but it will get the job done.I found that the Automaker PDF User Guide is outdated and this confused me a bit. Skip the documentation about the auto registration part since it is no longer in AutoMaker software. Also remember that you can click on the 3 dots on the panel divider to show Advance Settings. There you will find a panel to send GCode commands to the printer as well. If you can't open the printer door for any reason (make sure print is not paused and has cancelled/finished printing), just send the command "G37" to open the case door. I current do not know how to reopen "*.robox" project files that has my model scaling and rotation saved settings since the documentation doesn't match the latest version of AutoMaker. It's not big issue for me but Cel I request that you update your documentation for every AutoMaker version release.Finally, Robox is plug and play because you don't have to assemble the printer. You also don't need to level the bed and don't need to configure your filament/material settings every time before printing. But unlike inkjet/laser printers, there are some things you still need to do to ensure a successful print. A successful print right now can still have blobs and stringy parts. As far as I've researched, all consumer/commercial 3D printers have issues and they are not at the stage where 3D printers are truly plug and play like paper printers. You will still occasionally get bad and inconsistent prints. Even with the amazing technology Cel implemented on Robox, I still would not say 3D printing is now mainstream. But of all the 3D Printers, Cel Robox I think has addressed more issues than the competition (auto-leveling gantry, heated plates, microclimate ambient temperature, material detection and number of supported types, filament retract resolution, pause-resume, print-speed, extensibility, safety, etc). I wish I could say how it compares print quality wise since this is my first 3D Printer.* CommunityOn my first ever print, the first layer filament didn't stick to the bed. Don't panic if this happens to you. This is why doing the above steps is very important and they avoid this from occasionally happening. I figured out how to resolve my issue by reading the manual and going to the community forums. I'm impressed that I didn't have to open a support ticket to solve it. I lurked into the forums by the way and haven't introduced myself to the community yet. The community is smaller compared to other forums because the printer is relatively new and you won't find a lot of youtube videos yet.* TechnologyInstead of throwing specs around like 20 microns resolution (which I probably won't even configure/use since it will take forever to complete a print), I'll just say that I like the idea of upgrading the print heads. I can actually buy (backordered) a different print head RBX01-DM Kit Dual Material Head + 2nd Extruder. Even with that added to the cost, it is still cheaper than MakerBot Replicator 2X, MakerGear M2, Ultimaker 2 and LulzBot Taz 4. The Robox already has dual extruders but it is for the same material only. It has dual extruders with different sizes to speed up print time (uses bigger extruder to fill in material and smaller extruder for finer details outside). RBX01-DM has dual extruders for different color materials or different material types (probably same size extruder though). Robox is like the Dremel of 3D printers. It has the potential to attach 3d scanners, print circuit boards, and probably even do traditional subtractive manufacturing like cutting and routing.Note 1: You can print with different colors using the regular print head by pausing print, eject material, feed in new color material, and then resume print.Note 2: You're not stuck with buying Cel Robox branded filaments with EEPROM chips. You can buy and use filaments from other manufacturers/providers. It just won't have the pause/resume capability. There's a thingiverse Robox Reel Spooler: www.thingiverse.com/thing:576324 that allows you to rewind other brand filaments back into the Robox EEPROM SmartReel and even setup a custom material profile (temp, speed, etc. settings) for it so I guess you can still get pause/resume capability with other brands. Think "Cartridge World". I have not confirmed whether this works or not.* SafetyI have kids and while I encourage them to learn 3D printing with me, the bed and nozzle can get extremely hot. It will automatically lock the case door while printing. I like that I can lock the case door before turning it off as well.UPDATE 1/19/2015:It's been a month and things are actually better. With the recent software update AutoMaker 1.01.01 (now uses Cura slicer same developed by Ultimaker), I was able to print this seemingly impossible ring of ball bearings:http://www.thingiverse.com/thing:51806Something I thought was not possible to print on the Robox. I was also able to complete my 3D Printer Smoke Alarm project just recently.http://www.thingiverse.com/thing:633143Experience so far:Overall, I'm satisfied and I do understand why other reviews haven't been great. I do acknowledge reviewers are very technical and knowledgeable about the subject. The experience they share is very valuable. A lot of things I printed also didn't work out and got stumped for awhile too. For example: Some models cannot be printed as is. I wish it is what-you-see-is-what-you-print, but humbly learned it's not.On the hardware side I've had the same problems some have mentioned here so I don't think it's a lottery of good Robox printers. When nothing sticks on the bed I recalibrate. When nothing is coming out of the nozzle, I preheat nozzle, eject the material, re-cut filament, and try again. When it doesn't print right, I rethink and iterate. The community has been great and has helped me a lot.I guess what I'm trying to say is for this price point it's really good (I have no affiliation with CEL Robox). I encourage you to keep at it and it'll work out. To me, having a Robox is like having an Automatic(P) mode on your digital camera. It's not only because it can set material, auto-leveling, and profile settings automatically but it has amazing tools to resolve issues with features like Eject Material, XY Offset, Nozzle Opening, and Nozzle Height calibrations. It's really good. This is recognition that is well deserved.But just like with photography, the camera is not good alone. You need good lenses, a sturdy tripod, studio lighting, composition, and a good workflow. The workflow I learned is to always do planning and preprocessing: solidify models 1st with Rhino3D/MeshMixer, split the models if needed, plan orientation, and alternatively use MeshMixer to generate the support layer. So far, I've only used the default print settings on the Robox and have not played yet with all the different manual settings. Honestly, the Print quality is not yet on par with the $2500 and over printers. I think with future software improvements (Robox software has only been in development for a year) and learning how to use manual settings will help improve the quality even further.
ترست بايلوت
منذ 5 أيام
منذ يوم واحد