معلومات عنا
دعم العملاء
احصل على التطبيق

قم بتوجيه الكاميرا لتنزيل التطبيق
حقوق الطبع والنشر © 2024 Desertcart Holdings Limited


🖥️ Build Boldly, Display Proudly!
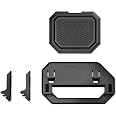
The Thermaltake Tower 300 Black Micro-ATX Case is a stylish and functional chassis designed for M-ATX motherboards. It features dual 140mm CT fans for superior cooling, supports up to a 420mm radiator, and offers an optional chassis stand kit for horizontal display. With multiple USB ports and a 3-year warranty, it's the perfect choice for modern builders.


| Number of USB 2.0 Ports | 3 |
| Number of USB 3.0 Ports | 2 |
| Brand | Thermaltake |
| Series | Tower 300 Black |
| Item model number | CA1Y400S1WN00 |
| Item Weight | 18.3 pounds |
| Product Dimensions | 11.5 x 14 x 22.5 inches |
| Item Dimensions LxWxH | 11.5 x 14 x 22.5 inches |
| Color | Black |
| Manufacturer | Thermaltake |
| ASIN | B0CS878V58 |
| Country of Origin | China |
| Date First Available | January 12, 2024 |
M**B
Because you can do this...
I haven't seen very many full custom water cooling setups in the Tower 300 yet. It is a tight fit depending on what components you have to work with for sure. It took me a few days of planning and a couple days to really get it built like this looking super clean. But end results speak for themselves. I migrated most of my existing waterloop with the addition of a smaller reservoir to this case. It all fits.. barely! I was going go go hard tubing but after a little trial and error decided against for ease of maintenance in such a tight space. If you take your time, soft tubing can looks great and SO much easier to deal with. The case itself isn't exactly what I would consider Micro-ATX size as it's quite tall and still has a decently large footprint. But you definitely save desk space in depth. Love the vertical GPU look and the Pump/Res being the centerpiece.There were 2 mods I had to do to get the airflow optimized and 1 to get the my GPU to fit and still use the included cable cover at the bottom. Mod #1&2, Get better airflow. The platform in the center where the Pump/Reservoir are mounted to is directly above the power supply. With the power supply mounted fan down (as it should be in this case), there is about 25mm of empty space between it, and the bottom of that center platform. Now, you can mount a fan on the top side of that platform if you wish. I personally don't want the ugly backside of my fan showing so I wanted to find a way to mount it up under that platform as an intake fan. Issue is, the standard 120mm-140mm fan thickness is exactly 25mm. So not enough space. Even if you could squeeze one in there, the airflow would be completely choked off being so close to the PSU. What I ended up doing was ordering a slim 15mm thick Arctic brand 120mm PWM fan. It fits under there perfectly with roughly 10mm to spare. They make an all black one and the cables are also black. So it just hides under there completely out of view. It runs very quiet and moves a surprisingly high volume of air! Just that mod alone dropped my case temp by 8c running at around 60%. Second mod, not really a mod, is to now reverse the fan/fans on the back of the case to be intake instead of exhaust. This brings in cool air and blows it across the back of the motherboard and around the sides feeding my 360mm radiator even more cool air. So I have cool air coming in from the bottom and back and heat being exhausted out the right side and top. I did a couple different fan configs and this one drops the temps the most. Mod #3. Fitting the clip in cable cover under the GPU. Out of the box, you have exactly 280mm of GPU space to work with if you intend on using this bottom cover. Any longer and you can simply pull it out and fit longer GPU's. My GPU waterblock is roughly 290mm. What I did was dremel out a rectangular cutout in the center of that cover to allow the longest part of my GPU to pass through it. Fairly easy mod if you of course have the tools. Without that cover it just didn't look right with all of my PSU and cable extensions exposed. I wanted a no compromises, clean build so I did the extra work.NOTE: I am using an EK P360 Radiator which is exactly 39mm thick. Most AIO radiators are about 10mm thinner and have plenty leave plenty of space. With the addition of standard 25mm thick fans, my setup JUST BARLY FITS! No cutting of that center platform needed. There is quite literally 1mm of space left so the fans do not rub. I took a bunch of pics so take a look and hope this info helps!!I absolutely loved building in this case. Fairly easy to cable manage in and very little wasted space. Its a head turner for sure.
L**S
Obsessed
I’m really happy with my Thermaltake Tower setup! The build quality is solid, with durable materials that feel like they’ll last a long time. The glass panels are super clean and give it a really sleek, modern look, which makes my whole setup look even better.Setting everything up was a breeze—plenty of space to work with, great cable management options, and good airflow. It’s definitely one of the most aesthetically pleasing cases I’ve had, and it makes my rig stand out in the best way.If you’re looking for a high-quality, stylish, and easy-to-build-in PC tower, I’d definitely recommend this one!
J**N
Great case, some caveats
This case is really amazing to build in. Unique looks, more space than you would think, and basically every panel comes off making it easy to reach basically everything.The cons are going to be a bit circumstantial. Some GPUs clearly do not like hanging in this orientation, particularly those with vapor chambers so keep this in mind. I have a 7800XT (no vapor chamber) that was running hotter than I liked and even crashed in some games. I adjusted the fan curve for the card itself and that helped. What helped even more was changing the right side case fans. Thermaltake suggests these as intake, but I think that was causing the GPU to recirculate it's own hot air. All 140mm, I kept the bottom as intake and swapped the top two to exhaust. Again, these are the side fans--GPU dropped 5-7C immediately in furmark. Will continue to monitor.Another preference thing is cable management, specifically IO. Going up the top and out the back is fine, but can clutter your desk space a bit. Still working out how I want to clean that up.
B**N
beautiful case but challenging build
I absolutely love how my new PC looks, but it was a challenging build. The case does everything it can for you - built-in cable retention clips along the back, easy removable panels, lots of options for mounting SSDs, and just tons of quality features overall. everything feels high quality and the bay window style glass panels are sight to behold.a couple of words of warning though:Radiator Size - I did manage to fit a 420mm radiator in it, but not easily. It's so tight the fan power cables coming out along the bottom of the rad blocked it from being inserted. I had to unclip them from their retention on the back of each fan. also, make sure your radiator is not too thick - I went with Thermal Take brand since I figured it would fit in their case (barely), but I hear the Arctic Freezer 420 won't, due to the thicker rad.Power cable length - Due to the orientation of the board in the case, I had to buy 12v EPS extension cables to reach, because my power supply cables were not long enough. They were also too thick to fit in the cut-out while a radiator was mounted. I found some flat ribbon style extensions which worked out great.Display Cable Angle - getting display cables plugged into the graphics card was a challenge. there's a sharp turn they have to do and my displayport cables were simply too thick to feel comfortable bending that hard. I found some short 90 degree extensions that worked out great.I suppose if you're building in this case, you've probably already watched videos on it and know what you're up against. and if not, go watch some videos first! make sure you're ready for the challenge. It does pay off when fully assembled - there's really nothing else quite like it.
K**S
“Smal pc case”
This thermal take 300 tower pc case is a beefy boy! Its a micro case but its huge haha but its got good air flow, very nice look to it and very good fan set up.Only thing i dont like is the case becomes very tight so cable management and connecting to the motherboard are very uncomfortable but once its done its a beast of a set up with a lay down option if you decide to get the stand which i dod but comong at a later dateOverall a good pc case with good airflow and a great look
ترست بايلوت
منذ يومين
منذ أسبوعين