
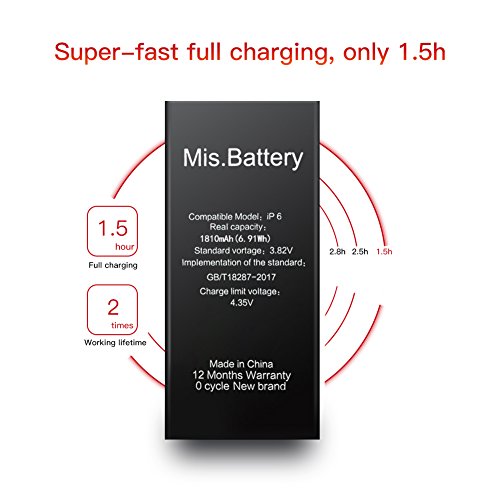


Color:Black iPhone 6 Battery Replacement Li-ion battery with Repair Replacement Kit: Mis Battery is a professional company which provides iphone 6 battery Replacement Li-ion battery with Repair Replacement Kit for iphone 6 4.7” 3.82v 1810 mAh. Compatible models: Mis Battery iphone 6 battery Replacement will replace your iphone 6 original Battery (Only-A1549,A1586,A1589) perfectly Safety protection circuit design: prevents battery from overheating, circuiting, overcharging, discharging and short-circuiting. iPhone 6 replacement battery Certification: CE/FCC/UL/RoHS/MSDS certification. Easy to install: Instructions are comprehensive and easy to follow that can be found on YouTube Channel Free iPhone 6 Repair Replacement Kit will make you install your iPhone 6 within 10 minutes easily, conveniently,LG cell with 100% 0 cycle guarantee your next 500 cycle times usage. NOTE: Please read carefully about the install guide, wear the glove, and watch install video on YouTube. Any human damage will not be accepted and please tested the battery before you screw the iPhone together(Pay attention about the LCD cable, it is very easy to break) Active: After the battery installed inside iPhone, we suggest you full charge 100% and lose charge 0% about 3 times, then the battery will became a super hero for the next year Now click“Add to Cart”to Wake up your iPhone with Mis Battery iPhone 6 replacement Li-ion battery.
C**M
My phone is working like new! A little bit of work, but so worth it...
I bought my phone refurbished about 6 months ago and was having problems after the first few months with the battery very quickly losing all charge (going from 60% to 10% in a matter of minutes), shutting off randomly especially if I was trying to run a few apps at one time, and having to wait for a really long time to recharge. I bought this as a last resort before taking the hit and paying for a new phone, and I'm glad I did!The instructions it came with were detailed on how to get the battery out, but stopped after you got it out. I think you were supposed to just reverse the instructions, but it would have been helpful to say that. I had a youtube video up and it walks you through all of the steps and it worked great! The hardest part is removing the adhesive behind the battery, but the kit came with everything needed to disassemble and assemble again.It's been a few days and there is an incredible difference--it's working like a brand phone! The first day after it charged I opened a ton of apps, let my kids go crazy with games, and I still had 35% at the end of the day. It's worth a shot, just make sure you have the patience and fine motor skills to complete the job.
A**R
Never gonna give up on my Nexus 5
This replaced a bad stock battery in my Nexus 5 - like some users, the stock battery would crash suddenly regardless of whatever charge it had. The stock battery crashed multiple times per day and revived only with external power, so I was annoyed that I had to carry an external battery with me wherever I went.This battery has been going strong for a week now; it has not crashed yet and it lasts 18 hours with my typical usage, whereas the stock battery life had dwindled to 6 hours before the crashing issues began. This battery is 80 mAh smaller than the stock battery, but the difference in device usage is unnoticed by me. Per the product insert, I completely charged and discharged this battery a few times after installation.The only negative thing about this product is that it did not come with detailed installation instructions. However, I found this easy enough to install after watching some pointers on Youtube. The most difficult part was prying out the stock battery since it was slapped in there with double-sided tape. I used a guitar pick to take off the device back cover.
M**O
No hassles
Second iPhone we ordered battery for. Worked great. The first time didn’t but returned and receive replacement. No hassles. Ordered another battery for the other iPhone. Working great also.
W**E
Made my Nexi useful again !
My original Nexus 5 started acting up a few months ago. Charge times got a bit longer; discharge times got a whole-lot shorter. What finally broke the camel's back were the frequent shutdowns if the battery fell anywhere near half-discharge. Do anything processor intensive (like opening a busy web page) and the battery voltage drooped enough to shut off the phone. Even taking a photo (without flash!) would kill it.A replacement battery was overdue. However, the original LG one's unobtainium (any Amazon vendor who claims to have the real-deal is a fraud). User reviews for most replacement batteries ranged from mediocre to piss-poor. I finally found the ONITE. While it didn't have many reviews, those it had (at the time) were three-star and above. So I gave it a shot.Replacing the battery is only a minor pain. There are plenty of resources on the Internet that can guide you through it. I was able to remove the case with a thumbnail (mine, not someone else's) and a library card. There's some sort of thin double-sticky tape holding the back to the battery, so patience is required. DO NOT apply pressure around the volume or power buttons. The case is thinner at these points and will crack if any torque is applied there. I found out the hard way. Yet if it does crack, no great shakes. The little line will hardly be noticed; with a cover on you won't see it at all.From there, it's to the eight tiny screws on the plastic panel around the camera lens. ONITE includes star and phillips screwdrivers for the task (you'll need only the phillips one for this job). The panel comes off easily as there is no glue. Place the screws in the case back you removed at the beginning so you won't lose 'em.There are a couple of ribbon connectors you'll need to detach. The short narrow one is the battery; DO NOT disconnect it yet! Pop off the longer and wider one first - just slip your fingernail or something non-conductive under one side and gently pry it up. Before you remove the battery connector, you should first loosen the battery (yup, more double-sticky tape). Carefully pry up around it, hitting two or three spots per side. When you feel it's about to give way, pop off the battery connection then pull out the battery.Before you put in the new battery, fold the connector tab to match the original one. Don't bend too sharply or you'll break it. Now put the battery into the phone and immediately connect the newly-folded tab to the connector inside. Be sure to line it up first, then give it a firm push. You'll be rewarded with a solid "click". Gave the same line-up/push/click treatment to the longer ribbon cable and related connector.Screw on the plastic piece around the camera lens, snap on the back cover, then power up the phone to make sure it works. Put it on a charger straight away. Let it charge fully before you unplug and use it.About that old battery...DO NOT just throw it in the garbage! It should be recycled, instead. Be sure to first completely cover the connector tab with a bit of packing tape so the end won't short against something conductive. BTW...this short-circuit risk was why you disconnected the battery last before removing it from the phone.I've been running the ONITE battery for about a month and so-far, so-good. The annoying shutdowns have disappeared. Per instructions, I fully charged/discharged the battery for the first three cycles. You should do the same. After break-in, I've gotten one or two days between charges with moderate use. That's slightly better than when the phone was new. However, I attribute this to improvements in Android OS rather than battery capacity. If the ONITE is able to maintain this level of performance, it'll be worth the 17 bucks I paid in February 2016.I'll update this review in a few months. Fingers-crossed it'll be good news.UPDATE - 22 June 2016:First the good news...after more than three months in service, the battery still works fine. I'm getting about a day and a half per charge - perhaps slightly lower than new. This might be summer foliage absorbing more of the signal, thereby forcing my Nexi to transmit at a higher power level. Or it may be all in my head. Either way, any real or perceived degradation isn't enough for me to demerit the battery. Charge times have remained reasonable. The annoying sudden shutdowns have not returned. It's all good.Well...almost. Here's the bad news. ONITE is now selling the battery five bucks cheaper than what I payed in February. Wah.UPDATE - 11 July 2016: The price just went up to $22.99. That's still bad news - just not for me.FINAL UPDATE - 5 November 2016: My Nexus 5 is Kaputt. At first I thought it was the battery. In fact, I peeled back the plastic and paper on the batt in an attempt to find the problem. I needn't have bothered, as the power switch was at fault (a common problem with older Fives). A sure sign of this failure mode is that it'll reboot constantly while charging, yet rarely power up at all when on its own. To know for sure if it's the switch, constantly drum your fingers on the display during power up. This rattles the failed internal switch contacts enough to break up the "long press". It just might make it all the way to the homescreen. Once you stop tapping, the camera will pop up, followed by the power-down sequence shortly thereafter.I did learn something by partially dissecting the ONITE - it uses a fixed-value resistor in place of a true temperature sensor. That's not a good thing. Still, the battery outlasted the phone (I decided to get a new one). It gave me eight more months that I would have not had otherwise - not a bad run.
F**8
Phone Dies Way Too Early
I've been using this product for a few weeks now. It was great as it increased my battery life significantly.
O**9
Great product, install not as easy
Works great! Removing old battery to replace new battery is not as easy.
J**S
Five Stars
Easy replacement battery kit. Phone working without issues.
G**.
Four Stars
Good
A**R
So far so good, finally got my phone back working again
So far so good,finally got my phone back working again. Not at all hard to install if you have just a little mechanical abillity.
A**R
It is difficult to disassemble the phone without the tools provide.
After much to do I finally found the answer. If the manufacturer would take more time with the pictures I would have found this to be an easy install.
K**S
The instructions didn't include a blow dryer to melt the ...
The instructions didn't include a blow dryer to melt the adhesive on the back of the phone. We couldn't remove the cover and had to have it professionally done.
B**.
Installed it correctly. plugged it in to charge and ...
Installed it correctly. plugged it in to charge and it shows a picture of the bayberry but will not charge it.
T**S
Not working
Battery was no working when installed. Couldn’t boot the phone even after trying to charge it.
G**X
Did not work right out of the box.
The battery did not work right out of the box.
ترست بايلوت
منذ شهرين
منذ أسبوعين
