We remain fully operational. Our teams are working around the clock to ensure your deliveries continue safely.

قم بتنزيل التطبيق


معلومات عنا
حقوق الطبع والنشر © 2024 Desertcart Holdings Limited
قم بتنزيل التطبيق
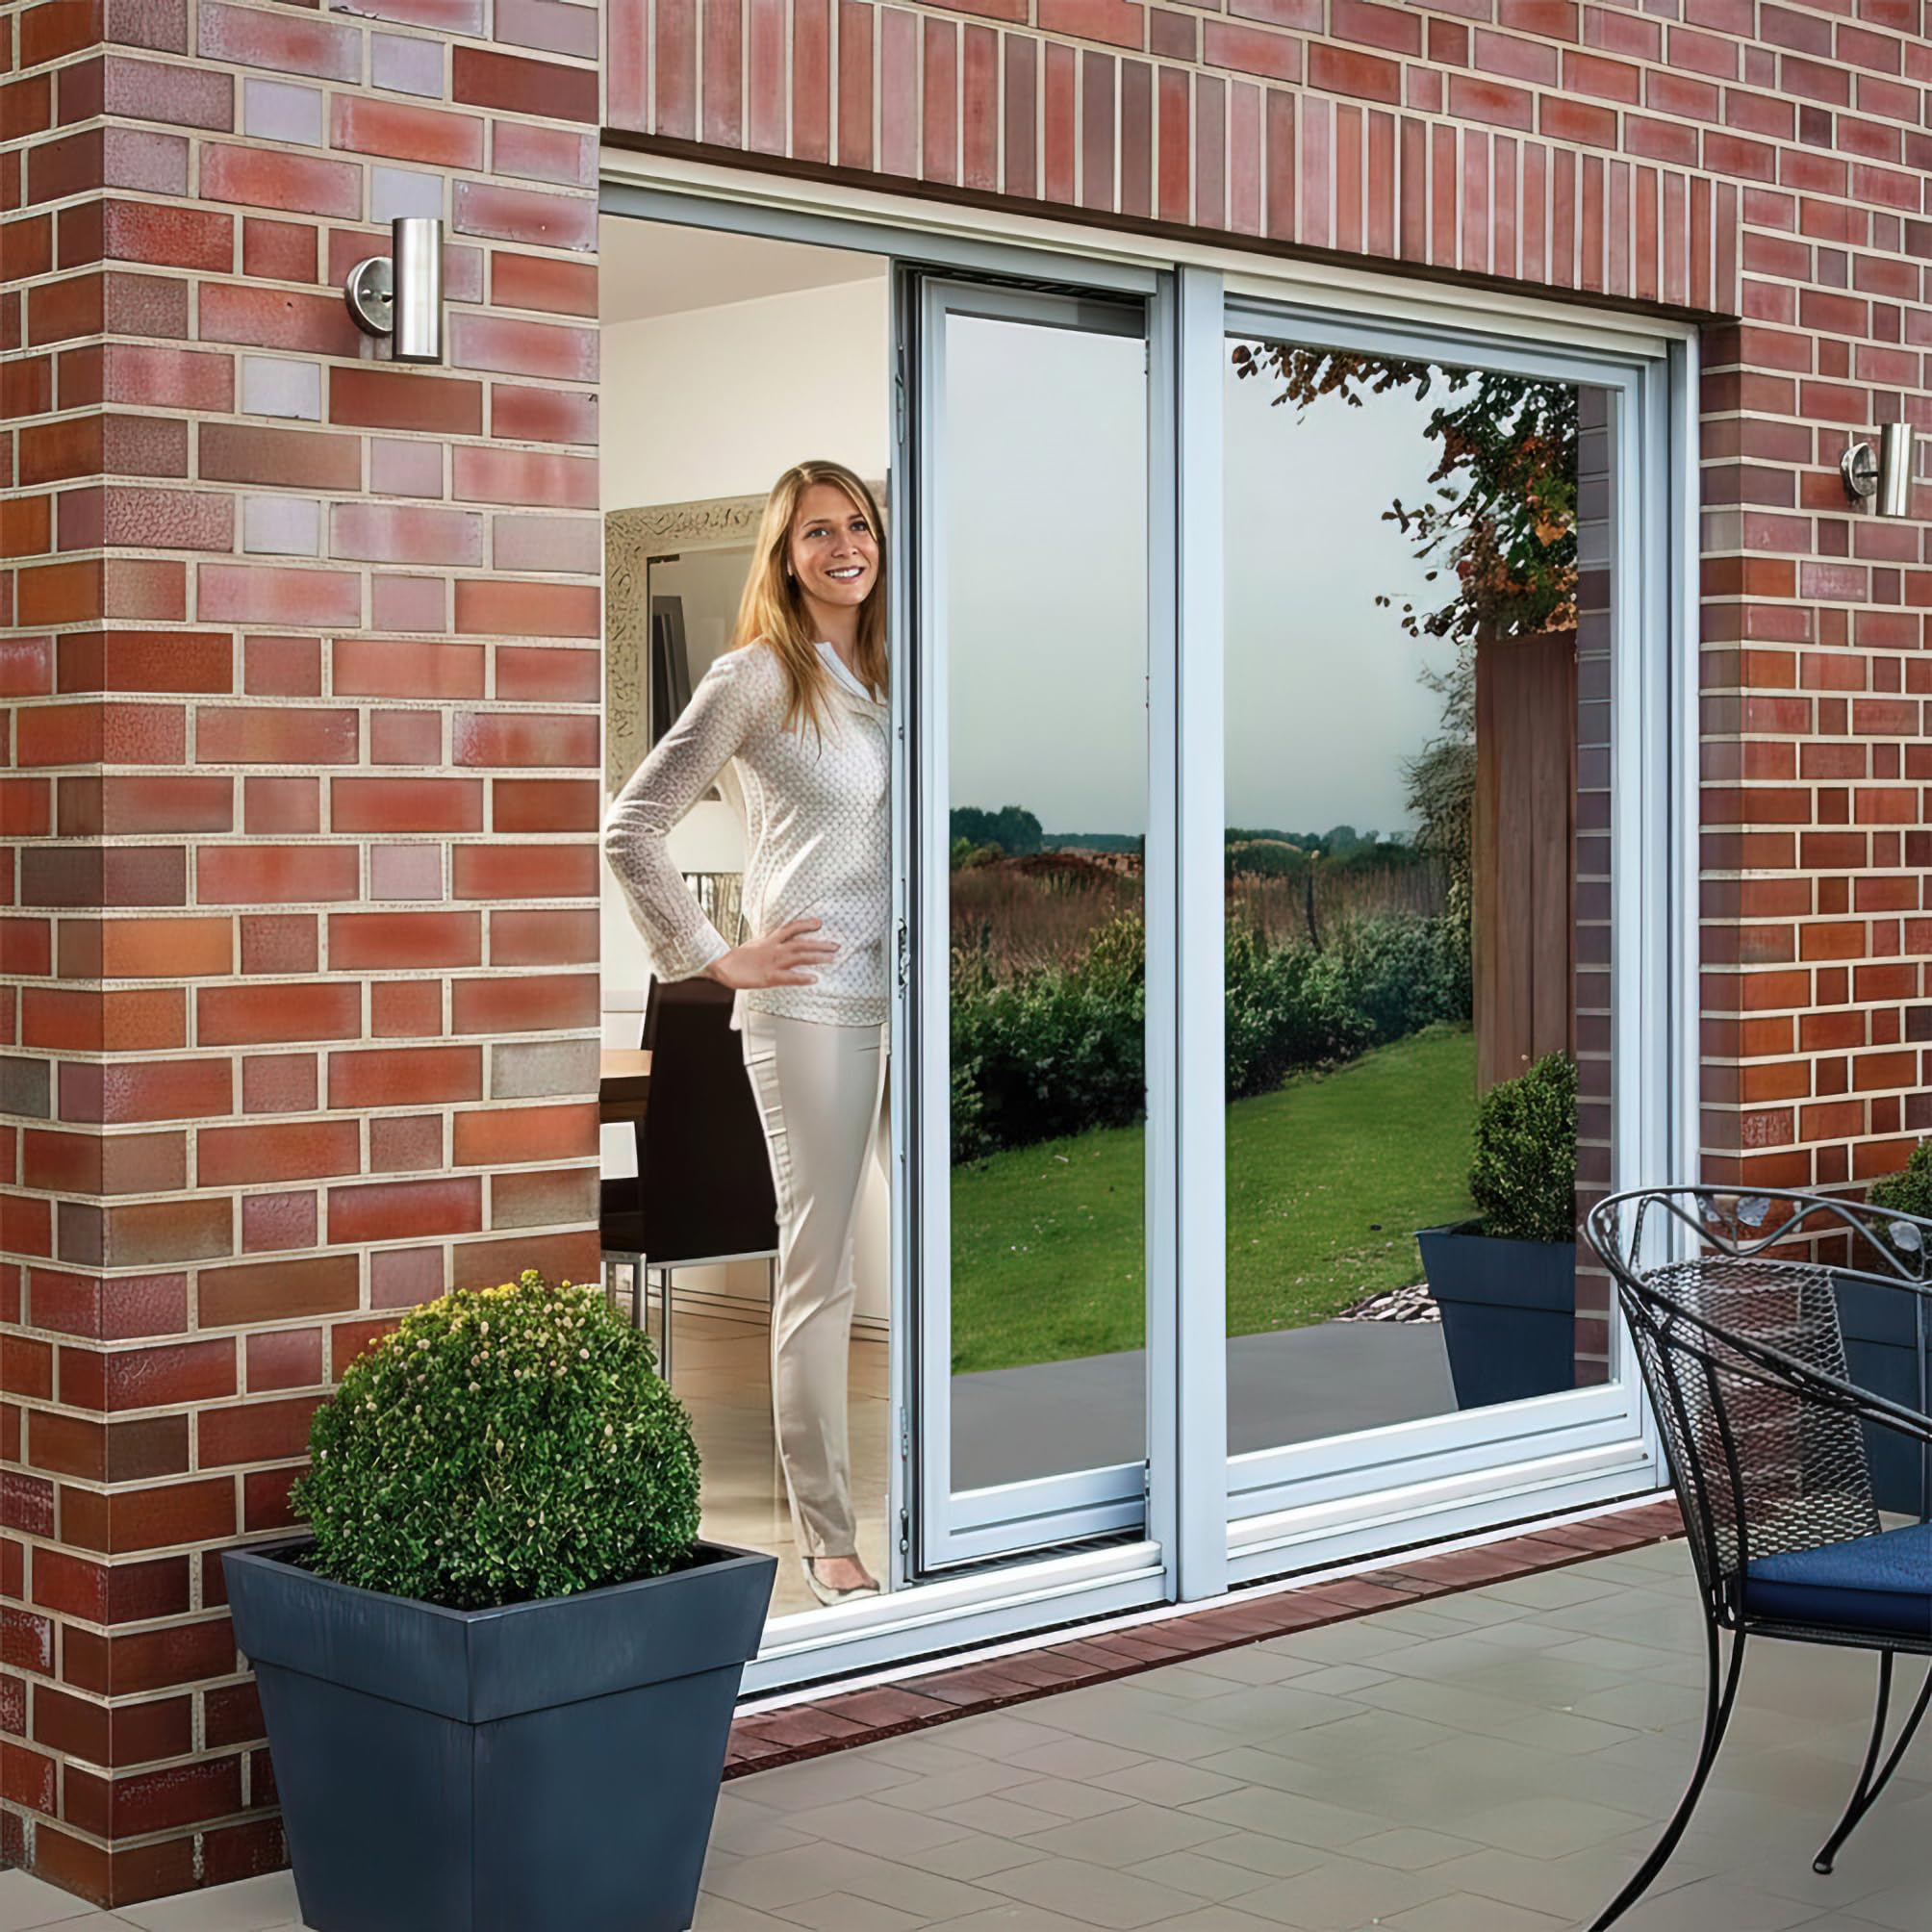
🪟 Reflect your style, not the heat — privacy and cool vibes in one sleek film!
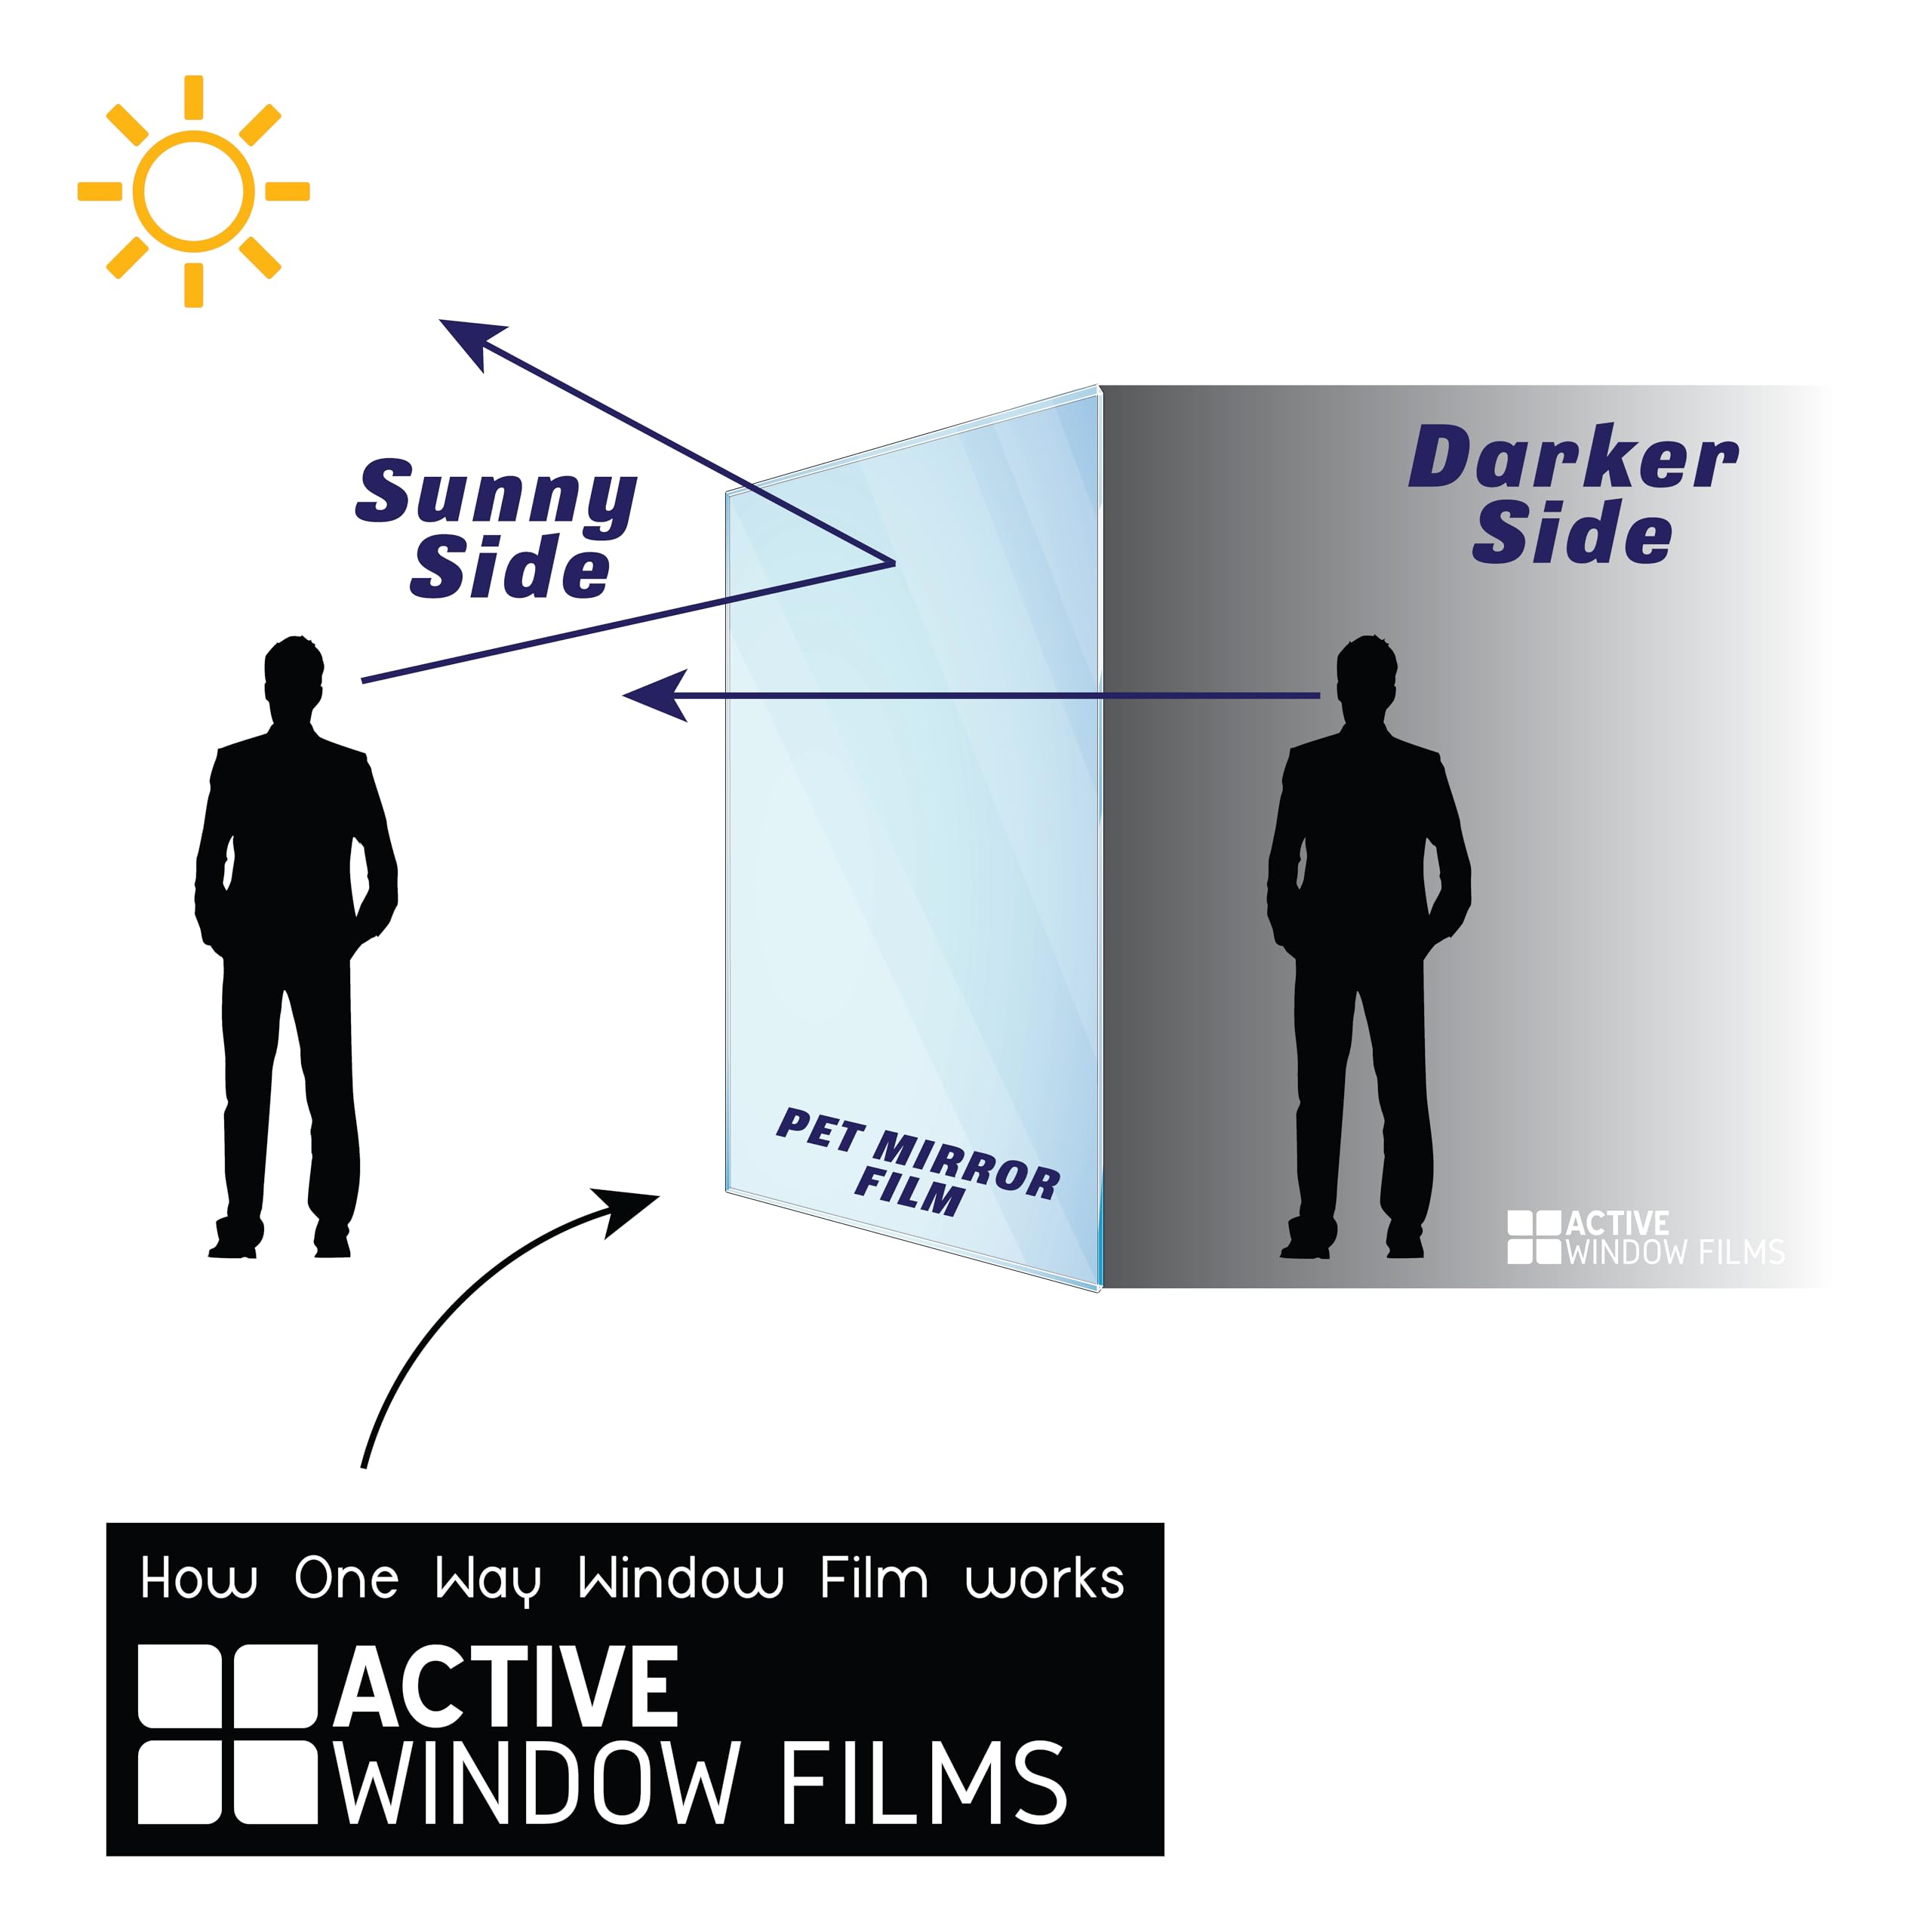
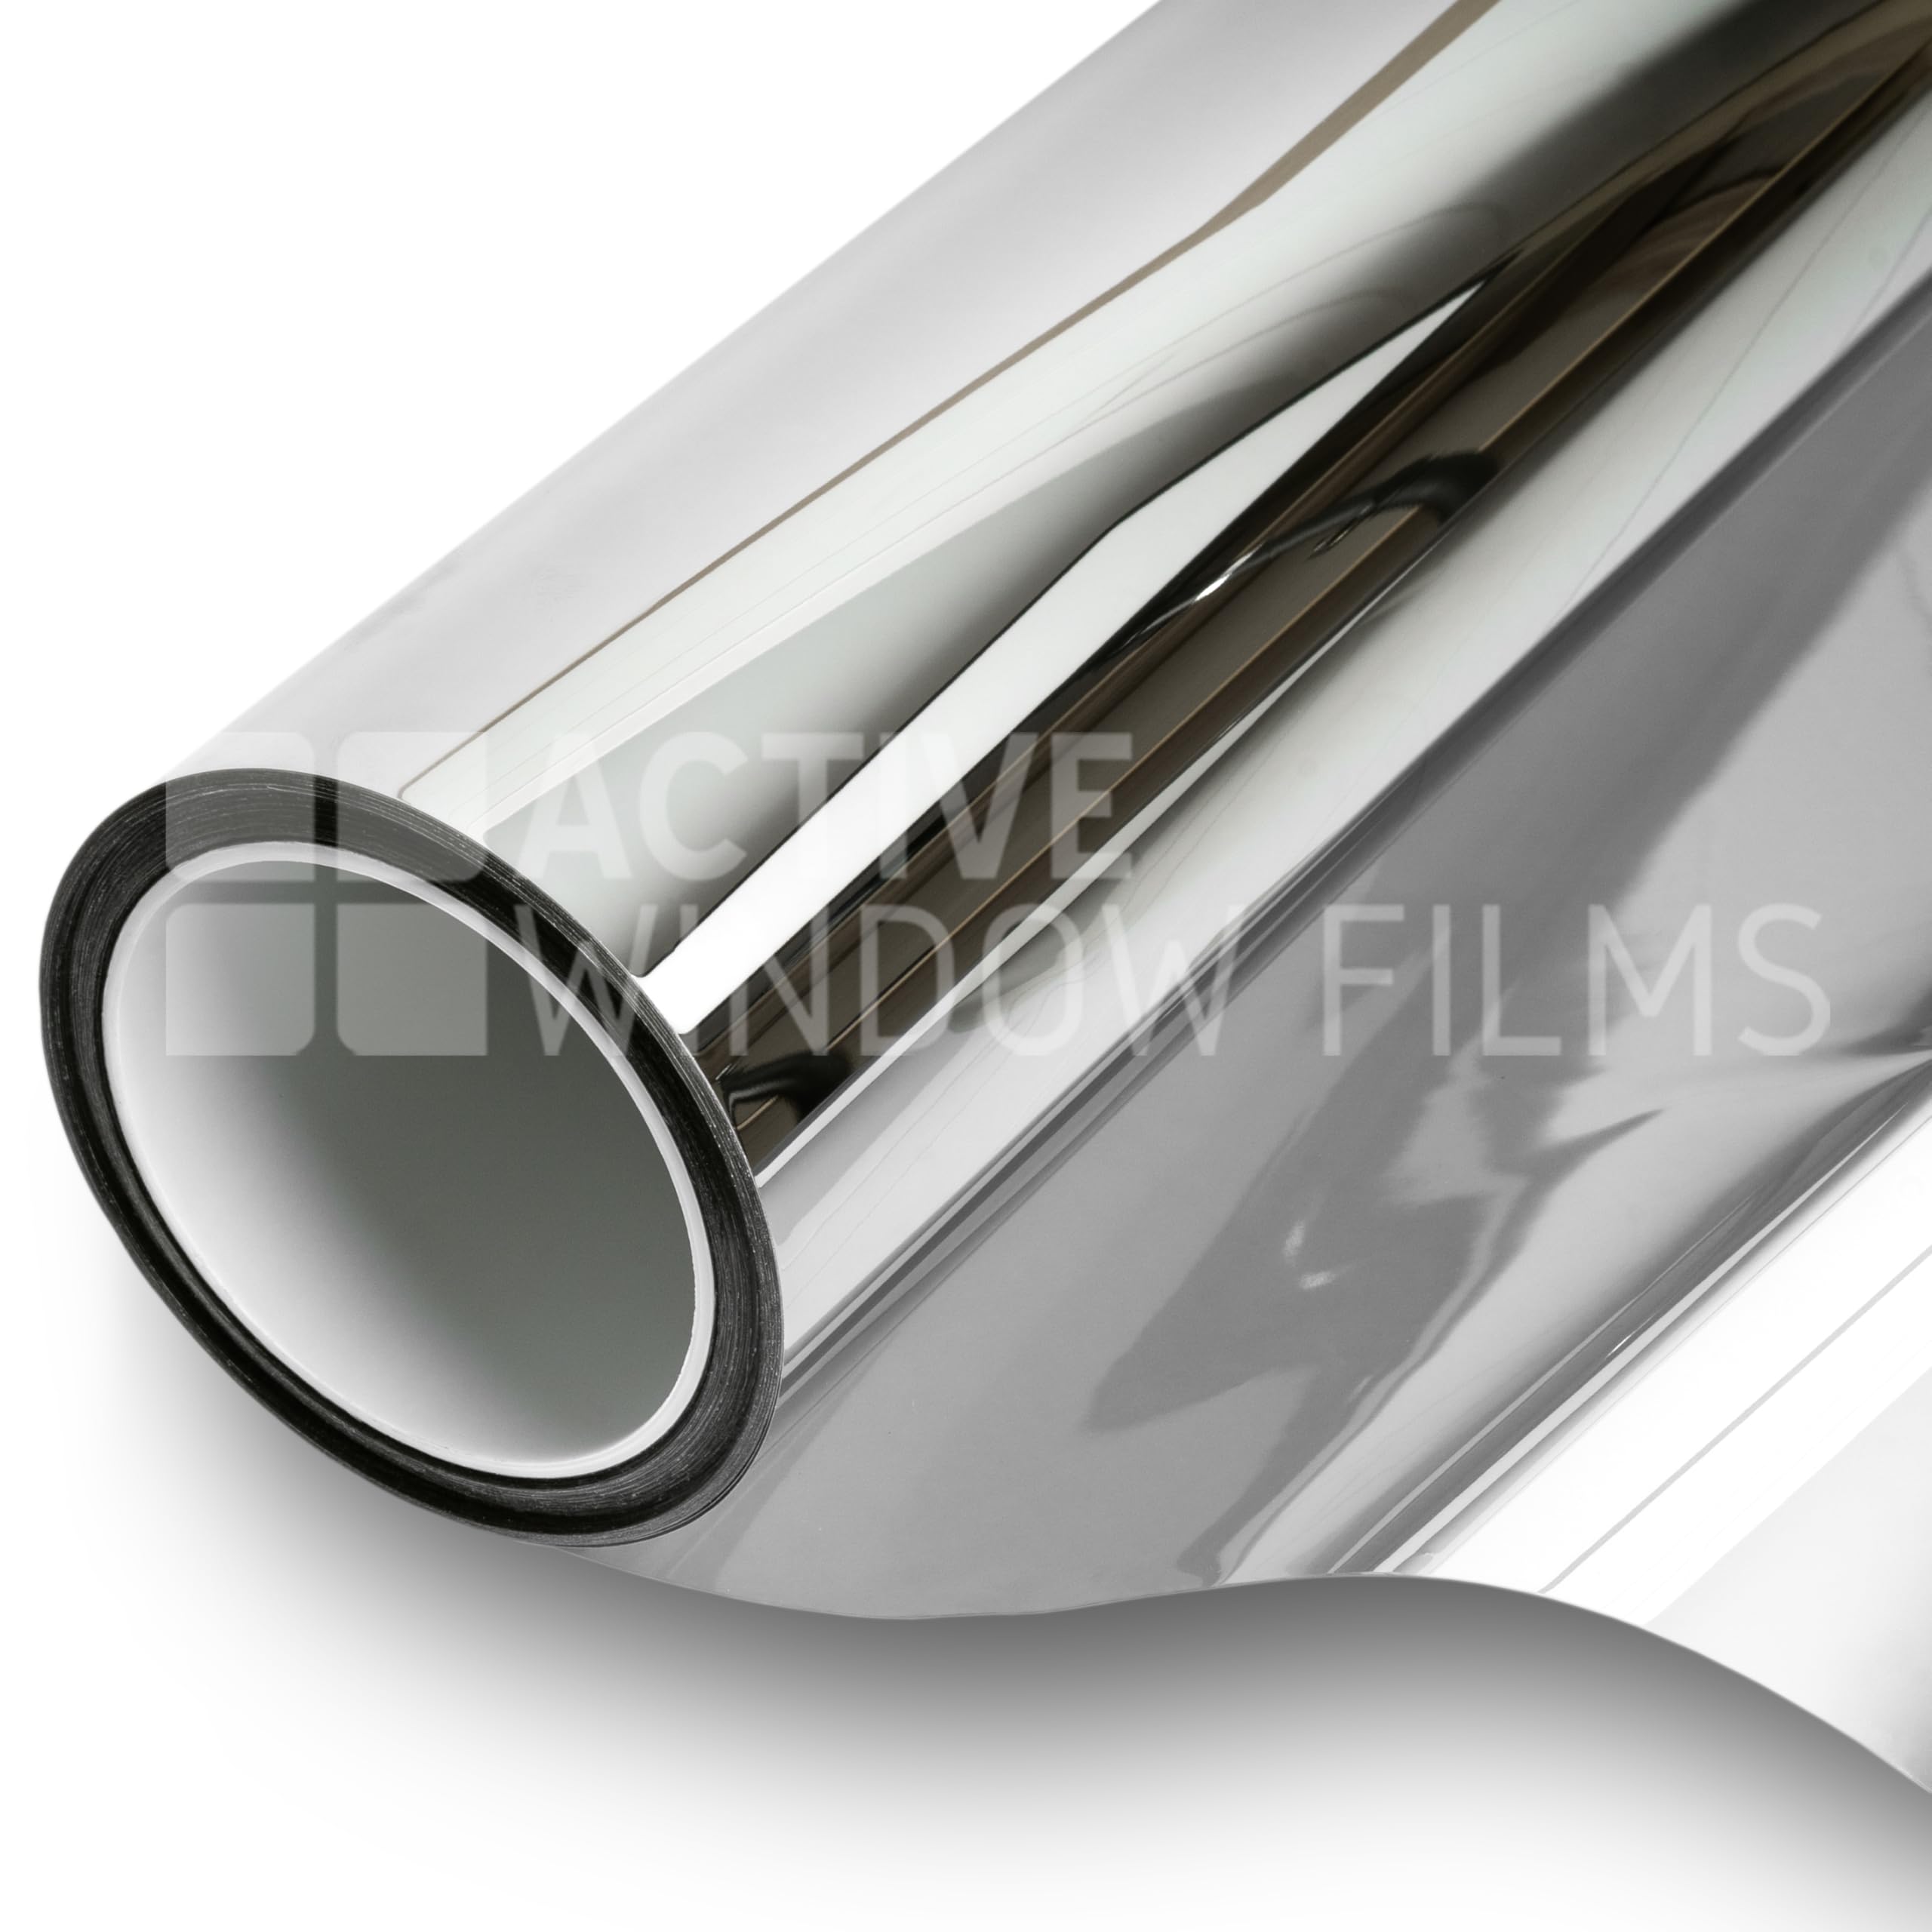
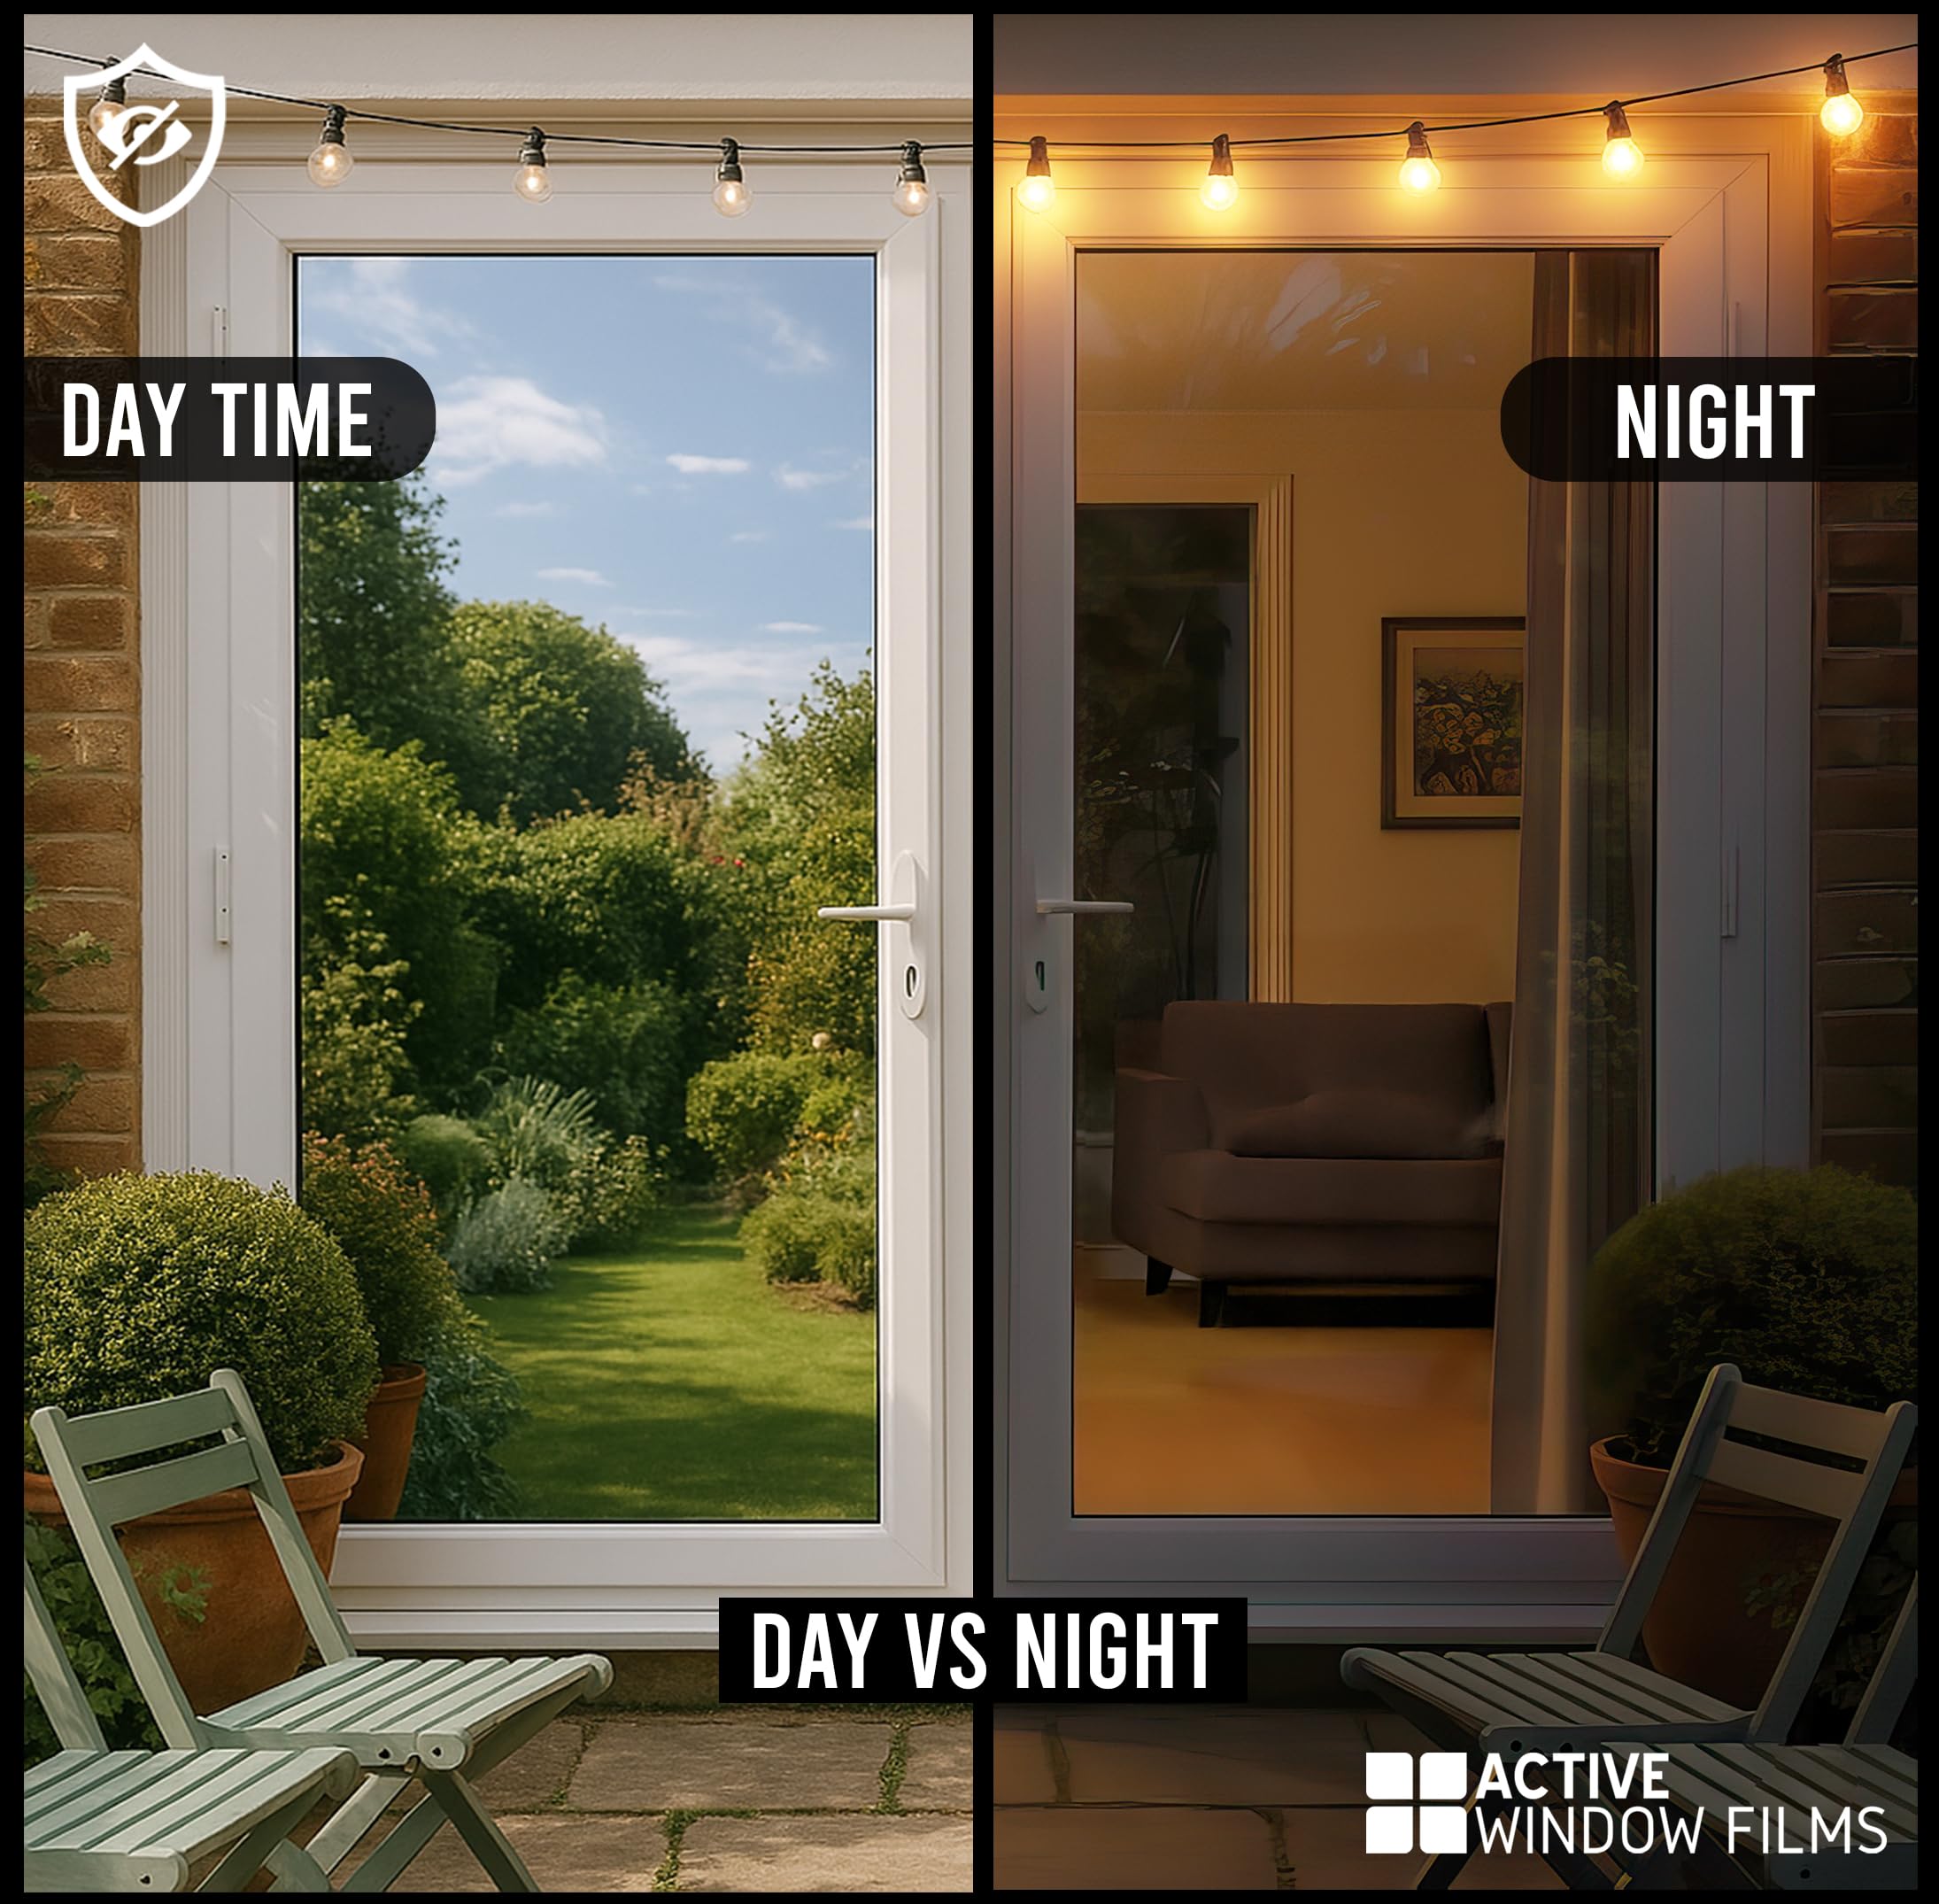
This 76cm x 4m silver reflective window film from the Active Supreme Range offers professional-grade solar control and privacy. It reduces solar heat and glare by over 80%, blocks 99% of UV rays, and creates a one-way mirror effect for daytime privacy. Self-adhesive and easy to install with included instructions and free support, it’s perfect for homes, offices, and vehicles seeking stylish, energy-efficient window solutions.
| ASIN | B00JC9ECHM |
| Best Sellers Rank | 766,140 in Home & Kitchen ( See Top 100 in Home & Kitchen ) 624 in Window Films |
| Brand | Active Supreme Range |
| Colour | Silver |
| Customer Reviews | 4.0 4.0 out of 5 stars (250) |
| Date First Available | 29 Mar. 2014 |
| Material | Vinyl |
| Product Dimensions | 76 x 4 x 0.03 cm |
M**C
Supperp product....
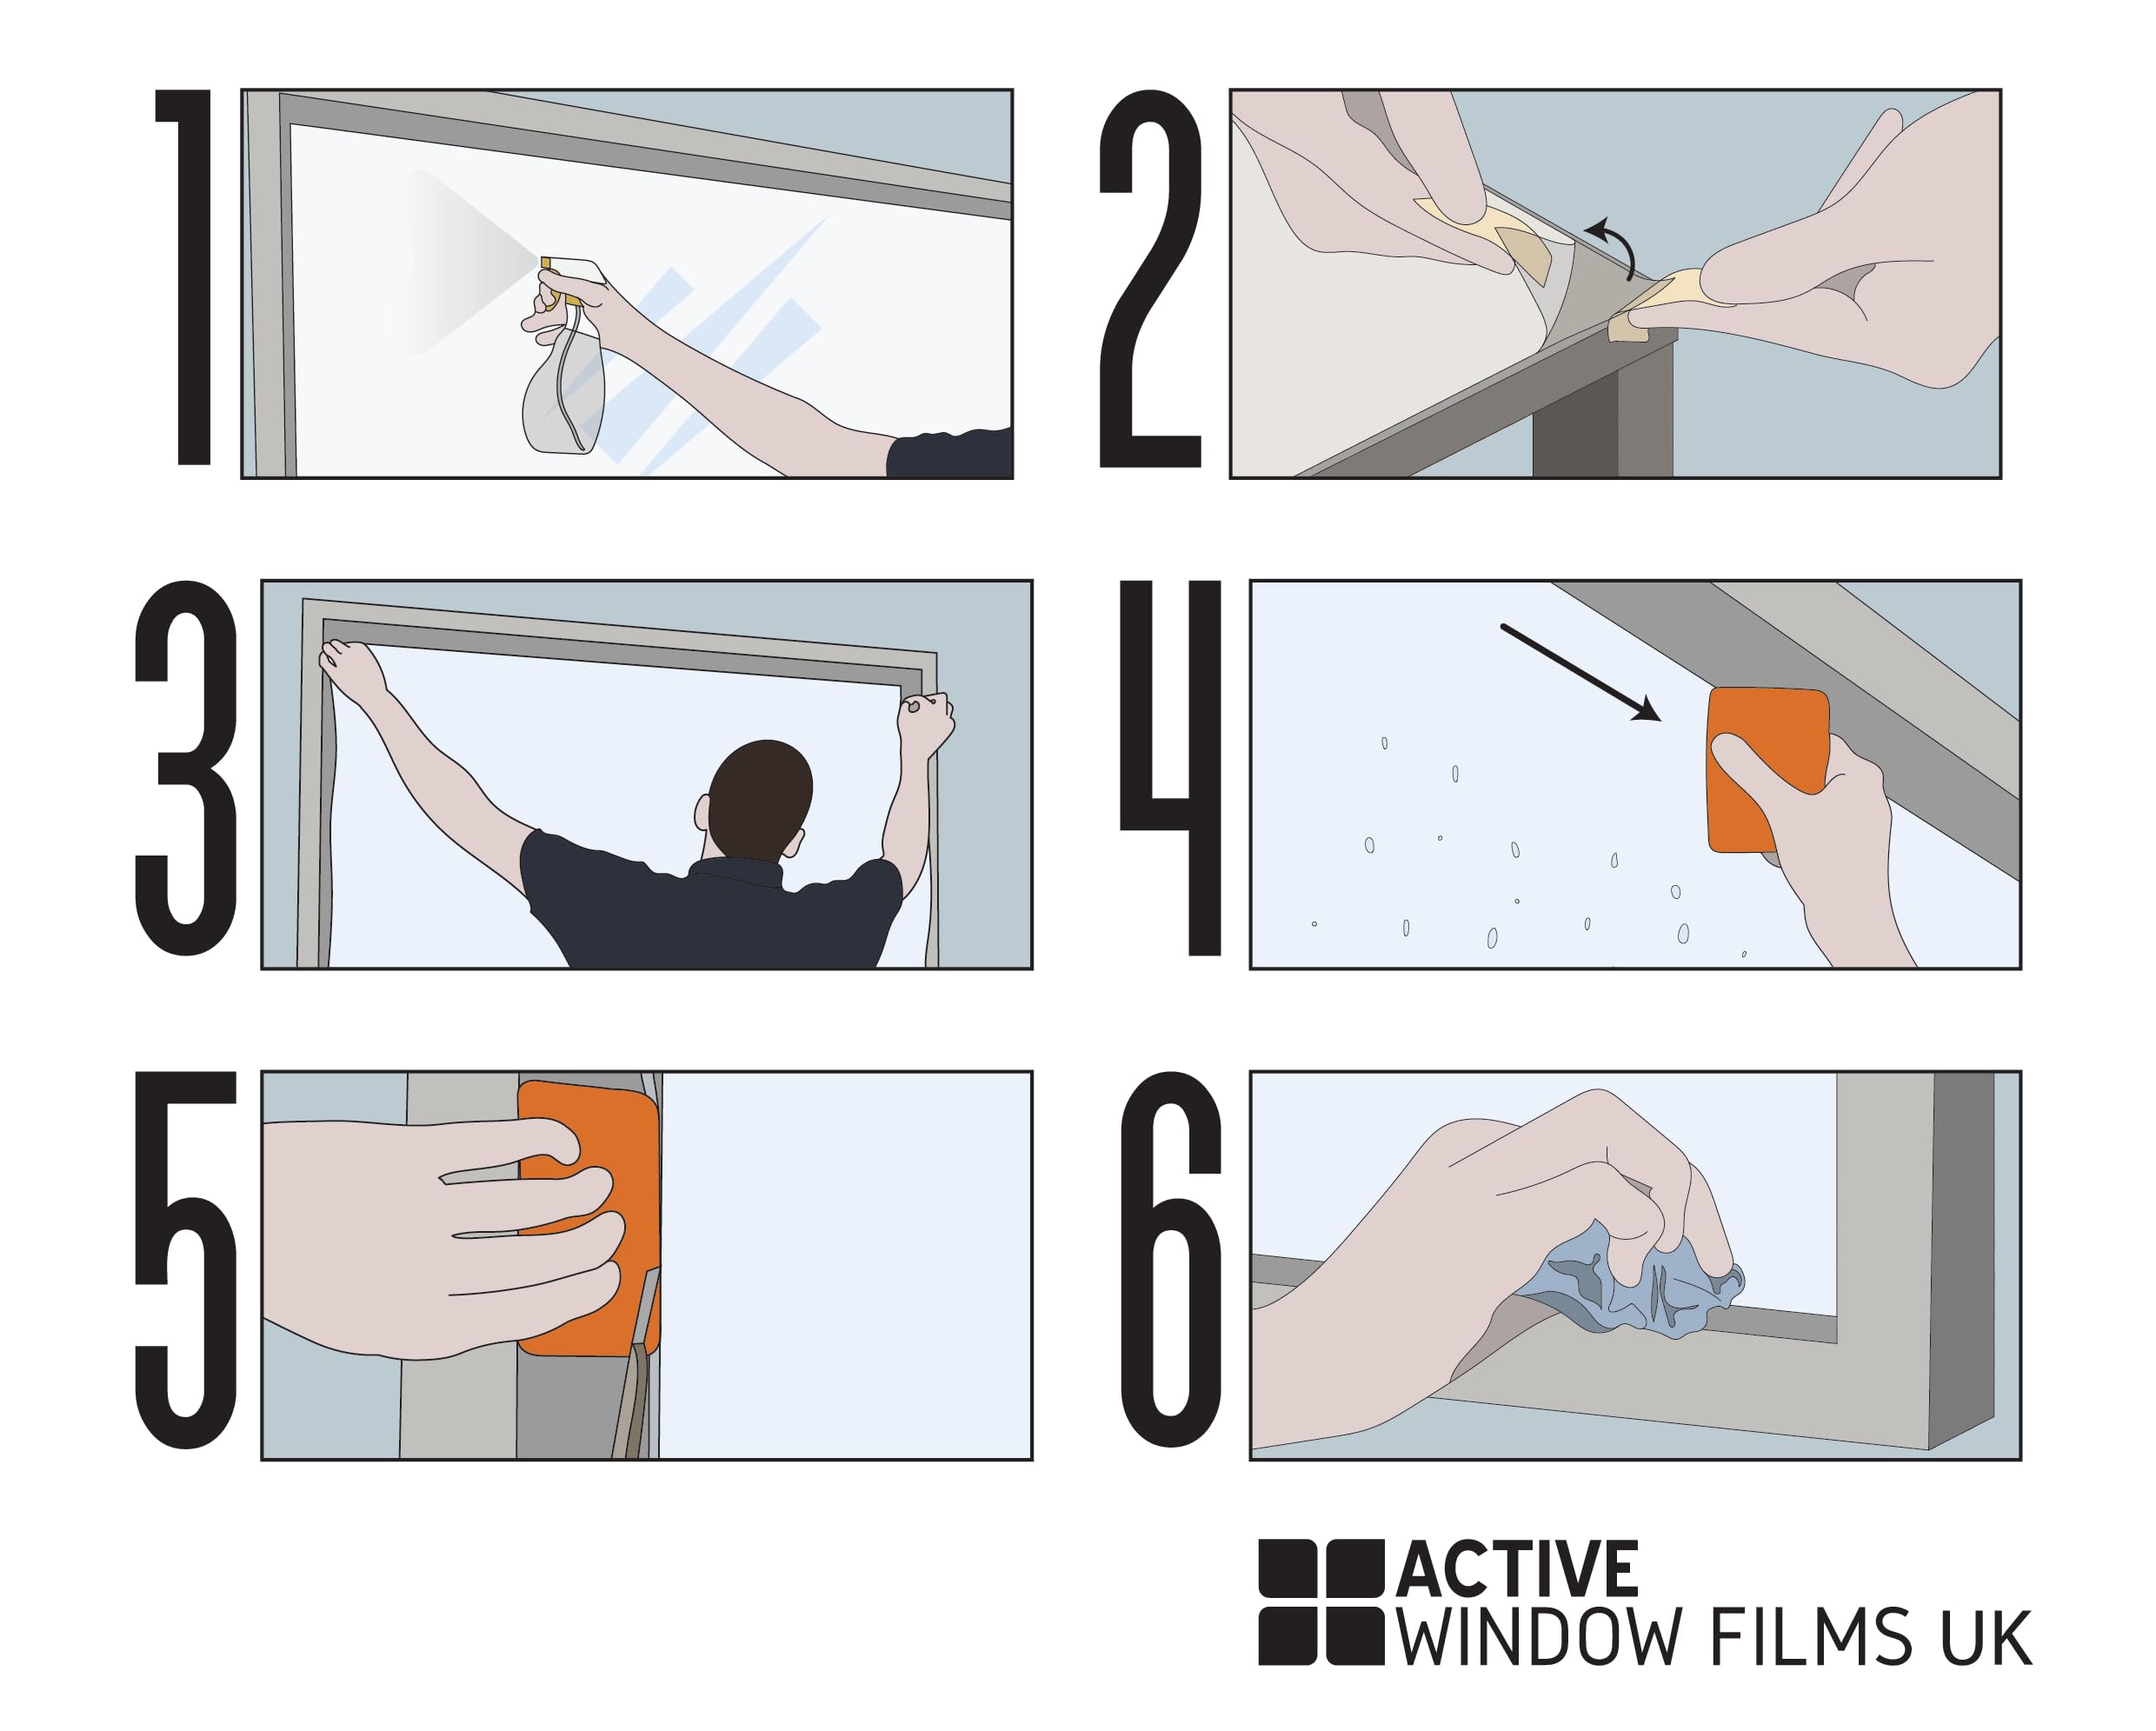
This product is great value for money and slightly thicker than others on the market, very easy to work with first give your windows a realy good clean and scrub around the edges, then spray the window with washing up liquid and water via a spray bottle leaving it wett ,quikly peal the back off plastic and spray the sticky back side with soapy water to quikly place your cutt out paper to window and use the card frominwards pushing the water on window and back of film out to edges of window were the water will leak out simply wipe up edges give the top plastic a coat. Of soapy water to and repeat getting the bubbles out , very easy just go slowley ,thats the trick , Now this is stuff is great if you dont want old net curtains at window, as people can walk past and not look in but you can see out , its advisable to get nice heavy curtains or roller blind to go over top for eves to stop peeping toms looking in, this product is great for flat dwellers on upper floors that get lots of bright light in summer it cuts the heat down supprisingley well , and. Strangley enough its pretty much stop condensaition on my upv window frames that always left puddles of wanter on the window ledge in winter so yesi would highly recomend this for the cost dont be fooledby price with this against other sellers theres are fine and crumble,this is a lot sturdier with more giveworth to pay a tiney bit more for better product and do easier job finnished welll, gd luck to all , bye the way you do not loose a lot of light via the inside tint wich is great, This product would be a blessing for lean tos and consevatrys they swet in summer this would cool that down to more comftable level for sitting in for shore, top marks from me ,ill be back for more well done guys
G**D
Hard to install but very effective
Practice probably makes perfect when installing this stuff but it is not easy, especially if access is right. One on it works brilliantly at stopping heat getting in. Haven’t tried removing it yet but it doesn’t look straightforward.
S**C
Water bubbles will disappear... Just be Patient
Overall a fairly cheap and modern way to add privacy without net curtains. Right first things first... The bubbles do not properly disappear on the day you put them up and you can not get them out at first no matter how hard you try, so please learn from my mistake and don't! I made the mistake of trying to much and actually damaged the first film I put up. Leave it for a few days and it starts to look better. Within a month you'll never know they were there and the film looks great. I prepared thoroughly for putting up the film and I would say that this was key to successfully putting it up. I have done two rounds now and am very chuffed. Watching the video on how to to it is a must. If like me, you have big windows, this is a two person operation for the separation of the films and placing on the window.
K**R
At night with lights on you can still see people inside and it was not easy to cut - Impressive delivery though
this stuff arrived and does not look like it will protect privacy. At night with lights on you can still see people and it was not easy to cut. And, is now peeling back off window unfortunately. Impressive delivery though
B**O
I am a woman and did this on all the front windows- it's FAB
I did this without waiting for hubby and here is how I did. First, cut the sheet of film about 1 inch larger than the window (try on a less important window first as it took me 2 goes to perfect my 'craft'. Once cut completely clean the window (if you don't thoroughly clean it first you won't get a snug fit). Then, place the cut film on a flat surface and use sellotape to peel back the film from the protective layer with the layer being the top sheet when you peel it off. This leaves the sticky side up (be careful as, if you accidentally crease the film it won't come out and will show on your final window!!) Next use a tablespoon of washing up liquid in water (about 500ml) and spray onto the window you are doing. SOAK it until there is water running down the window- THIS is key as, if you don't use enough your film won't slide around and you will struggle to get a smooth finish! Once you have sprayed the window spray the film (sticky side- that is facing upwards) loads too! Then, gently pick it up and slide it into position on the window- it should be so wet you are able to get it lined up how you want it with ease. THEN, take your squeegee and using FIRM pressure squeeze the water from the film (I am 9 stone and used my total body weight to squish the water (and the bubbles) away and didn't rip the film! Catch the water as it squeezes from the edges of the film/window using a cloth. KEEP squeegeeing until all the bubbles have gone- this can take time. Once you are happy you have got rid of all bubbles take a Stanley knife and cut around the edge of the window frame to get a completely flush fit. THEN, take a look and see if there are any more bubbles to squeegee out. Then go outside and look at the reflective side to see where any more bubbles are showing up and keep doing this until they are all gone. Because you have used LOADS of water you will look at the window and see lots of 'unsightly' marks between the film and the glass due to the washing up liquid smears and you will, at that point, think you've ruined your window and will want to take the film off.... but, after a week or so, those marks just go and you are left with a stunning window. We live in a bungalow and I used it on all front windows and am so pleased. As I said, I did it on my own (fairly large window frames) without help and only had to redo the first one as I had creased it. My husband was impressed lol. I averaged 15- 20 minutes each window pane and found the easy part was measuring it out, cutting it and then applying it. The time is taken with removing the bubbles. You need: A flat surface (I used a large cardboard box that I had flattened and used this to cut the film on too) Stanley knife- sharp Washing up liquid solution in a spray bottle Squeegee (I actually used the one recommended with this as it came with a Stanley knife) Clean cloth (to soak up the excess water and to wipe the film on the window post application Phew- I have never written such a long review before but this stuff is amazing and looks great so I wanted to give you a step by step on the easiest way to do it and NO I am not one of those people given this stuff for free or whatever to try. I am a genuine punter like you!
M**E
Tricky, a bit dark but is good for privacy
This was tricky to install, as I expected. I had my mum to help me and we didn’t succeed in getting all the air bubbles out. This wasn’t too much of an issue though as they weren’t overly noticeable. The main problem was that it made my room too dark. I have a huge west facing window and the room gets extremely hot in the summer. It worked very well to keep the heat and glare out but I found that on a cloudy day my room seemed very dismal so I actually took it off - which was very easy. I suppose if it’s a small window and you want it for privacy then it’s a good thing, as you definitely couldn’t see through it from the other side.
ترست بايلوت
منذ أسبوع
منذ أسبوع