

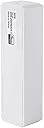


Monoprice Z-Wave Plus Door/Window Sensor, NO Logo | Tamper-Proof Switch, Easy to Install, White (115270)
Product ID: 34677082
⚡Faster operation
📏100ft effective range
🔋1 CR123A battery included
🔒 Secure Your Space, Effortlessly!
The Monoprice Z-Wave Plus Door/Window Sensor (Model 115270) is a tamper-proof, easy-to-install security device that seamlessly integrates into your existing Z-Wave Plus network. With a 100ft effective range and included battery, it allows you to monitor door and window activity while enabling smart home automation.
| Brand | Monoprice |
| Item model number | 115270 |
| Item Weight | 1.76 ounces |
| Product Dimensions | 4.1 x 2 x 1.6 inches |
| Item Dimensions LxWxH | 4.1 x 2 x 1.6 inches |
| Power Source | Battery |
| Batteries | 1 CR123A batteries required. (included) |
| Manufacturer | Monoprice |
| ASIN | B01I5YET2W |
| Is Discontinued By Manufacturer | No |
| Date First Available | July 8, 2016 |
A**M
Great for basic use, not for more
Works well as a basic low-cost magnetic switch for door/window. If that is what you want, then this is for you.There is no configurable Z-Wave option, except for one to enable the external connector-- which does not work.The external connector block is accessible after drilling a small hole in the top.I actually purchased this specifically because of the external connector, but it does not work regardless of enabling the option.The reed switch is on the left side when the unit is mounted as designed.The tamper switch is activated by the cover removal. Removal of the whole unit does not trip the tamper alarm, though it can trip the reed switch if the magnet is removed at the same time.The red LED flashes when transmission takes place. It cannot be disabled since there is no configurable parameter.It is a plus that they use a common and long-lasting CR123A battery.A small Phillips screw driver is needed to open the cover.I am using this with Vera 3.Fibaro is the way to go if you want all the features.
A**R
Perfect!
I purchased with the intent to solely use the 'external sensor' terminals only: I didn't care about the magnetic sensor part (i.e. I wanted the sensor to trigger with a simple CLOSE event of the contact wires), which worked beautifully!First things first, you have to enable the external sensor via your automation platform (I use Openhab) - They're disabled by default . For me, I had to then remove and re-install the battery for the setting to take effect. The software reported the change was applied, but, it wasn't until I took the battery out and back in that the external sensor contacts functioned. (a bit of time was wasted figuring this out...)I taped the magnet part to the side of the sensor body so it will always be there: This is required in my case because the sensor will only show CLOSED when the magnet is in proximity to the sensor !!AND!! the terminal contacts are closed. If just one is OPEN, then the sensor will read OPEN.Although I didn't need it, the magnetic sensor part looked like it would perform well enough. If you must know what I used this for... I've used them for two things:1) I installed a relay on my smoke detectors, connected through Interconnect, that creates a CLOSE condition on two of its wires. I connected these to this sensor - Boom, automation communication with ALL of my smoke detectors.2) I needed to install a wall switch to control a newly installed recessed can light, and it was impossible to get any kind of cable to the location we wanted the switch. I wired the light to a smart switch in the attic. Then I cut in a single gang box at the problematic location and installed an old fashioned ON/OFF wall switch. - connected to this sensor inside the switch box. Through automation rules, I can now control the light above.
J**R
Be aware, though the outside housing looks the same ...
Be aware, though the outside housing looks the same as the Go Control WADWAZ-1 sensor, it is not the same. The inner board is slightly different with an additional chip, likely due to this sensor being Z-Wave Plus. It is NOT compatible with Wink or Wink 2 for certain, and I suspect it will not be in the future. For SmartThings, there are downloadable device handlers that can be installed for full functionality, available at Rboyapps.com. However, they are not free. I do not know if these are compatible with Vera, but if I test them with my VeraPlus, I'll post an update.
C**H
Works with Vera Lite UI7 Plus External Sensor Port
I was successful at getting this working with a Vera Lite UI7 including the external Sensor and wanted to share the info. There are a few others who have also managed to get this device to work for external devices. This is what I found and seems to be working well.The device actually registers as a Vision ZD2102-5. I found a posting from years ago that described how to enable the external sensor which is not as the directions state. Instead follow these directions:"Go to "Device Options" and the “add configuration setting” adding variable 1 as a 1 byte decimal and value=255 (instead of the default 0) - saved changes then had to wake it up by taking the cover off and it worked." - Per User r4arnys on vera forums.As others have mentioned, you will need to tape the magnetic sensor to the side of the unit and make sure the device is closed as it will the external sensor will not trigger if the magnetic sensor is removed or if the tamper switch is not engaged. The only odd thing I have seen is that it is giving me two alerts when the external relay is activated.I am using this with a "Guardline Wireless Driveway Alarm", the Guardline has both NC/NO relay connections as well as powered relay connections so plenty of options to trigger external devices. I am very pleased with this low cost sensor and will happily buy more.
P**.
Easy to pair with a SmartThings hub after a factory ...
Easy to pair with a SmartThings hub after a factory reset (swiping magnet across contact while case opened). Still a bit of a bummer that the contacts inside the unit are non-functional.
J**E
Cheap but sometimes shows up Open when it's really closed.
Bought several of these. Cheap but one always randomly says it's open. Very annoying, especially when I'm out of town.
A**R
Works well with Smartthings hub
Works very well with Smartthings Hub. Paired instantly After about 2 months it still shows 100% battery in the ST app, so either it consumes very little battery of the battery indicator is broken :)
S**W
Not a good deal.
To use this door/window sensor with a Samsung SmartThings hub you will need to install a special device handler (programming code) from a company named RBoy. Getting access to that code will cost you an additional $40 approximately. And then making it all work will be an endeavor only a techie would enjoy. The product from Ecolink, also on Amazon, is only $29 and doesn’t require third party device handlers. But, unfortunately, they only let you buy three of them.
D**D
... fully discovered however after that it has been working great. The device is designed to completely sleep when ...
Had some difficulty keeping the device awake by clicking the internal button until it was fully discovered however after that it has been working great. The device is designed to completely sleep when idle and can't be polled when sleeping, it only wakes up when its sensors are tripped.I would probably suggest registering the device before mounting it just to make this part more convenient.I had not noticed it before but this units supports an auxiliary sensor to be attached which would be really convenient if you have double sliding windows. You could purchase a basic magnetic reed sensor and track if ether side of the window was open.
Trustpilot
1 month ago
1 month ago