⚙️ Upgrade your garage game with authentic precision!
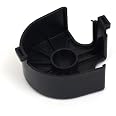
The Liftmaster Gear Kit 41C4220A is a genuine OEM replacement assembly designed for 1/3 and 1/2 HP chain drive garage door openers from Chamberlain, Sears, Craftsman, and LiftMaster models dating back to 1984. This all-inclusive kit features gear, sprocket, worm gear, grease, and bearings, ensuring a durable, easy-to-install upgrade that restores smooth, reliable operation.
| Manufacturer | Chamberlain |
| Part Number | 41c4220a |
| Item Weight | 1.04 pounds |
| Product Dimensions | 5 x 5 x 5 inches |
| Item model number | 41c4220a |
| Is Discontinued By Manufacturer | No |
| Size | 1 Pack |
| Item Package Quantity | 1 |
| Batteries Included? | No |
| Batteries Required? | No |
D**K
works great great price
works as advertised
P**T
All the parts I needed; working well so far
This kit had all of the parts I needed to replace the main part that was broken on my opener, as well as other wearable parts around it. The components seem to be made of the same material and of the same quality as the originals. I'm not sure if that's good or bad, given that one of the original gears shredded into dust, but they do appear to be OEM, as advertised.The installation was straightforward, after watching a few YouTube videos on the process. You'll need to have some basic repair skills, a few tools, and a desire to tackle this project in order to succeed. It's not hard, but might be a challenge if you're not used to fixing your appliances, or doing routine auto maintenance, for example. Honestly, I spent most of my time cleaning and re-lubricating the opener, tracks, trolley, door, etc. The broken gear provided a good excuse to tune everything up - and the effort paid off in substantially quieter operation. While you're up on your step ladder, attend to all of that dust and grime you see, if you have the time.I'll offer two recommendations, in case you decide to dive in without researching the process first:1. Definitely drive the screws into that big, circular plate that holds the top of the main gear shaft BEFORE you install it into the opener (then remove them again before installing). The holes in the plate aren't threaded, so running the screws through once, ahead of time, will cut the threads you need in order to ease installation.2. If you decide to install the worm and/or bushings, brace things appropriately and take your time. It's not rocket science, but you don't want to bend anything - including the motor shaft. Use a bench-mounted vise if you have one (the motor is heavy) and support any shafts / brackets / etc. from which you'll be pounding out bushings and pins using a block of wood. Spending a few extra minutes here is a good investment. Of course, wear safety goggles while you're hammering on things.Good luck!
R**W
Easy to Install Replacement Gear Assembly (I’ve included some installation tips)
This “Liftmaster Gear Kit” had everything I needed (and then some) to fix my LiftMaster Professional Model 3265 garage door opener. Both the washer above and below the top sprocket gear that rotates the chain had become worn-out and broke, so the gear would wobble and the chain would come off. Replacing the entire “top-hat assembly” was not too difficult and it worked perfectly.NOTE: To thread the Top-Cap/Top-Hat holes:Place the Top-Hat into a vise. Take one of the old 5/16th screws (you removed from the old top-hat) and lubricate the threads with some of the included grease (WD40 or 3-in-1 oil would probably also work). The screws have a hex-head so take a handheld screwdriver with removable tip and remove the tip and then place the screwdriver directly on the hex-head screw and manually turn it (force it) into the unthreaded hole on the top-hat. Back out the screw and repeat. It was fairly easy to do and didn’t take me long.NOTE: Adjust the gear timing:Before re-installing the chain, make sure you first adjust the gear timing. To do this, make sure your garage door is off the trolley, and place your garage door in the fully down position. Then plug-in your opener and push the button (with the chain still off). If the top gear turns counter-clockwise, then push the opener button again, until the gear turns clockwise and stops spinning on its own (a complete down cycle). Then, unplug your garage door opener and turn the chain by hand (with gloves) to re-attach the trolley. Next, attach the chain to the opener top sprocket gear, and adjust to the proper tension level. Plug in your opener and test it.
C**E
Read Reviews and Watch Videos Before Attempting!
Take the time to read the tips in these reviews and watch some videos on YouTube. This is not a 10-minute job, and it is impossible without the right tools. As others have suggested, you'll want to tap the holes on the top by forcing the screws into the holes (the screws do the tapping), while holding the assembly in a vice or in your hand rather than while trying to install it. You may not need all of the parts in the kit - some videos suggest not bothering with the worm gear if it looks ok. I replaced mine because I had to drop the motor out to get at the third screw. Remember what I said about tools? I used a socket on a stick handle to get two of the three screws out. The third was blocked by the motor, and my ratchet plus adapter plus socket was too tall to fit in the space and I didn't have a small enough wrench to get at it. My worm gear was chewed up anyway, so it was just as well. The gear and shaft assembly exits the chassis through the top. If you have a lot of space above the unit - no problem! Of course, I didn't, so I had to drop the whole thing down onto a cardboard box I placed on the top of a step ladder. At the end, you need to adjust your door travel limits via the two screws on the side. I found it easier to do that while I still had the housing off. Good luck!
N**O
Got the job done
The chain sprocket broke off my garage door opener and I was thrilled to find out that it could be replaced without having to pay a professional or buy a new opener. All the parts you’ll need to replace the gear, sprocket, and worm drive are included. The instructions are helpful, albeit somewhat unclear in spots. This is not an endeavor for someone uncomfortable with messing around in electromechanical systems, and you will definitely have dirty hands afterwards. The whole process took me about 3 hours, but a lot of that was trying to figure out some of the confusing directions. If I had to do another one, it would probably take just 1 hour now that I know what I’m doing. The instructions recommend putting the shaft back in prior to putting the motor back in, but I found that to be essentially impossible. The fit between the gear and the worm-screw is so tight, that I had to hammer in the gear-shaft after installing the motor. Now that’s it’s fixed, the garage door opener has never been so quiet.
ترست بايلوت
منذ شهر
منذ شهرين