معلومات عنا
دعم العملاء
احصل على التطبيق

قم بتوجيه الكاميرا لتنزيل التطبيق
حقوق الطبع والنشر © 2024 Desertcart Holdings Limited


🚀 Elevate Your Efficiency with Every Pulse!
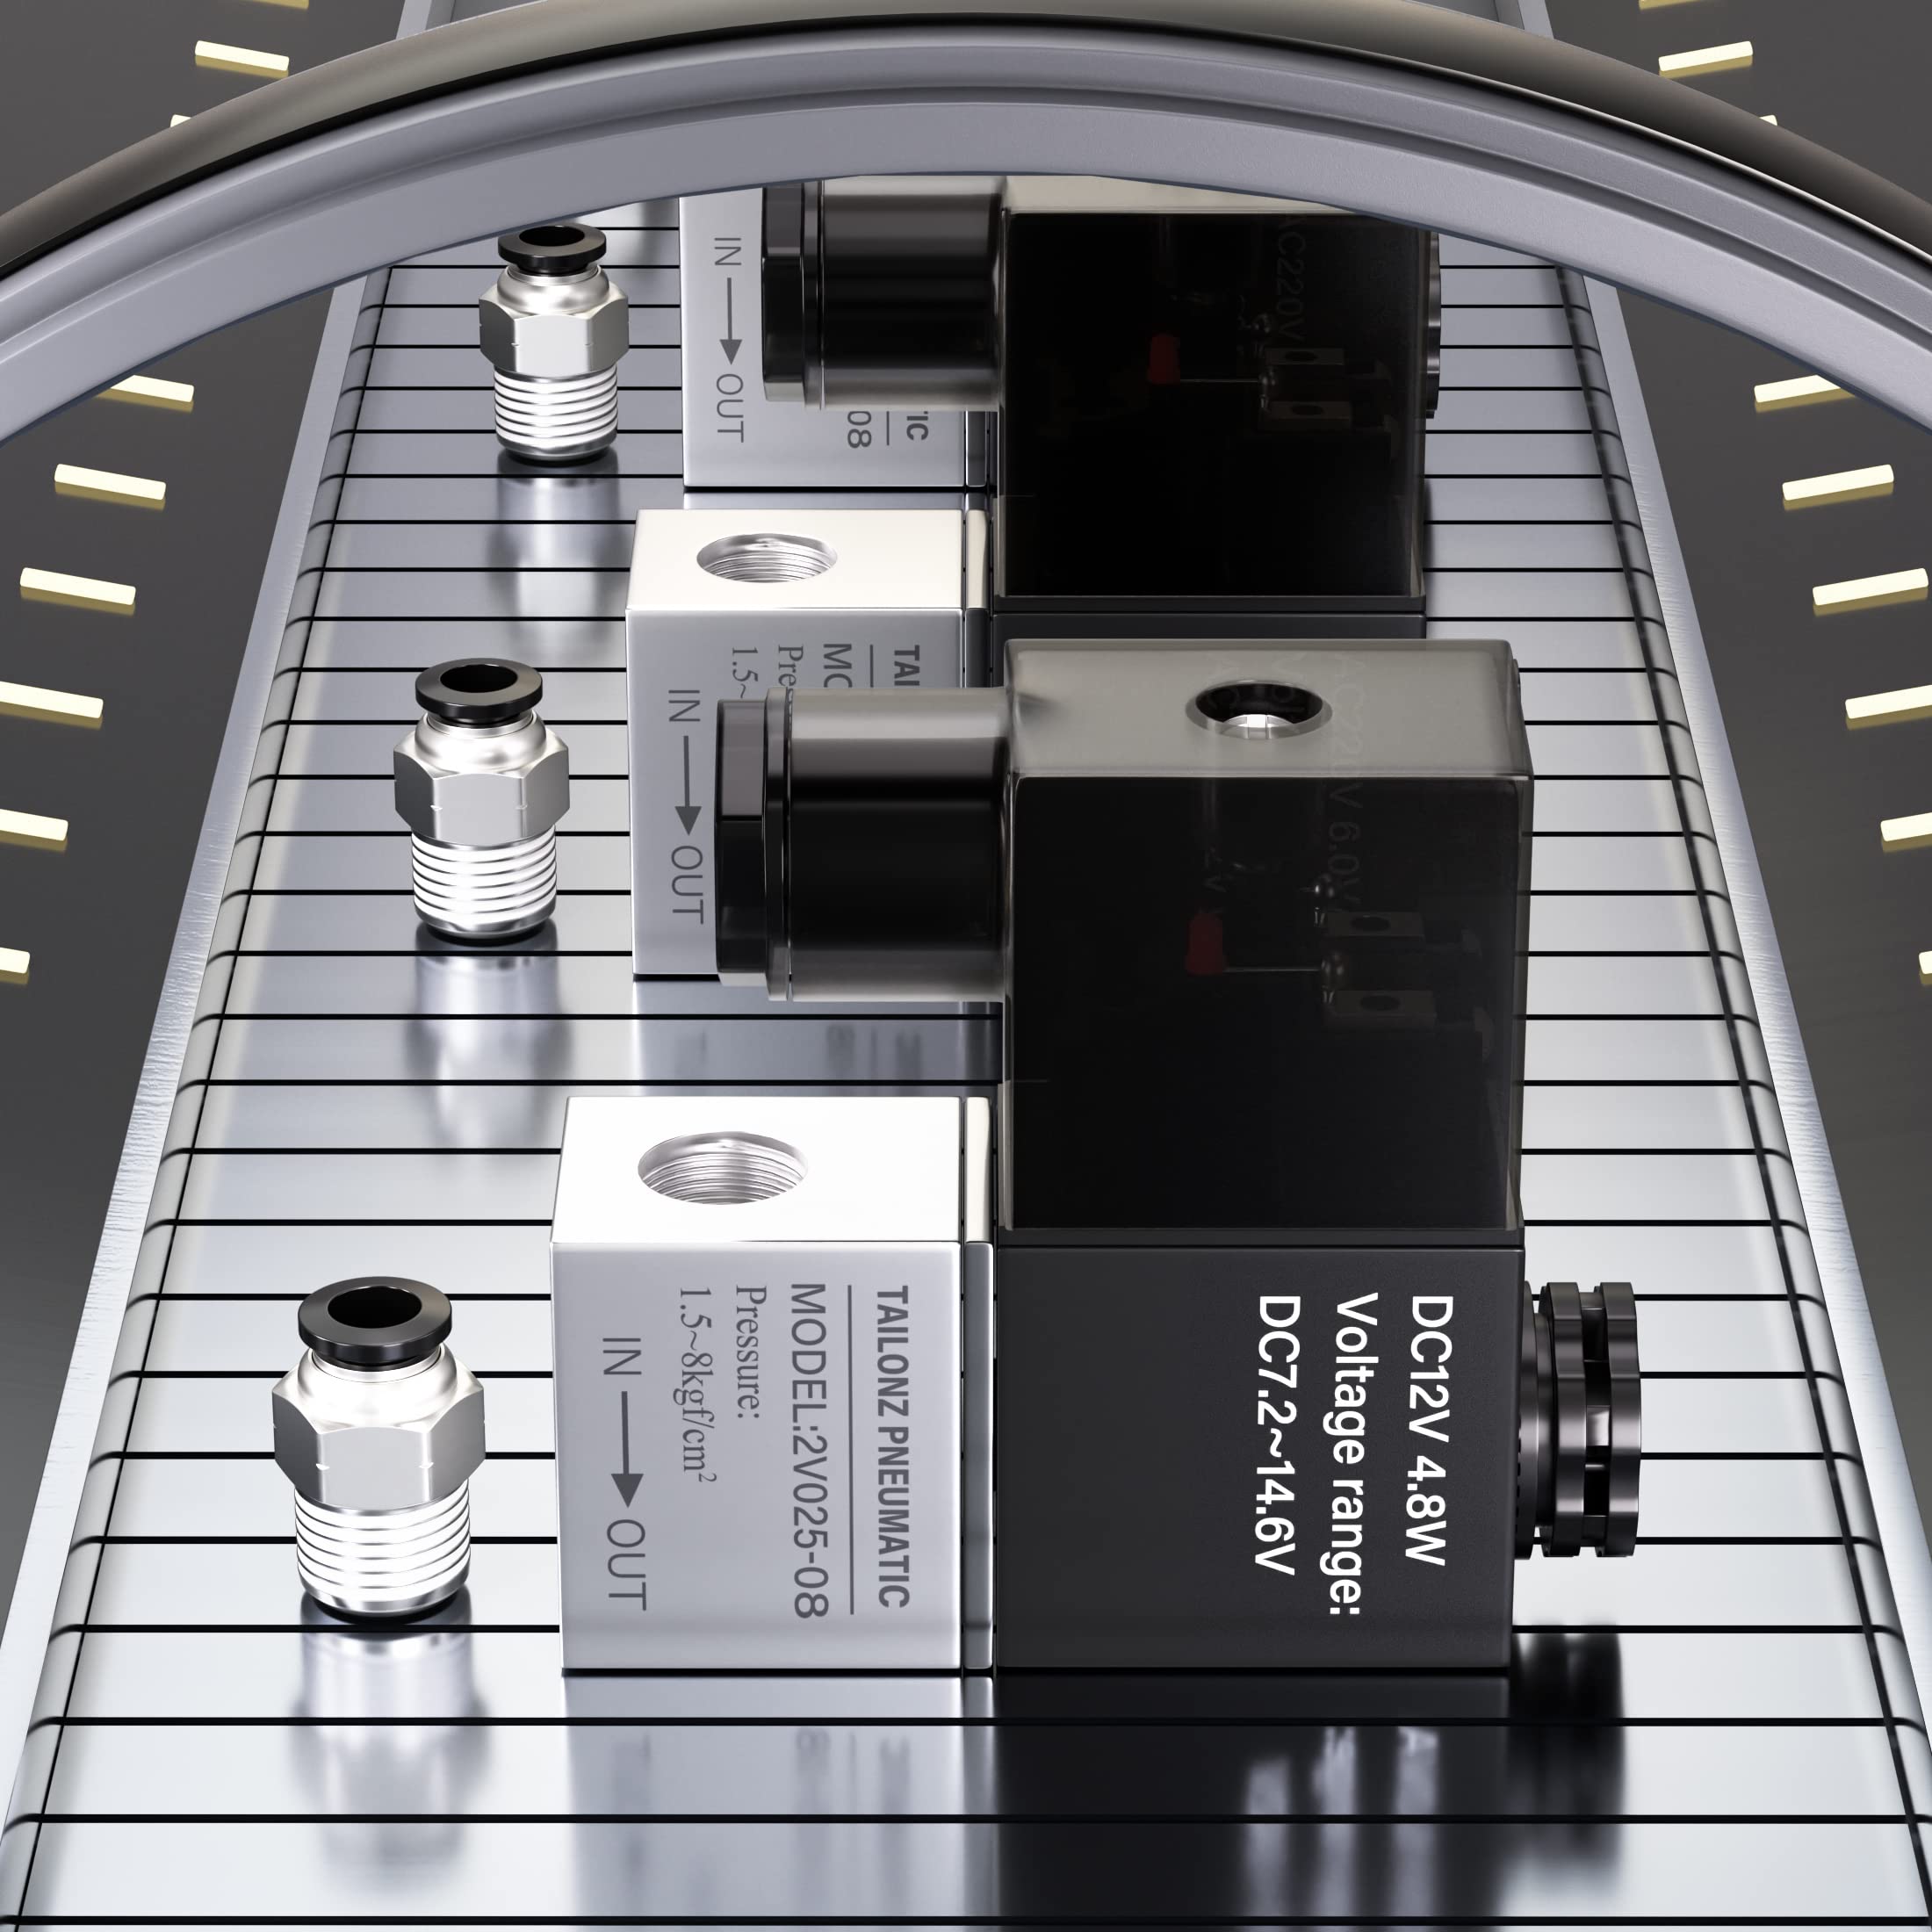
The TAILONZ Pneumatic 1/4 inch NPT 12V 2 Position 2 Way Normally Closed Electric Solenoid Air Valve (Model 2V025-08) is engineered for high-performance applications, featuring a rapid response speed of up to 5 times per second, a robust temperature range of 0-140°F, and a pressure capacity of 25-116 PSI. It comes with convenient push-to-connect fittings, ensuring easy installation and compatibility with various systems.
M**3
Good Quality
Purchased this to install on my Laser Engraver, worked great and now my air assist is controlled electronically!
H**E
Perfectly crafted
I installed in fueling setup. it works flawlessly as expected. low profile and easy to operate.
P**S
Performs well for triggering a pneumatic drill
I'm using this as a trigger to run air to a pneumatic drill. For that purpose, it is performing very well. I haven't had to replace it and it's performed well over 200,000 times by now. I expect it might do a million plus cycles similar to other solenoids from this company. Recommended, though your mileage may vary if you have to hold it open for a long time or something like that, might get hot. I wouldn't necessarily think that would be a good idea, but for providing a puff of air, it's great. Total recommend.
R**Z
It’s alright. My came busted but not bad
I got this to help with my air assist on a laser. After wiring it wouldn’t turn on so I thought it was my wiring. It was not after careful inspection. It was the unit that was broken. Power came in but the switch did not work. Replaced it for the pre wire one and that one worked well. Over all it’s good just test before fully assembling.
I**H
Doesn’t Last
Was nice while it lasted. Until it wasn’t. Installed it less than 2 weeks ago with minimal use. This is the second one bought. First one stopped working as well but didn’t overheat and cause melted plastic worms to come out. Yes, it was hooked to 24v in case you were wondering. It also shorted my laser out and made it stop working. Luckily it didn’t damage my laser.**UPDATE:I contacted the seller and they quickly responded and sent me a new one. However, the new one was hooked up and I was having more issues. After racking my brain I decided to pull the valve off and start from scratch. The thing was super, super hot. Once I let it cool down I took it off and that’s when I noticed it. The valve said it was 12V! The box said 24V and that’s what I ordered. I have to fine the old ones and I’d bet my right leg that’s what happened to the others. So, I contacted the seller again and they are checking their inventory and sending me a new 24V one. I hope. The one I was ordering is not marked as “Unavailable”, so I assume their stock is messed up. I was just contacted and they shipped the new one. Looks a little different but will operate the same.I say all this to say…. Triple check the writing on the valve itself before installing it. Thank god it didn’t start a fire and/or burn up my $3k laser. The seller has been great with fixing the issue. I was able to work around the valve while I deal with this so I’m not too mad.
R**0
Great flow control for air-assist for laser engravers
the unit was easy to install and is on the left in the picture above. I think you can get the unit in 12/24 VDC, but since my LEDS and power for my CO2 laser are 24 VDC, I picked 24 VDC to stay consistent on power requirements.
A**X
Good part quality
After receiving my valve I disassembled it partially to check for any issues, it looked great, just like some of the valves used in FRC. The push connects are great also, never used one that was spring loaded before
M**A
Some DIY Guidance
I’m not an electrician but I was able to wire it up the 12 volt version just fine. The solenoid says it needs 400ma but I read another review that said it got hot under that load. I tried a 200ma (typical cell phone adapter) adapter and it energized the solenoid just fine. If you are new to wiring, just open the unit by unscrewing the only screw visible. Pull the clear unit off (it will be tight). Looking at the clear unit, Remove the electronic bottom portion from the clear portion (I used the screw to pop the clips in the screw hole and it came right out.) Strip the wires. You’ll see three set screws. Thread the wire through the clear housing and wire one lead to each of the top two set screws (leave the bottom one alone). Put it back together.Again, I’m not an electrician. Please have a licensed electrician approve all work.
R**D
Works
Works great, fittings that come with it are a not great but the valve itself is fine
C**N
llego antes de tiempo
trabaja muy bien lo instale en las cornetas de aire
ترست بايلوت
منذ شهرين
منذ يوم واحد