🛠️ Fix it fast, fix it flawless—because your gear deserves the best.
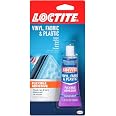
Loctite 1360694 is a 1 oz clear flexible adhesive designed for quick, durable repairs on vinyl, fabric, plastic, and leather. It sets in 10 minutes, cures fully in 24 hours, and forms a waterproof, invisible bond that resists yellowing and brittleness, making it ideal for both indoor and outdoor use.


| Brand | Loctite |
| Specific Uses For Product | Repair |
| Material | Plastic |
| Compatible Material | Wood, Brick, Metal, Stone, Polyvinyl Chloride |
| Item Form | Liquid |
| Special Feature | Dries Clear, Waterproof, Long Lasting, Self Adhesive |
| Color | 1 Squeeze Tube |
| Item Package Quantity | 1 |
| Package Information | Tube |
| Item Volume | 29 Milliliters |
| Full Cure Time | 24 Hours |
| Water Resistance Level | Waterproof |
| Manufacturer | Loctite |
| Part Number | HC1050904 |
| Item Weight | 1.41 ounces |
| Product Dimensions | 8.1 x 3.9 x 1.3 inches |
| Country of Origin | Canada |
| Item model number | 1360694 |
| Batteries | 1 12V batteries required. |
| Is Discontinued By Manufacturer | No |
| Size | 1 oz |
| Special Features | Dries Clear, Waterproof, Long Lasting, Self Adhesive |
| Included Components | Vinyl, Fabric & Plastic Flexible Adhesive |
| Batteries Included? | No |
| Batteries Required? | No |
| Battery Cell Type | Alkaline |
W**O
Flexible Fabric Fix in a Tube
Clear adhesive bonds vinyl, fabric, and plastic—and stays flexible after curing. Perfect for patching inflatables, car seats, or outdoor gear.
A**Y
Sealed my Air mat
Had a small tear in side cloth. Fingernail size. I put this on and then blew it up in an hour. It was holding well and i thought i would add a little more to double up. DONT DO THAT. If you add wet to dry, it opens it back up. You can only put one coat on. Not sure about Durability, but has held for a week. and held last two nights with someone sleeping on.VERY HAPPY
E**D
Worked on pool float!
This product actually sealed a leak on a high dollar air mattress. The leak was on a seam and this product, Loctite-1360694 Vinyl Fabric & Plastic Repair Flexible Adhesive, sealed it up. It's been over a year since we made the repair.
A**N
Fixed a tear in my leather / sheep skin jacket!
The media could not be loaded. I accidentally brushed up against a rose thorn bush, and much to my dismay it tore a small part of the arm in my leather jacket! It's a genuine leather (technically sheep skin) jacket from Emporio Armani. I was able to repair it to my satisfaction (see pics), and so far the glue seems to hold well while being flexible, and I'm happy with how the seam was closed up. I did some research prior to purchasing this, so I'll list the steps I took below. One thing that I saw some reviewers mention is that the glue melted away some of the fabric they were working with (but I believe they were using faux leather). This was not the case when I used it on real leather, so I would recommend this product for anyone with a similar use case to mine.Here are the steps:Materials needed:(1) Loctite Vinyl Plastic Adhesive Glue (this amazon listing)(2) A palette knife (I bought this one and used the smallest one: https://www.amazon.com/gp/product/B072P1R5B7/ref=ppx_yo_dt_b_search_asin_title?ie=UTF8&psc=1 )(3) A piece of thin, flexible fabric that is a bit larger than the size of the tear you're working with. (e.g. if you have a 10mm diameter hole, the piece of fabric you use should be at least 14-18mm diameter). Doing research online, the most commonly recommended material was "organza fabric", which is very thin, strong, and most importantly mimics the flexibility of leather. This is what I bought: https://www.amazon.com/gp/product/B0842WZB2H/ref=ppx_yo_dt_b_search_asin_title?ie=UTF8&psc=1If you have any thin flexible fabric laying around, it should work. Just keep in mind that organza is super thin which is nice. If you use a material that is too thick, it may cause the area around your tear to appear stiffer than the rest of your jacket, and so you'll end up seeing an outline of the fabric.(4) A Q-Tip(5) Tape (e.g. masking tape) which is gentle, easy to remove, and does not leave residue. It will touch your leather, so make sure it's not too strong so it doesn't damage the leather when you remove it.(6) Acetone / Nail Polish Remover (not mandatory, but I HIGHLY recommend you keep it handy so you can either fix a mistake, but also it allows you to clean up your edges for a sharp/tight seam).(7) Scissors (to cut the organza fabric and to possibly trim the tear to clean it up if needed)(8) ToothpickSteps:(1) Protect the area surrounding your tear by putting masking tape. This is important because you don't want your glue to accidentally land on some other part of your jacket!(2) Get your organza (or other flexible, thin fabric) piece ready. Trim it to size if needed. Make sure it is bigger than the tear itself.Details: This piece is going to be a subpatch / "sub patch". The way jackets work is that on the outer side is the actual leather material, but on the opposite side of the leather (the side your body touches when you put it on) is a different type of flexible fabric that is not leather. That fabric is stitched/attached to the leather at various points on the jacket, but on a majority of the jacket it is not. What we DO NOT want to do is glue the leather to the fabric that came with the jacket. That's not how the jacket was originally designed, and doing so could cause you to tug on the leather when you move around because now the inside fabric will be glued to the leather. That's why we instead get a piece of organza fabric and use that as a subpatch which will serve as a substrate on which the glue will be applied, and then the torn leather will be glued to the subpatch. The subpatch is a meeting place for where the torn piece of the leather meets with the original untorn portion of the leather, and going forward will remain between the leather and the original inside fabric forever. The sub patch should NOT be glued to the inside fabric. It should only be glued to the leather.(3) Using the palette knife and a toothpick if needed (or even your fingers if the tear is big enough), gently slide the subpatch underneath the tear. In other words, stick the subpatch into the tear, and then flatten out the subpatch so that when you look through the hole/tear in your jacket, the only thing you see is the subpatch.(4) Open the loctite vinyl glue. DO NOT open it over your jacket. Open somewhere else to the side. When I opened it for the first time (where you have to pierce it using the cap), a little bit oozed out everywhere...good thing it wasn't over my jacket!Now, using your finger, a Q tip, and/or a toothpick (or whatever method you're comfortable with), gently apply a thin layer of the glue onto the subpatch. In other words, gently lift the tear to expose the subpatch that you placed underneath, and apply the glue. A thin layer is all you need.(5) Gently close the tear and press it onto the subpatch. Try to line up the tear as well as you can so the seam is as invisible as possible. If you want, you can add a tiny bit of the glue (super thin layer) directly over the seam to make it extra snug and secure. Then, apply a tiny bit of acetone (nail polish remover) on a q tip and do a few gentle, light strokes over the excess glue on the seam. This will clean up the excess glue so that only the glue that has fallen through the cracks between the seam will remain.(6) Optionally apply masking tape onto the tear itself so it doesn't accidentally open up again during the drying/curing process. I didn't end up doing this because by the time I finished steps 1-5 above, it was already stiff enough that I wasn't worried..(7) Remember how I said that you DO NOT want the sub patch to be glued to the inside fabric of your jacket? Well, be sure to look on the inside of your jacket and make sure this isn't the case! The organza subpatch fabric is porous, so in my case some of the glue made it to the opposite side of the subpatch and caused it to adhere to the inside of my leather jacket. Good thing I had immediately checked, because the solution was super simple: I just put a bit of acetone on a Q-tip and rubbed it over the the inside fabric (from the inside of my jacket) where it was accidentally adhered. I gently rubbed and pulled until the subpatch was separated from the internal fabric.(8) Let the glue cure...Loctite's instructions recommend 24 hours. I waited about 18 hours before putting the jacket back on.... and it works great!
T**T
Excellent for olefin carpet and felt
I recently purchased a vintage Devon mug coaster, which is made of olefin carpet and felt with a rubber back. When I received it, it was strongly smelling of mildew, so I cleaned it in the washer. But during the cycle, the carpet got damaged on a couple of sides, and the felt also unglued from the carpet. This loctite glue was extremely easy to use, not messy and you can't tell where the damage was. It brought it back to like new condition. Excellent product for these materials.
G**O
Bonds well to a vinyl inflatable paddle board
We've left our inflatable paddle boards inflated for each summer, but this time it must have been in the full sun for too long, and some of the seams on a fin failed. I used this to fix the holes. I'm still finding a few more to fix, but this seems to work as well as other vinyl repair glues that I have used before.
D**S
Worked well on torn rubber "scroll design" door mat, not as well on plastic and vinyl (for me).
I had a few plastic and vinyl items to repair. A car key with a plastic top, dropped one too many times; a torn in one place (but nice) scroll type black rubber door mat and some small to major rips in a vinyl chair seat. This product worked the best on the rubber door mat and I would buy it again for that purpose. I had used others that didn't work. There was a suggestion to put tape across the bottom of the "scroll" piece that was ripped, apply the glue, wipe of any excess and then tape it up for a few hours until it dried. That was a good idea, resulting in a strong and imperceptable repair. Not so successful on keeping the plastic key together or vinyl chair repair. I might use it in combination with one of those "really strong" little applicator type glues on my keep. The fact that this glue is good for "flexible" things did help. But like the glues that dry brittle, it just didn't help enough. Will have to reglue the key any day. I will go with a vinyl repair kit for my vinyl repairs. This glue is more of a "liquid" than a "gel" and it was very hard for me to use successfully (and it look okay) on the vinyl chairs. This glue was good for the rubber door matt, but I'm thinking that there are better glues out there for vinyl, fabric and plastic repairs. I would use an iron on type adhesive before I would put this on fabric. Its messy. Hope that helps.
L**L
This is the best glue to get. Forget super glue and gorilla glue…get this!
This is the best glue to put anything back together. Hands down! I’ve fixed lamps, vases, wooden pedestals, plastic.I store it upright so that the cap doesn’t get stuck like super glue and gorilla glue. Over 1 year later, I can still open it.I’ve had problems with the other sturdy glues in that it gets stuck even if I clean it according to the instructions. So it ends up being a one-time use. This is the best!
Trustpilot
2 months ago
3 days ago